One Facebook member asked, and I documented a surprisingly long checklist.
Here’s my tried and tested best FZ2500 camera setting for event videography.
Event videography refers to the likes of road shows, carnivals, and conferences.
I shoot in Singapore, so my settings shown here are for 25 frames per second.
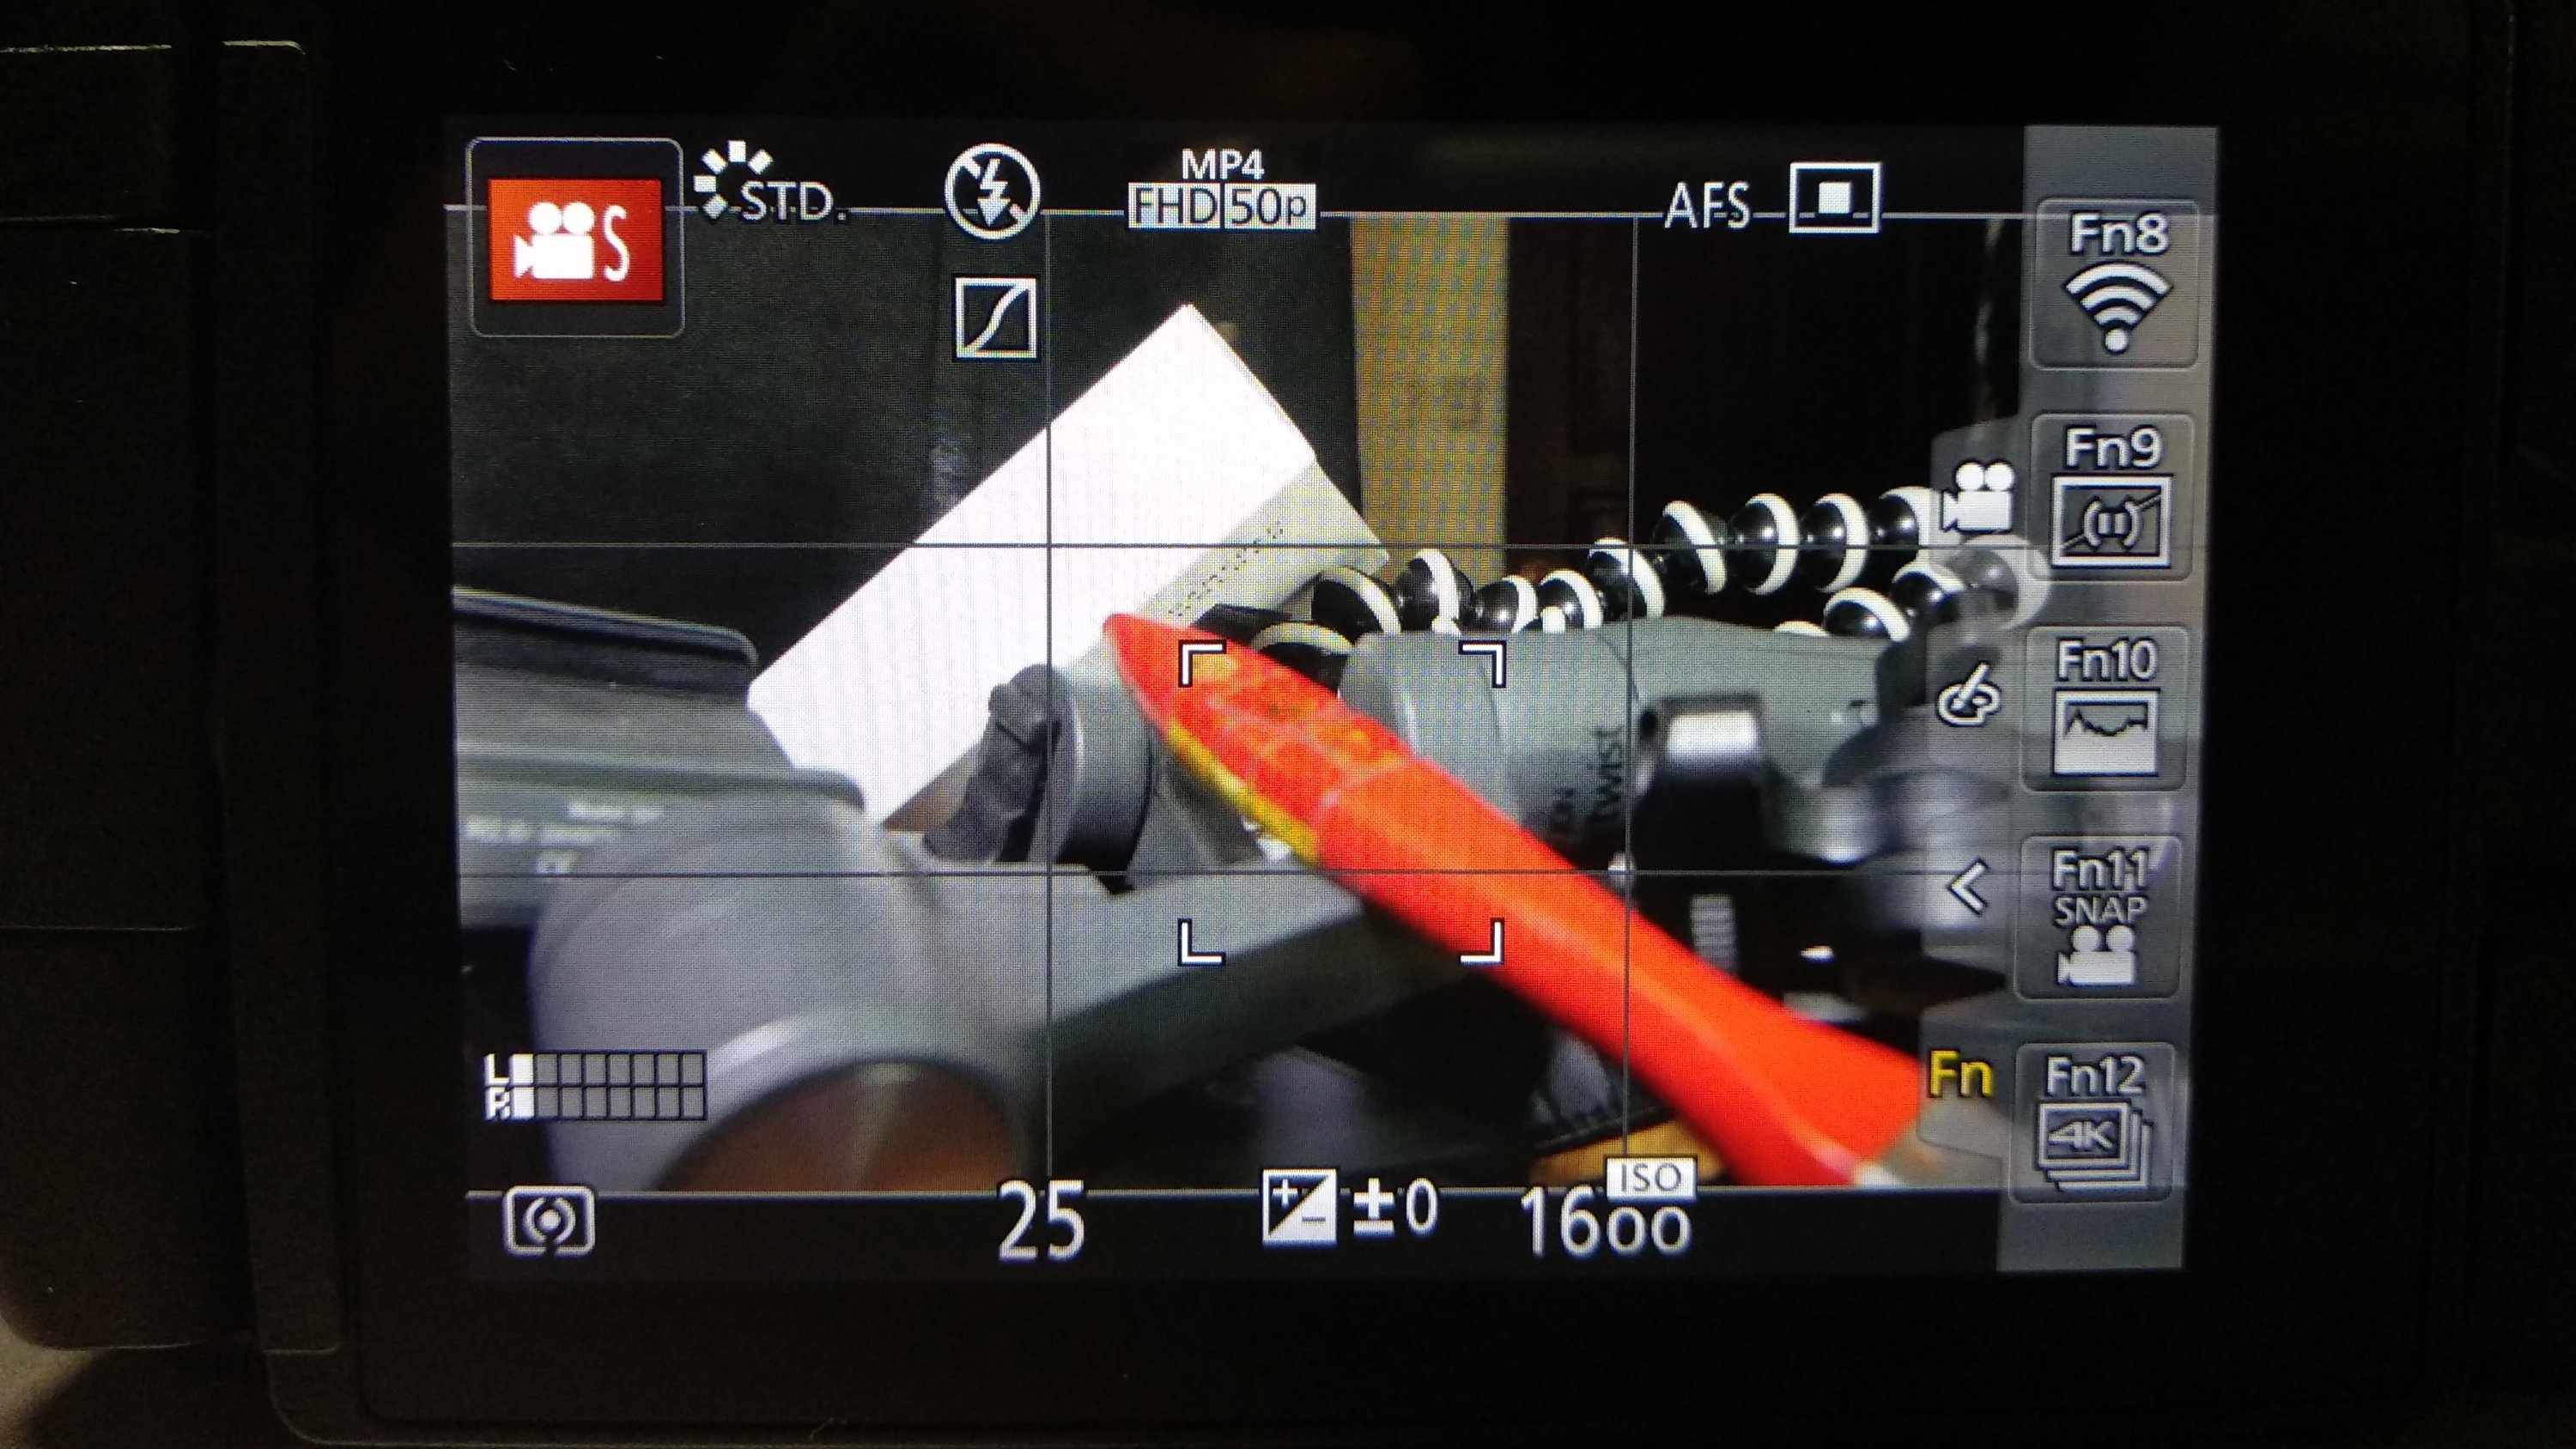
Creative Video Mode
Set the mode dial to creative video mode. Note that you cannot take photos in this mode, only video.

Single Shot Mode
Set drive mode dial to single. Though this applies to photo taking, I ensure it’s there.
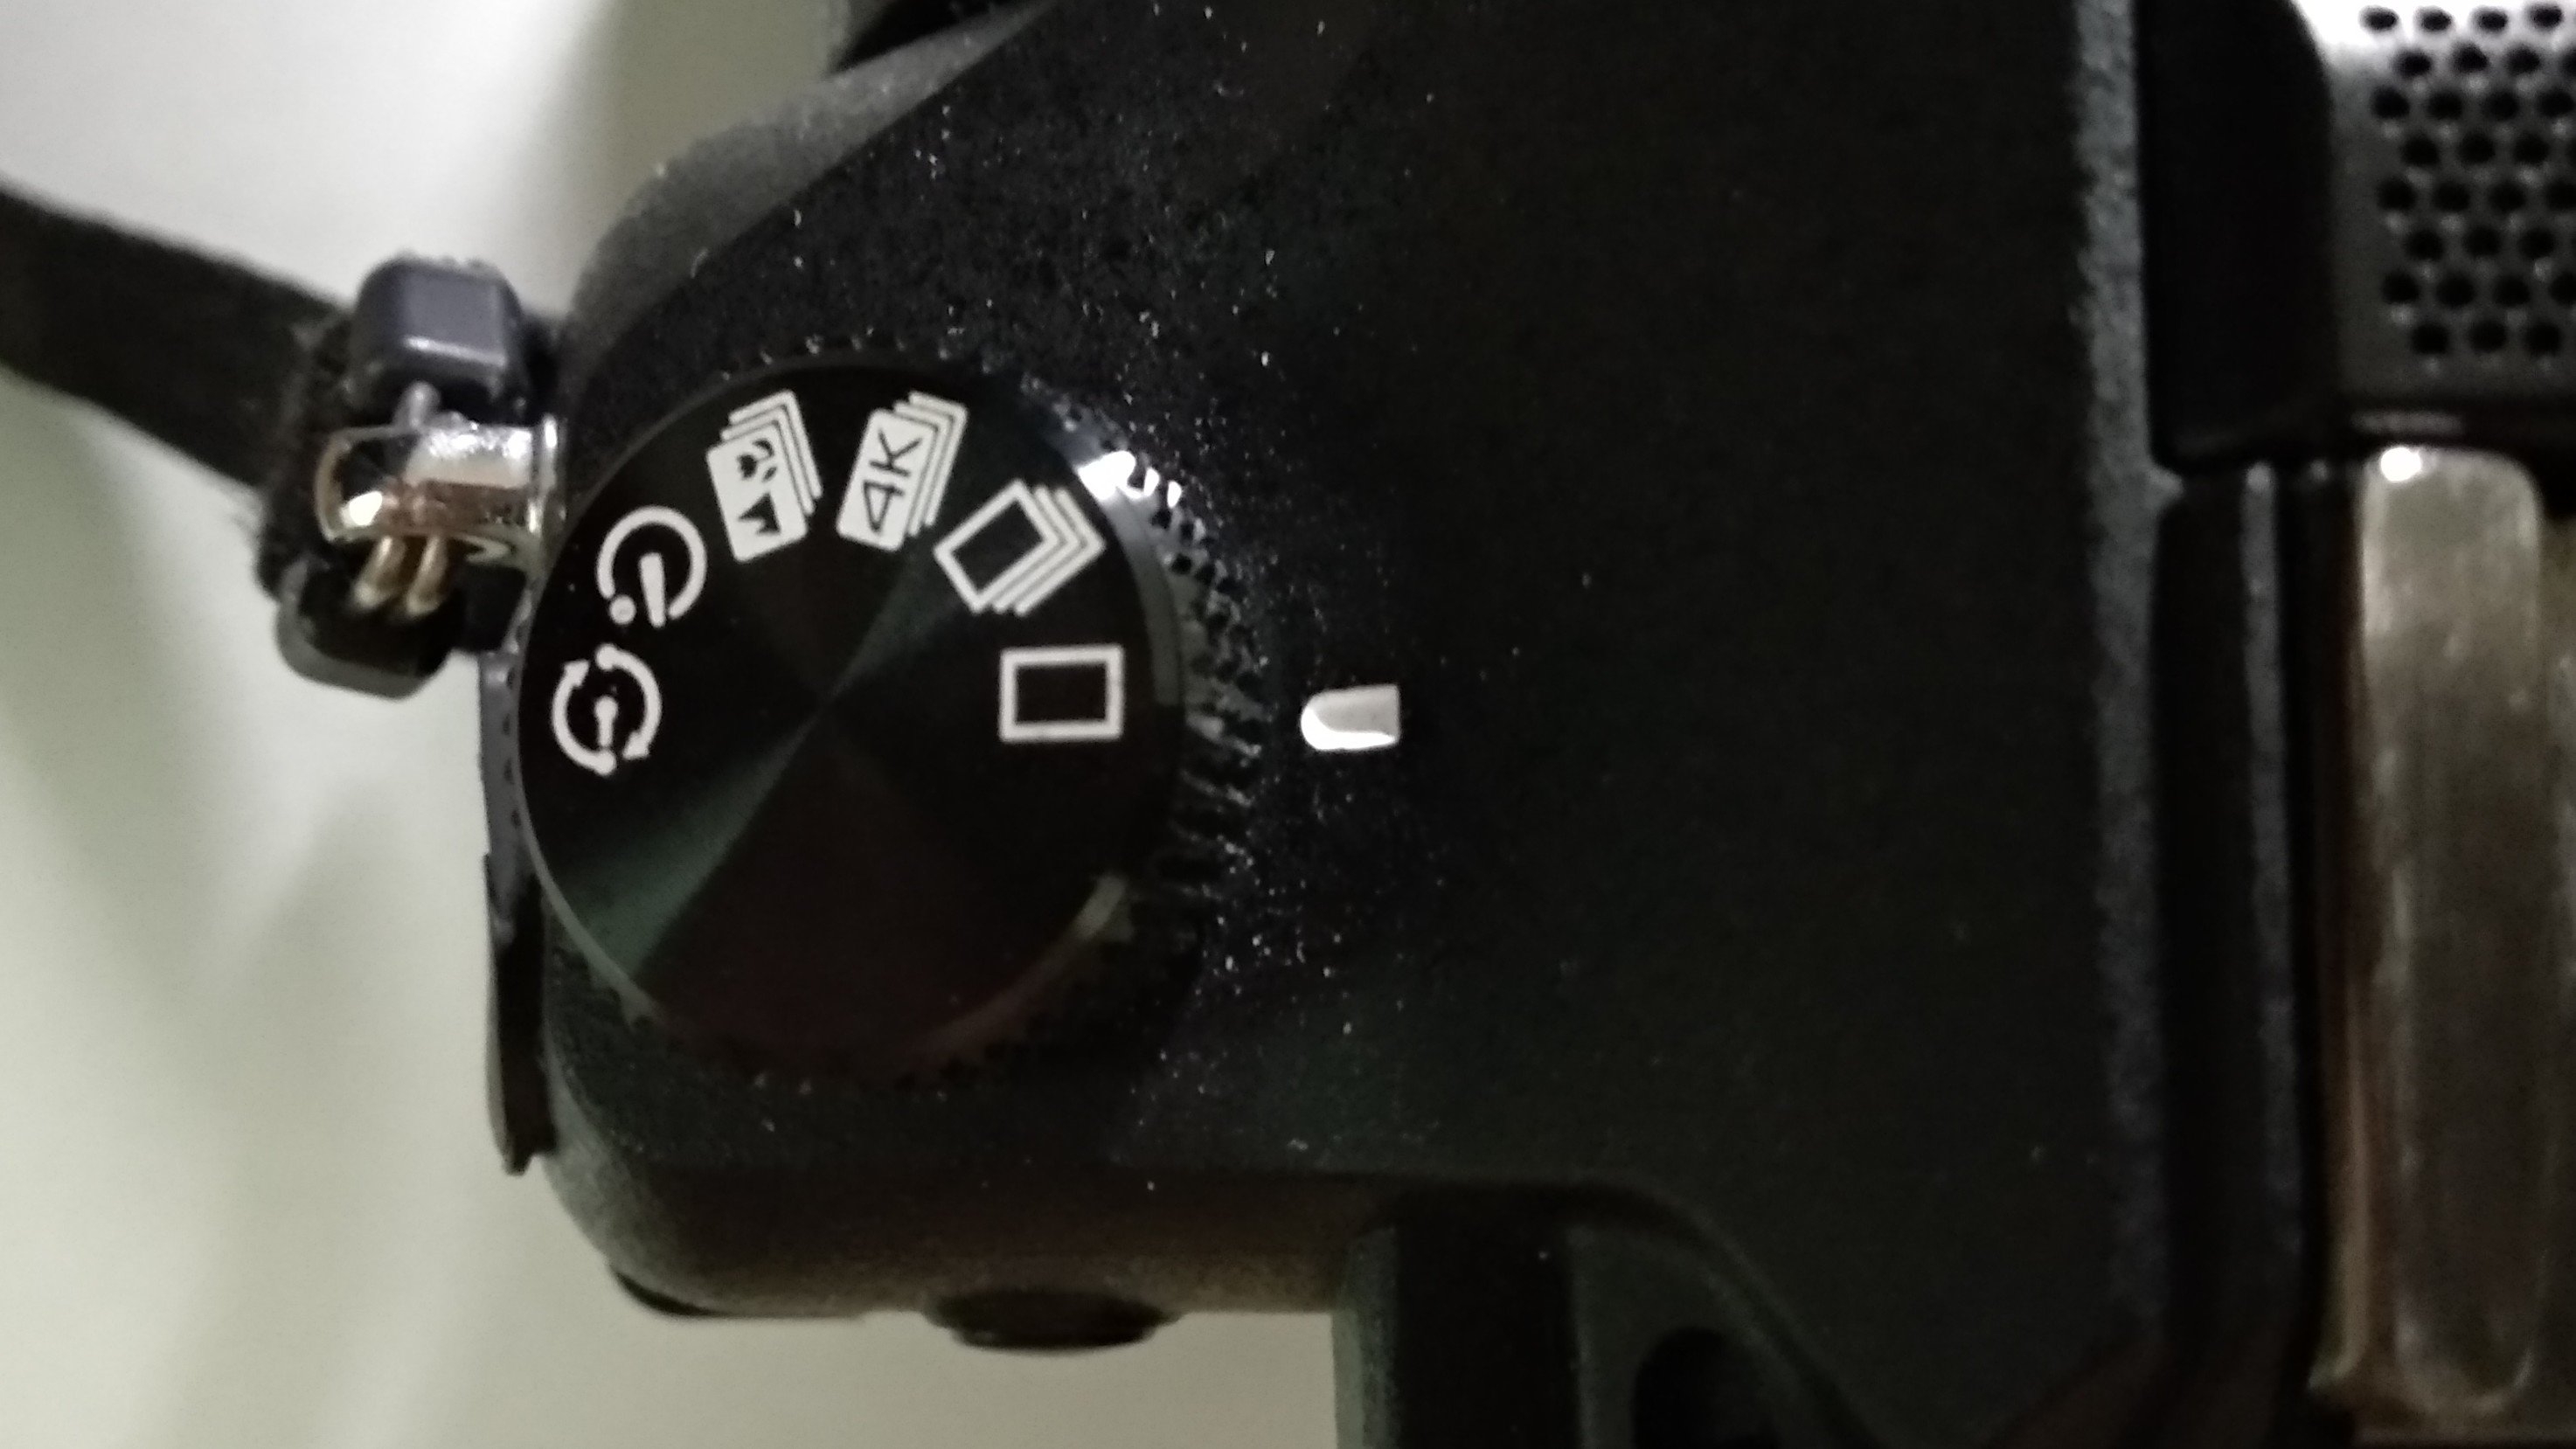
Auto Focus Mode
Set the focus mode lever to AFS/AFF. I find this mode responds better to unexpected subject movements.

ND Filter Off
Set ND filter Off. That’s from the start. Change it when there is too much sun affecting the exposure.

Standard Photo Style
This really depends on the look I want to achieve. I set Photo Style to Standard when I am going to correct the color in post. Otherwise, I may also select Natural for that bright cheery look.

Recording Format MP4
Set recording format to MP4. MP4 video files are small and manageable when editing long events. The image quality is surprisingly good too.

Recording Quality FHD 28M 50p
Set recording quality to FHD 28M 50p. For full day seminars, I set this to FHD 20M 25p for longer recording time.

Auto Focus Single
Set AFS/AFF to AFS. This allows me to press the shutter button to automatically focus on the subject while starting to record at the same time.
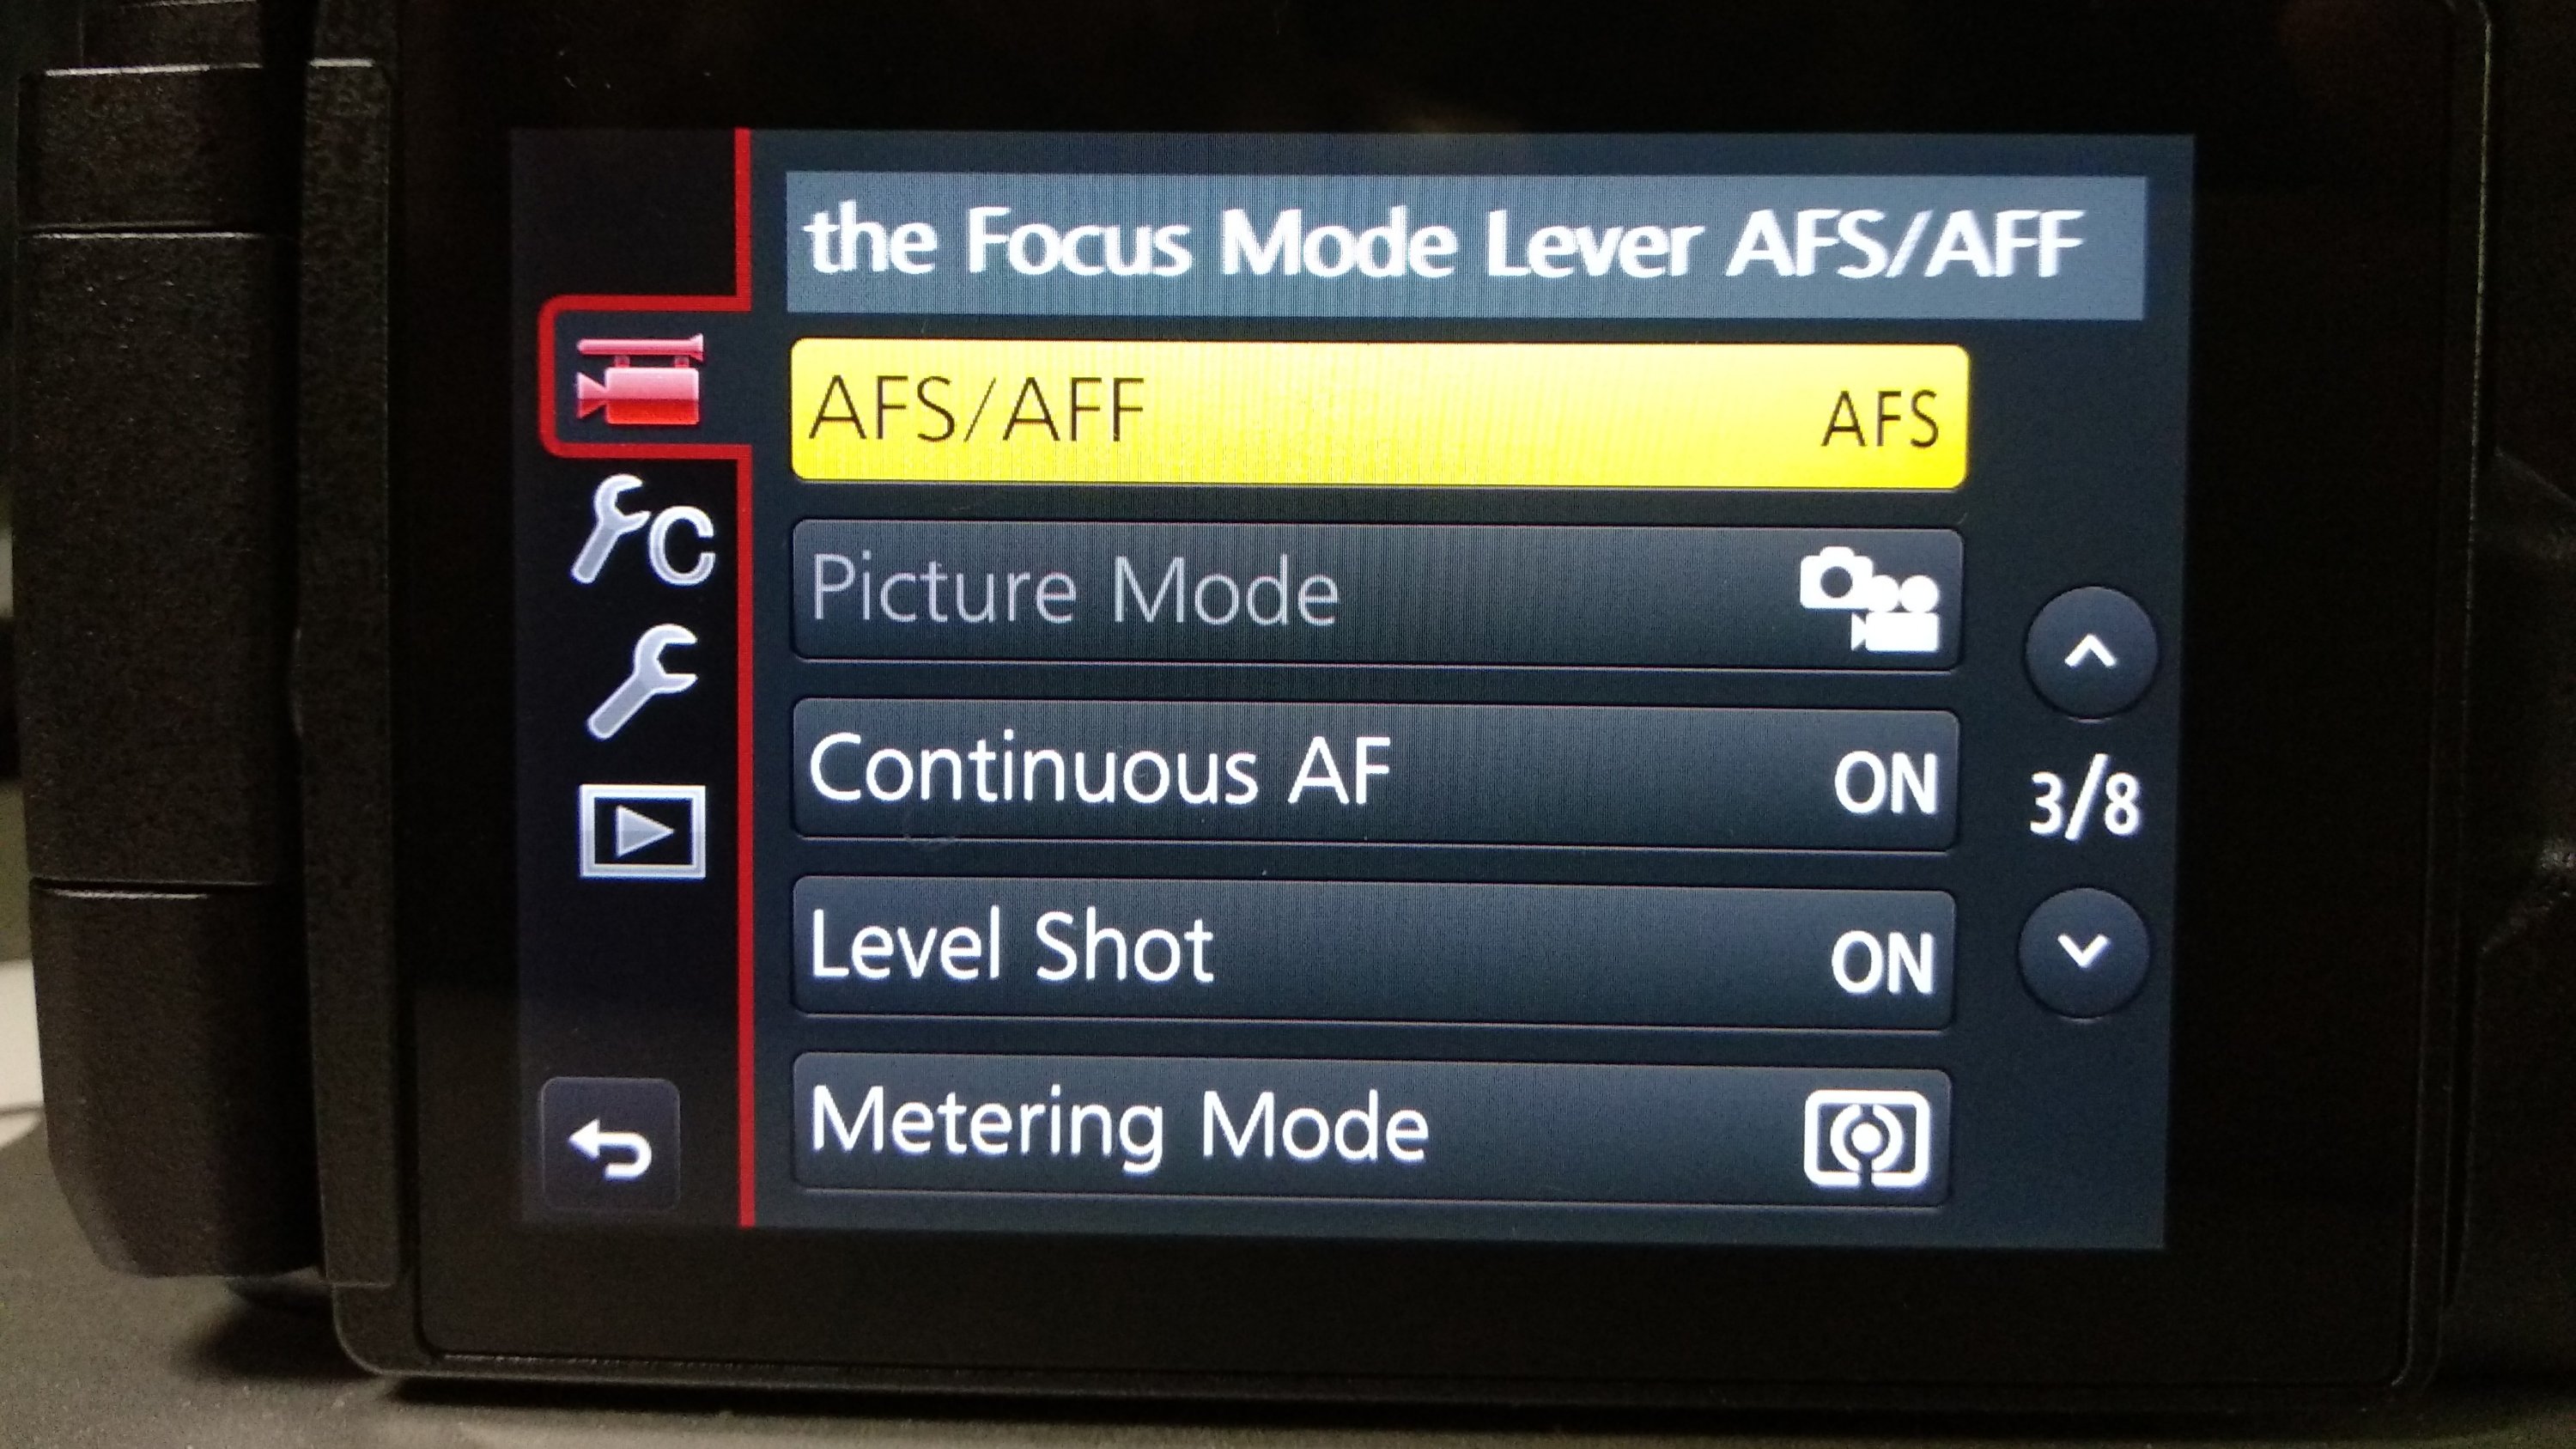
Continuous Auto Focus Off
Set Continuous AF to OFF. I prefer to touch the screen to select my focus point. Many times the Continuous AF focus on the wrong thing.
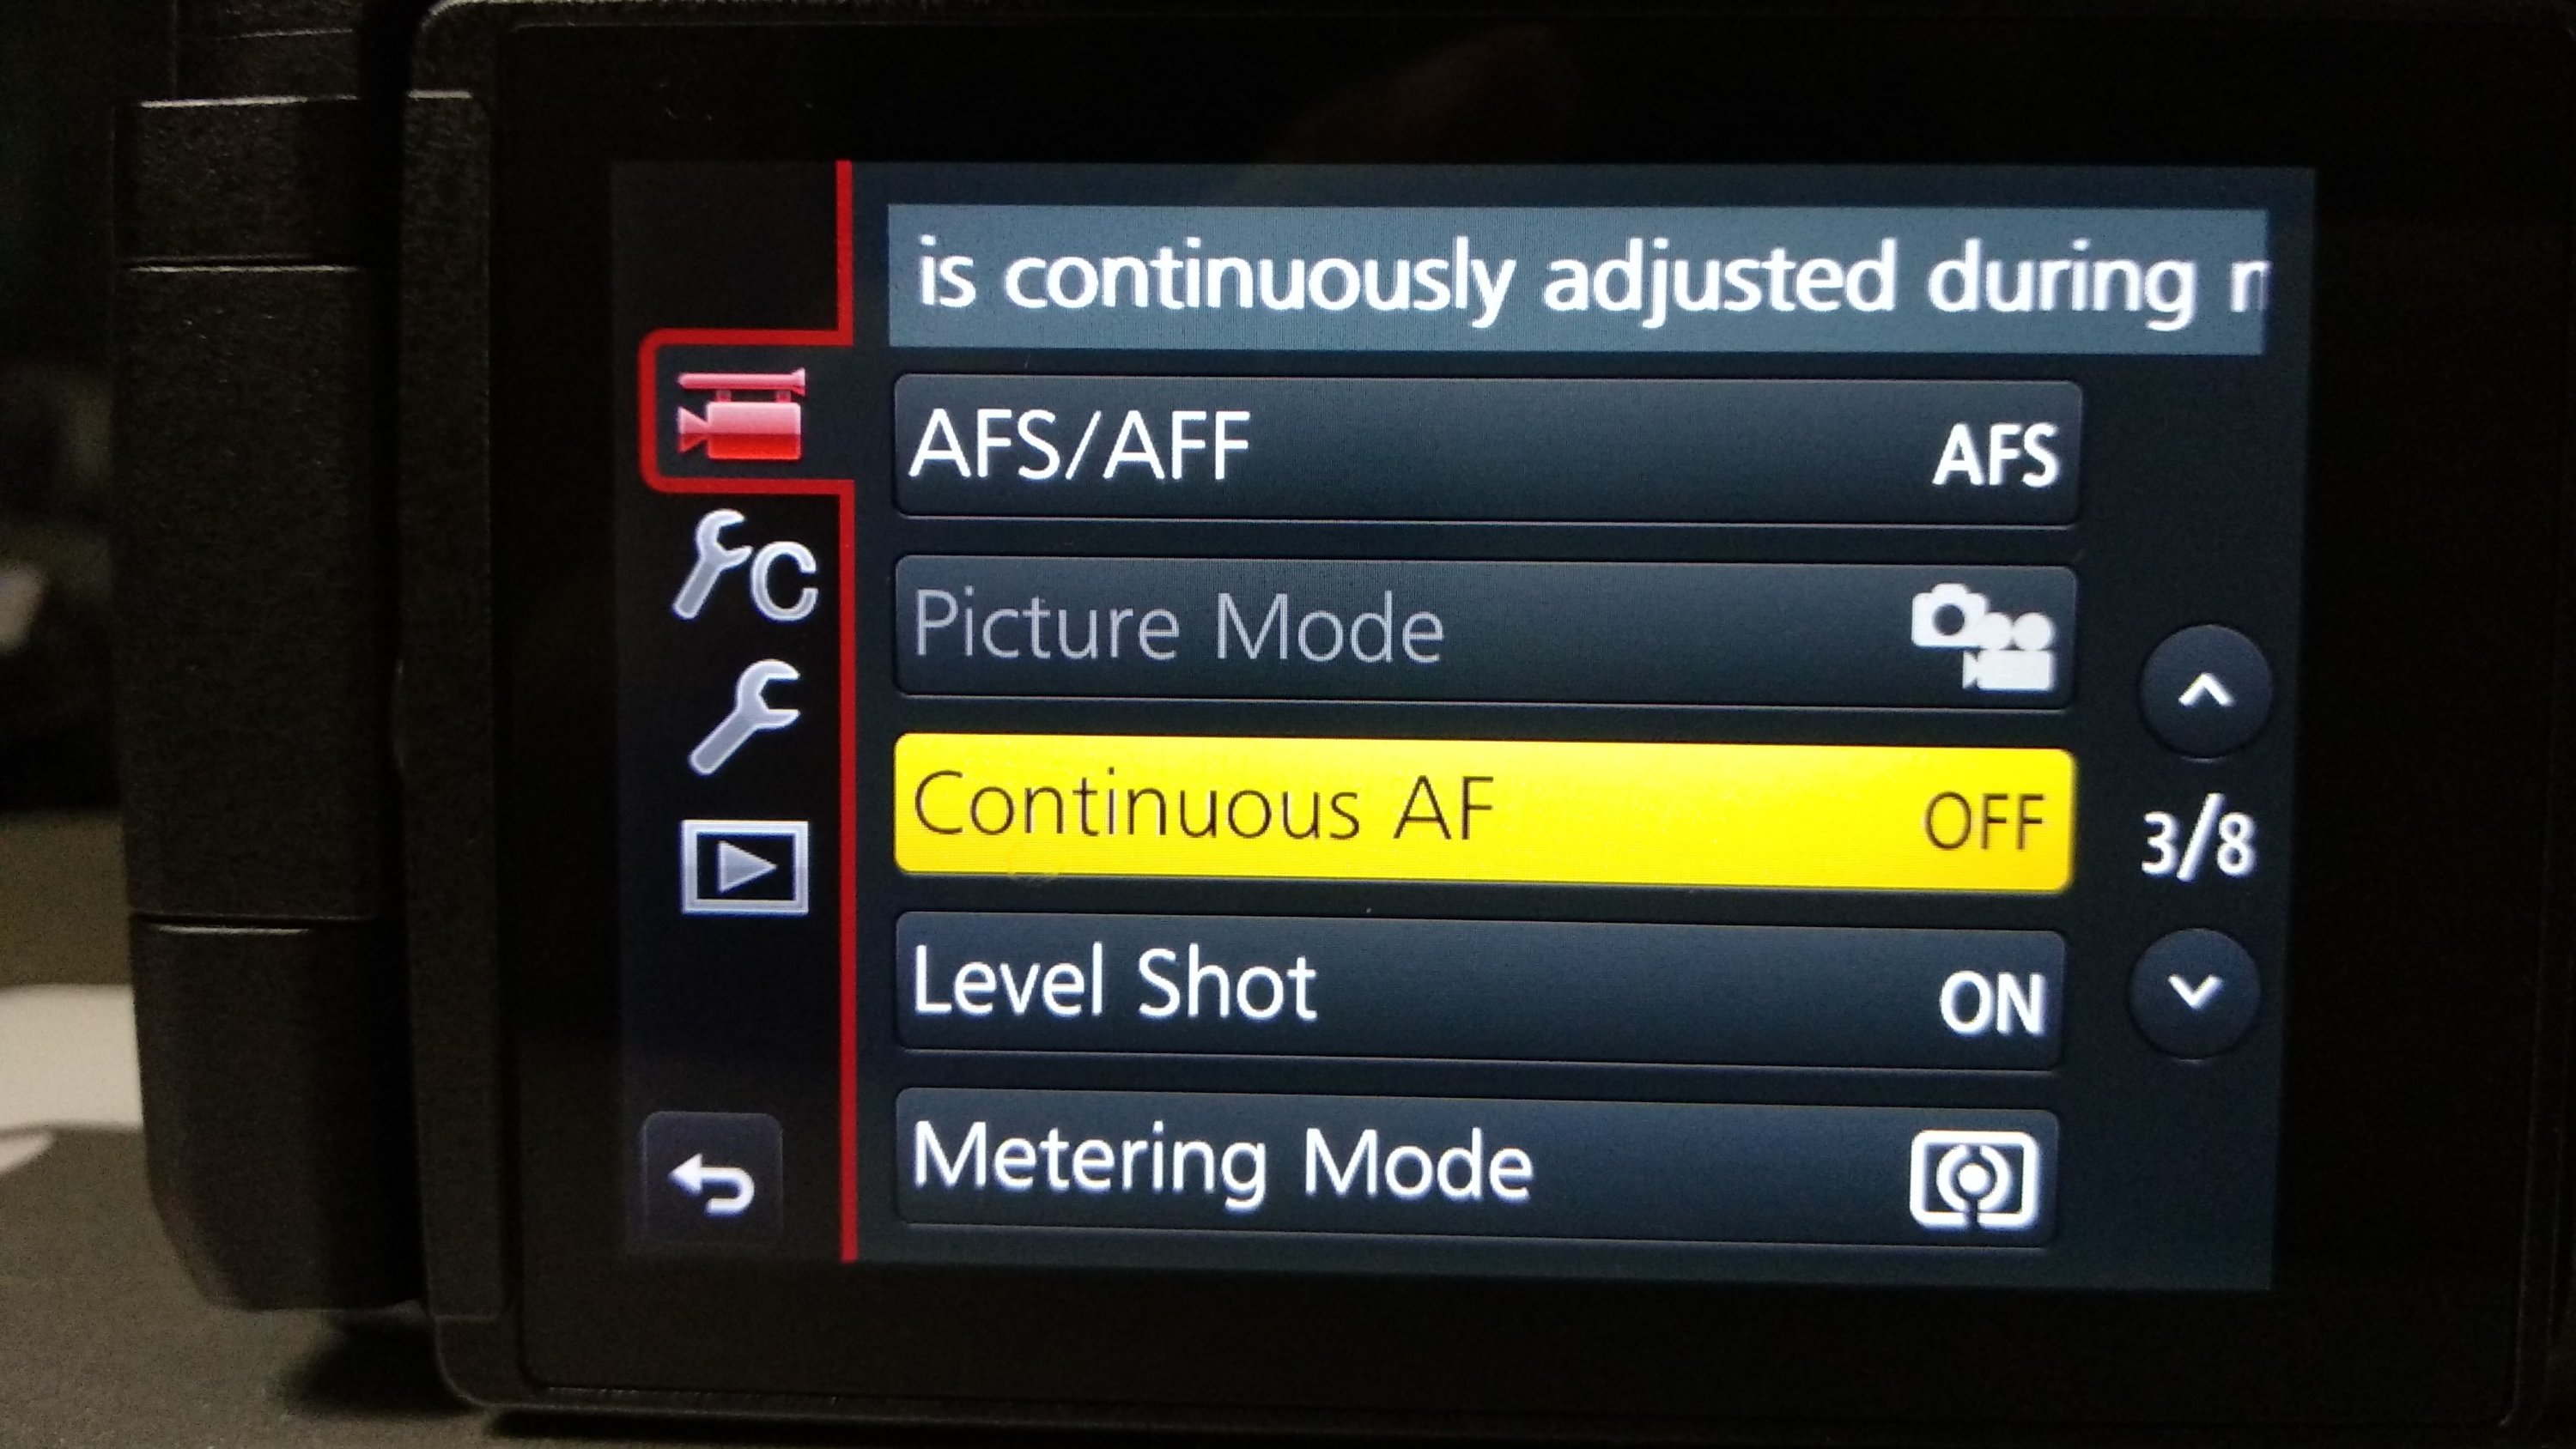
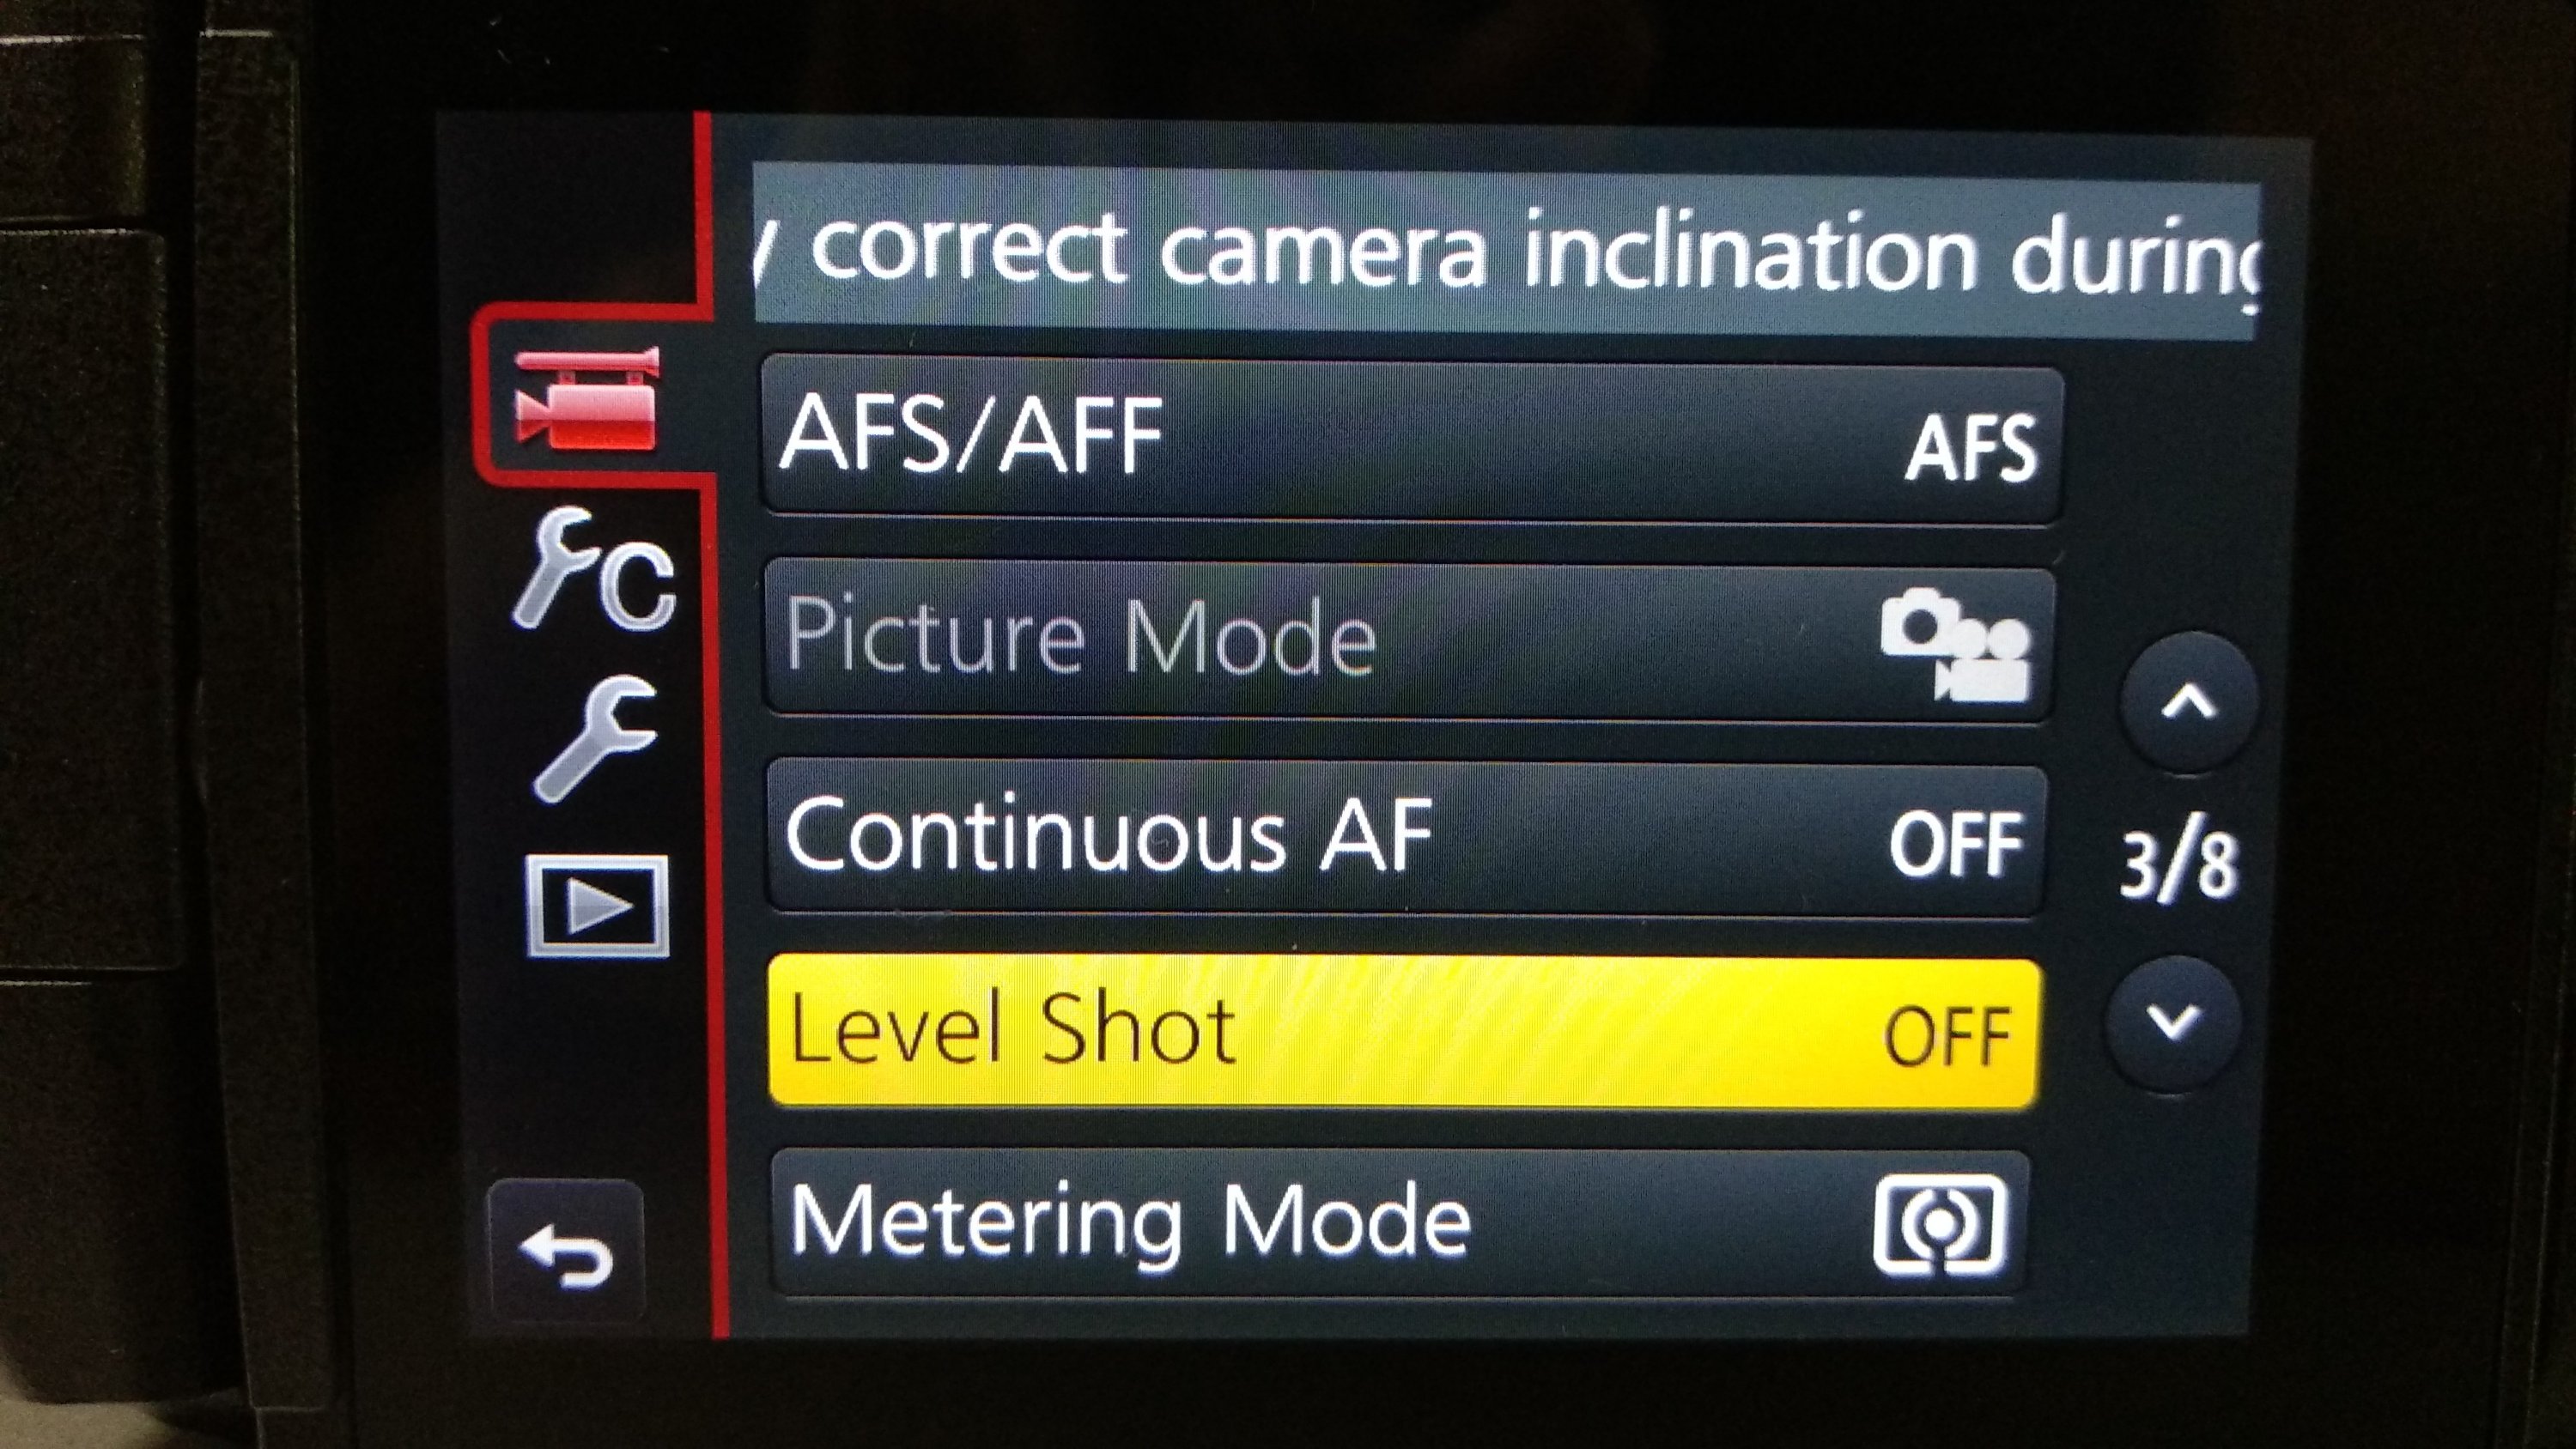
Level Shot Off
Set Level Shot to OFF. I turn this on only when I want to fake a handheld slider shot.
Intelligent Processing Off
Turn off i.Dynamic, i.Resolution and Diffraction Compensation. They improve your image on the fly but slows down the camera. Not good for run and gun events.

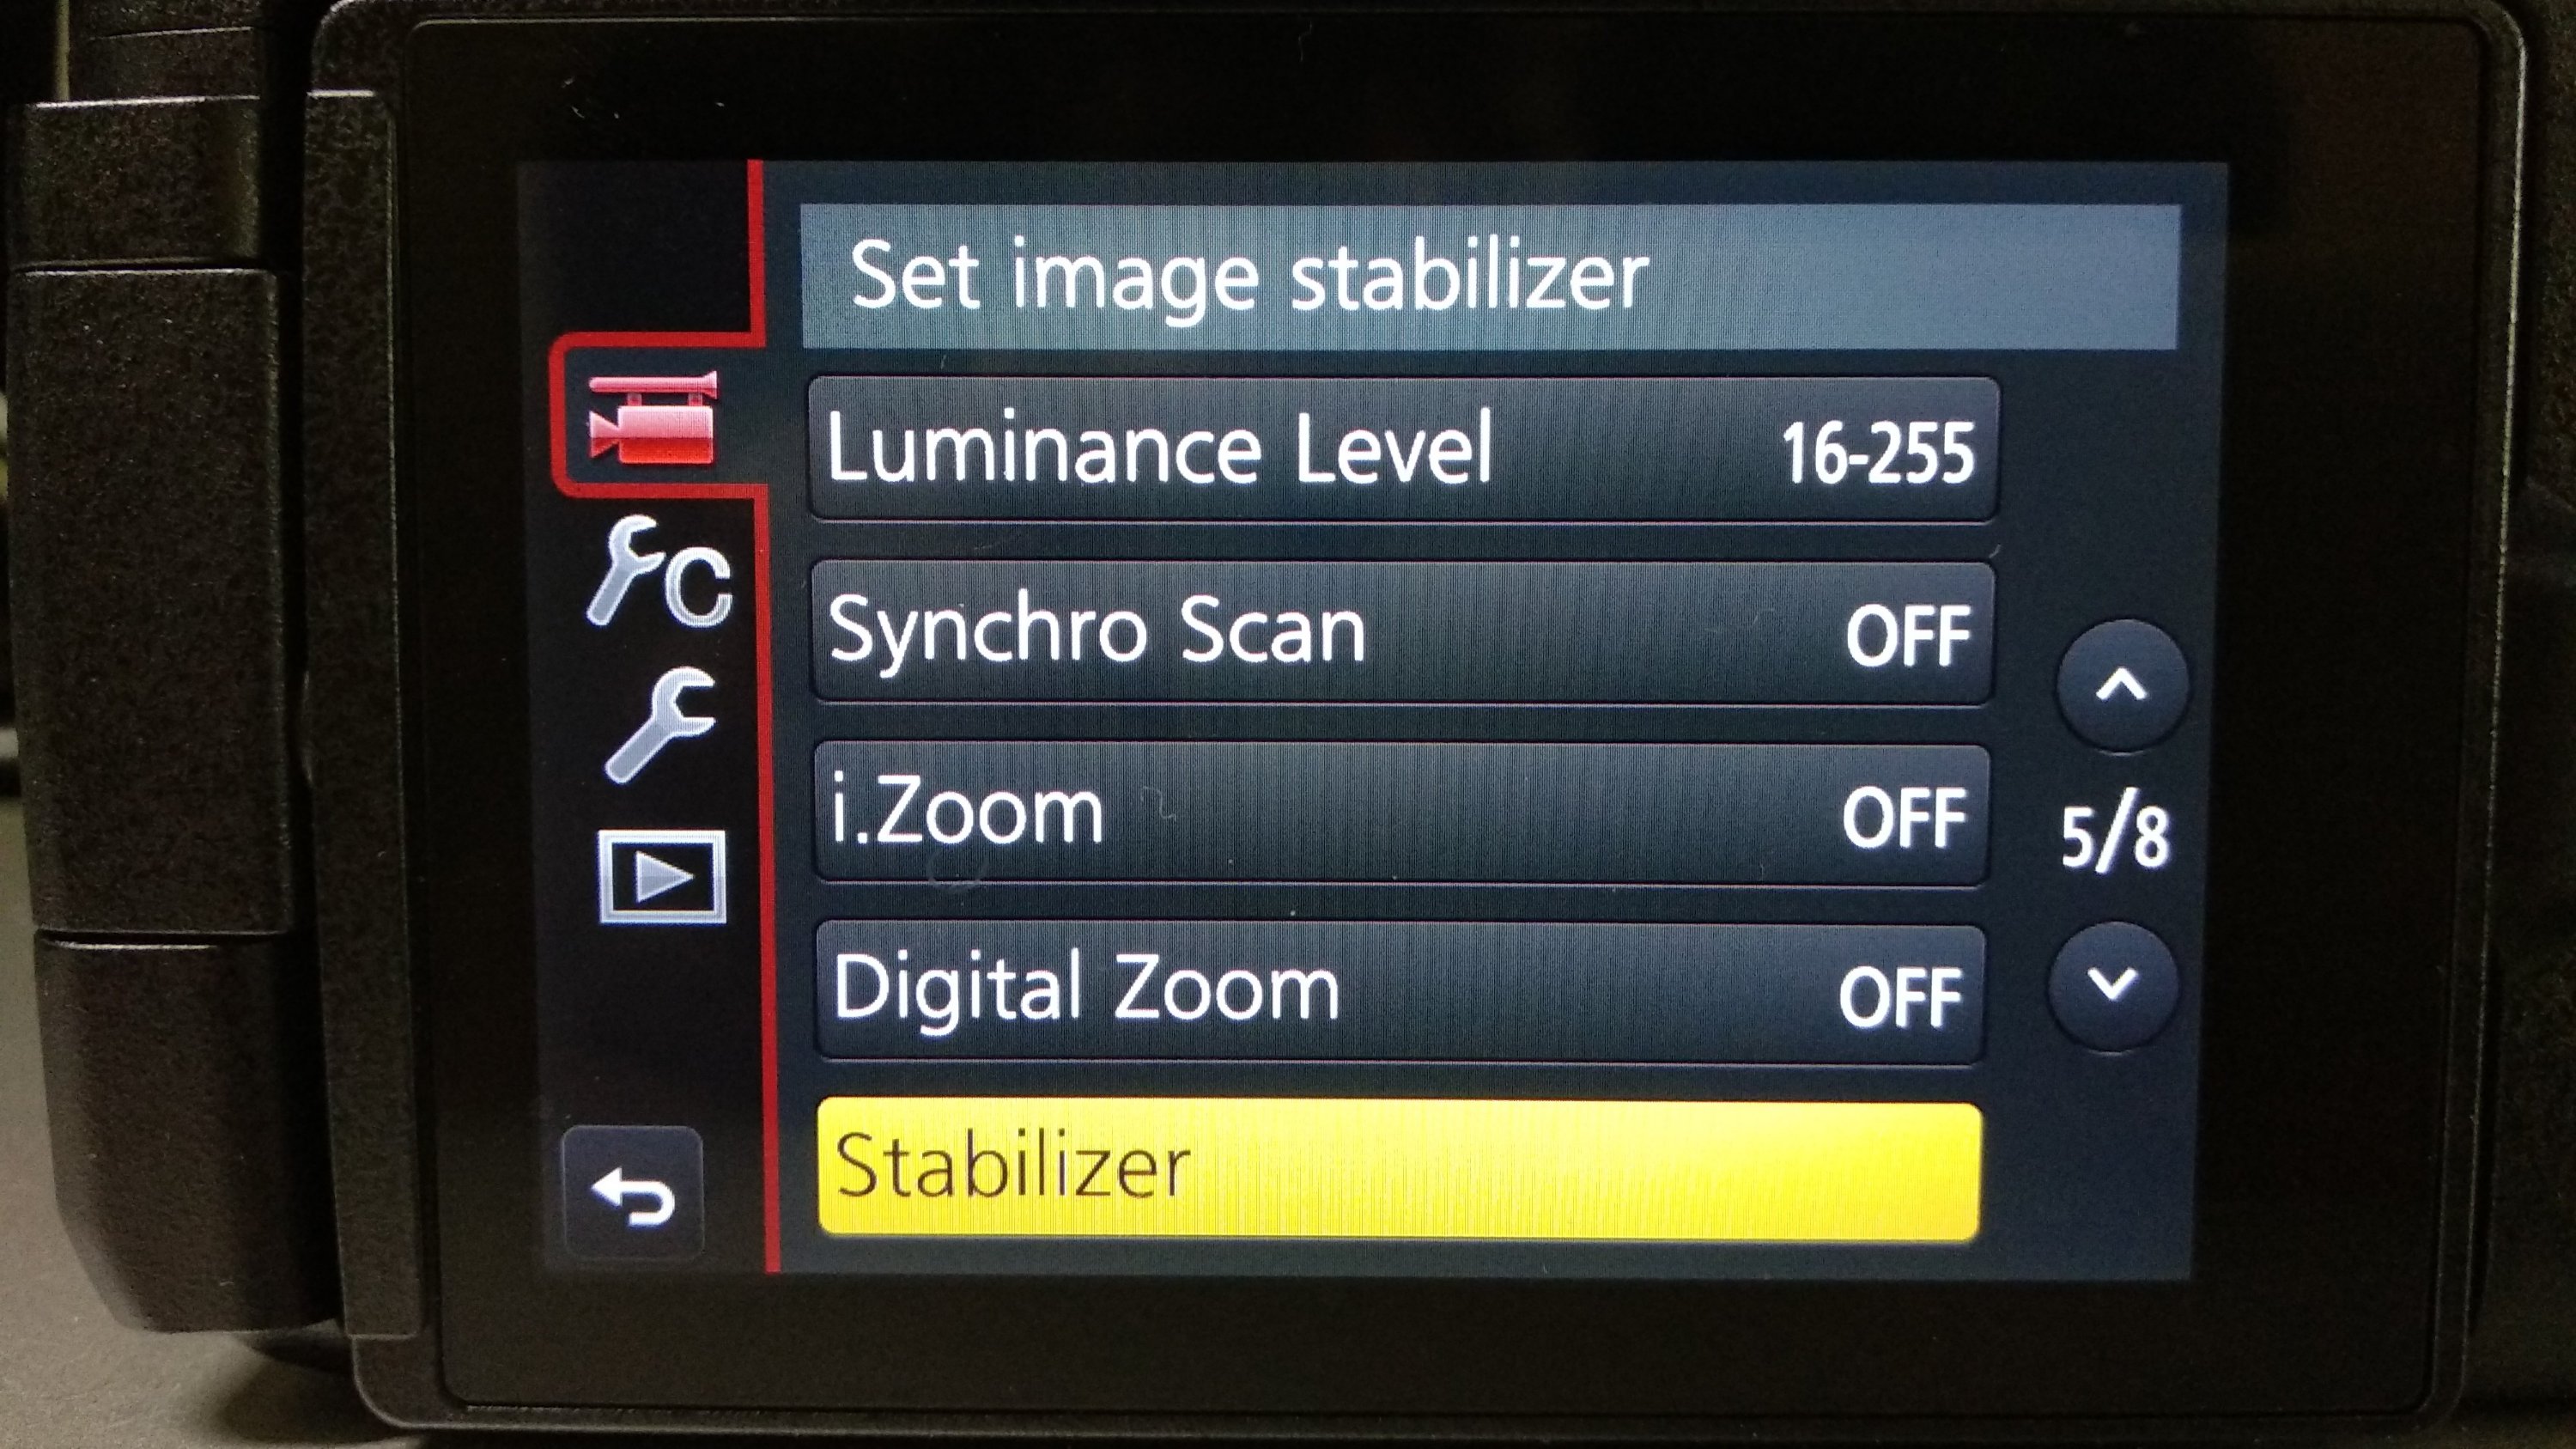
Stabilizer ON
This is the reason I love the FZ2500 for events when shooting handheld. Turn ON Stabilizer Operation Mode and leave e-Stabilization OFF to get a wider sensor view.

Watch my Panasonic Lumix FZ2500 Review on Stabilization…
Sound Output to REC SOUND
Set Sound Output to REC SOUND to hear exactly what is recorded. Must wear headphones for this. Great for interviews.
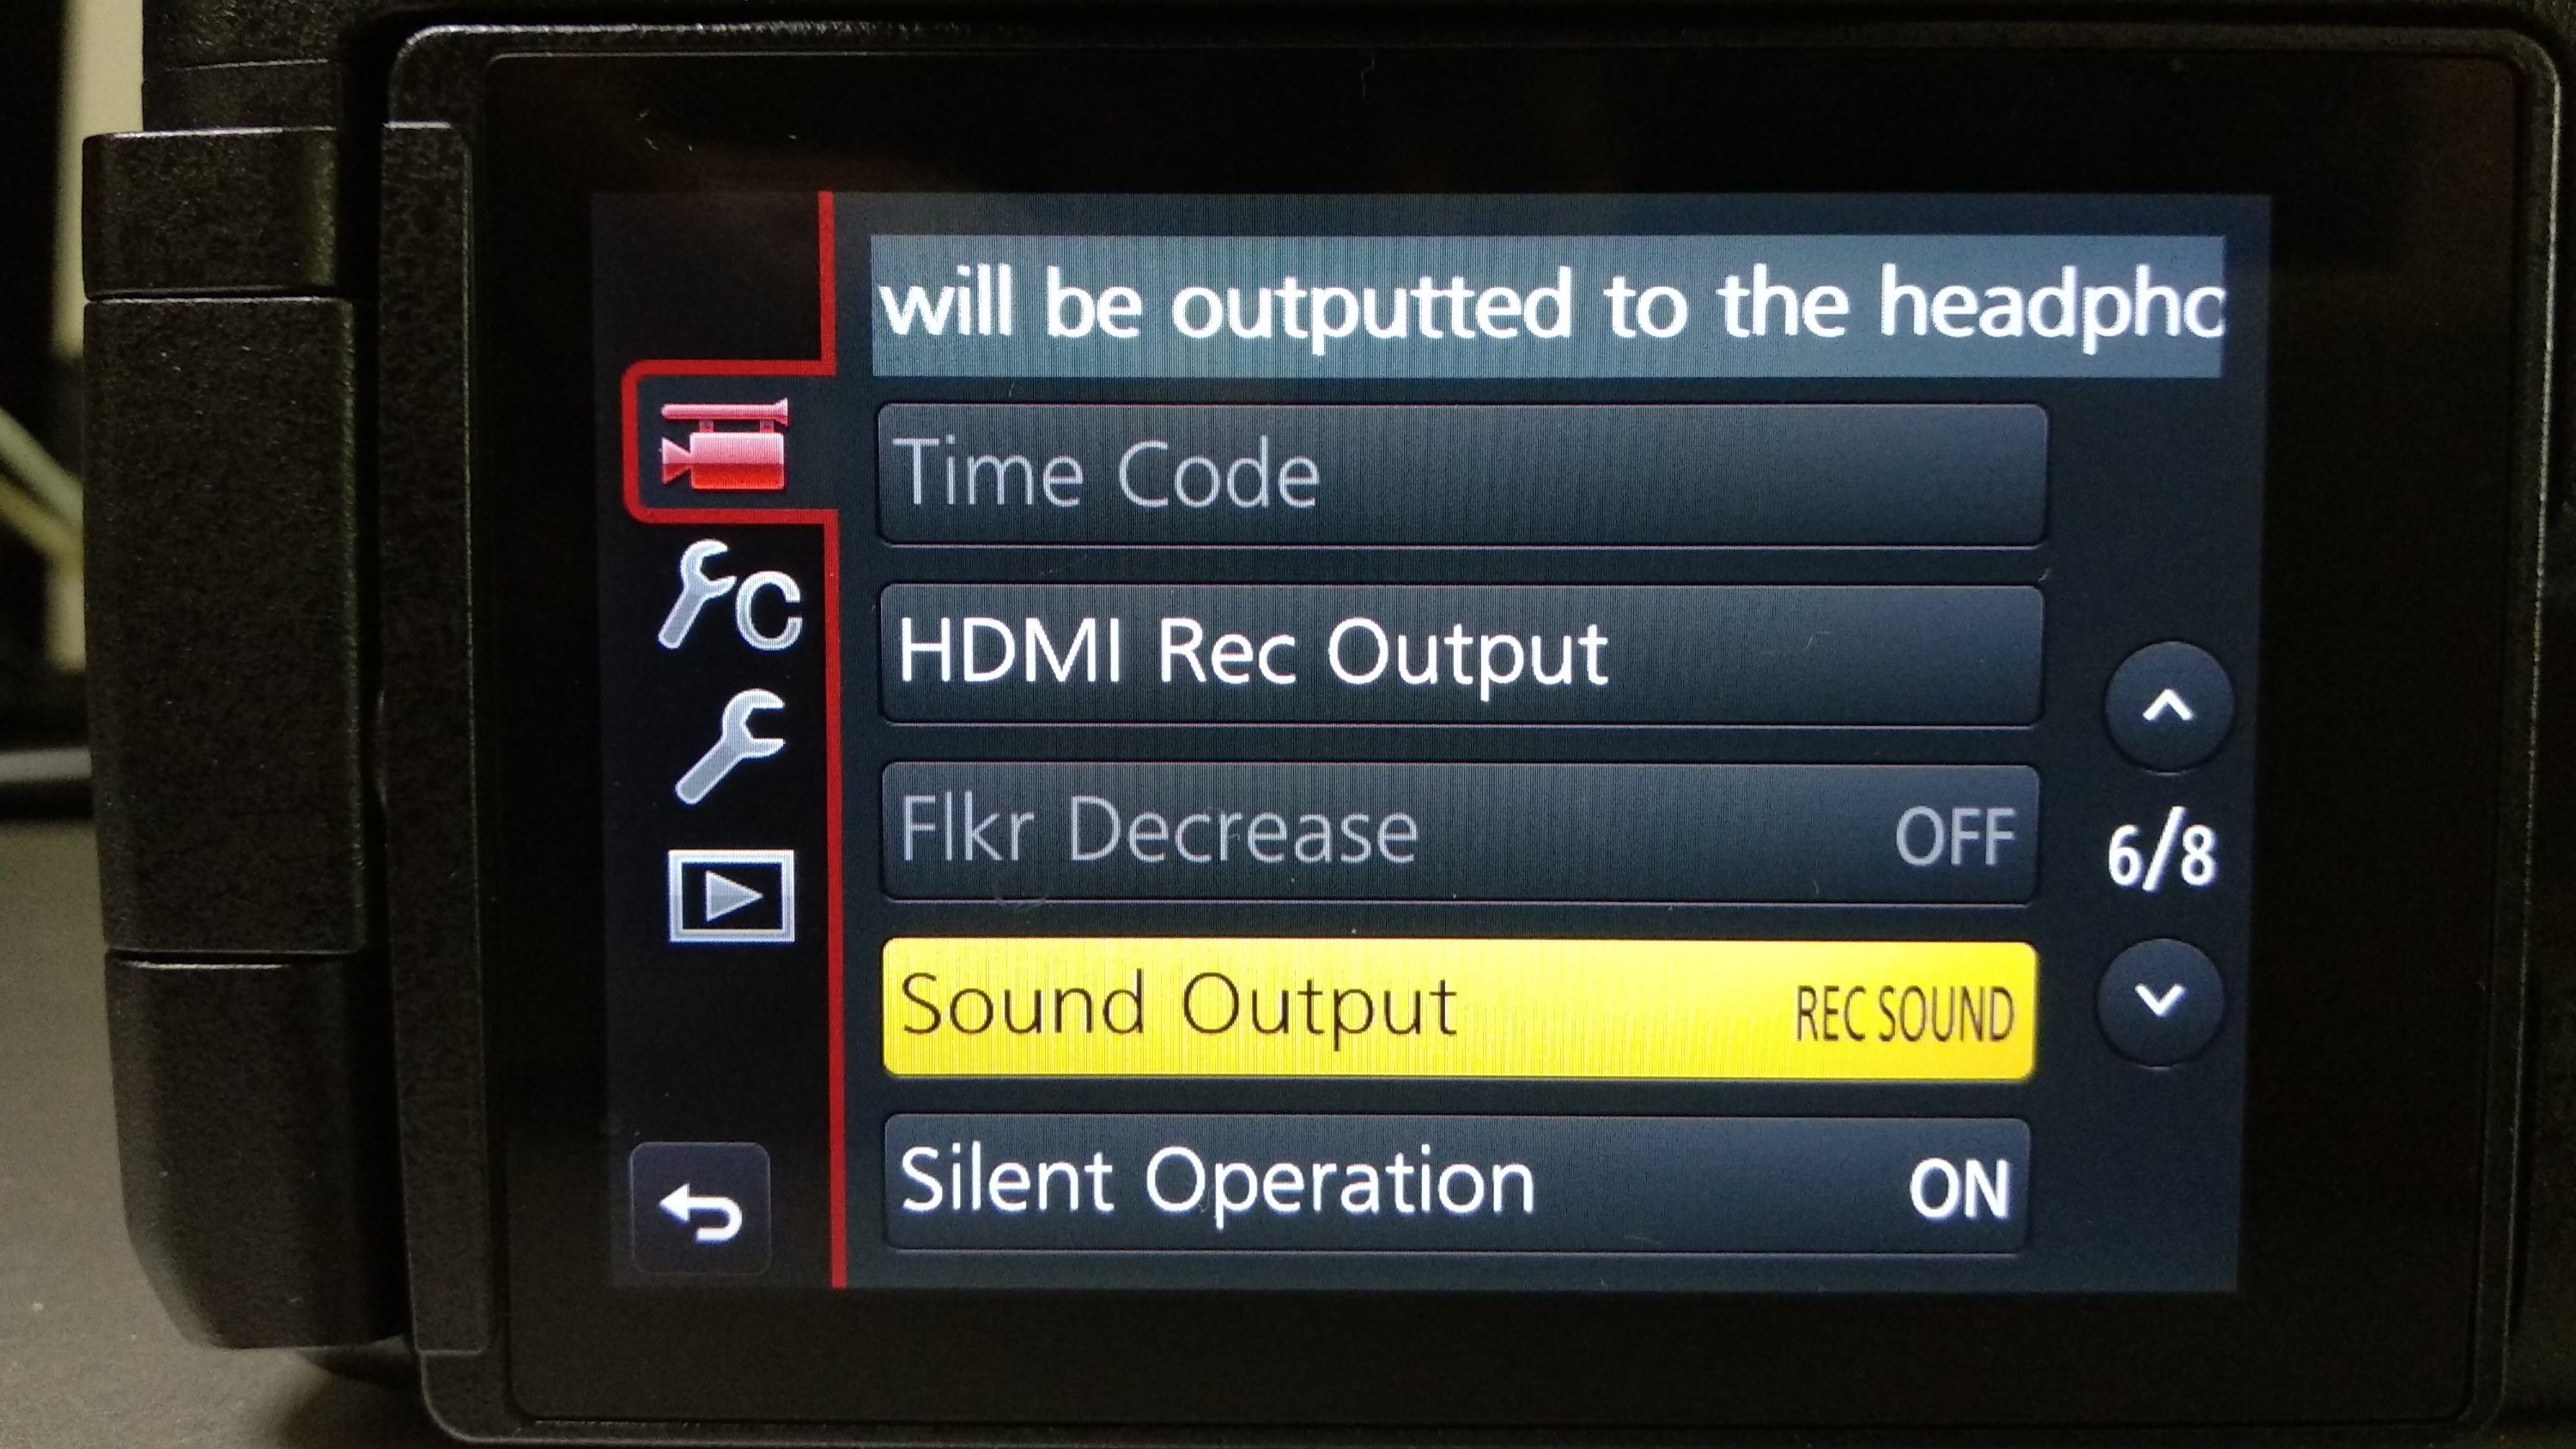
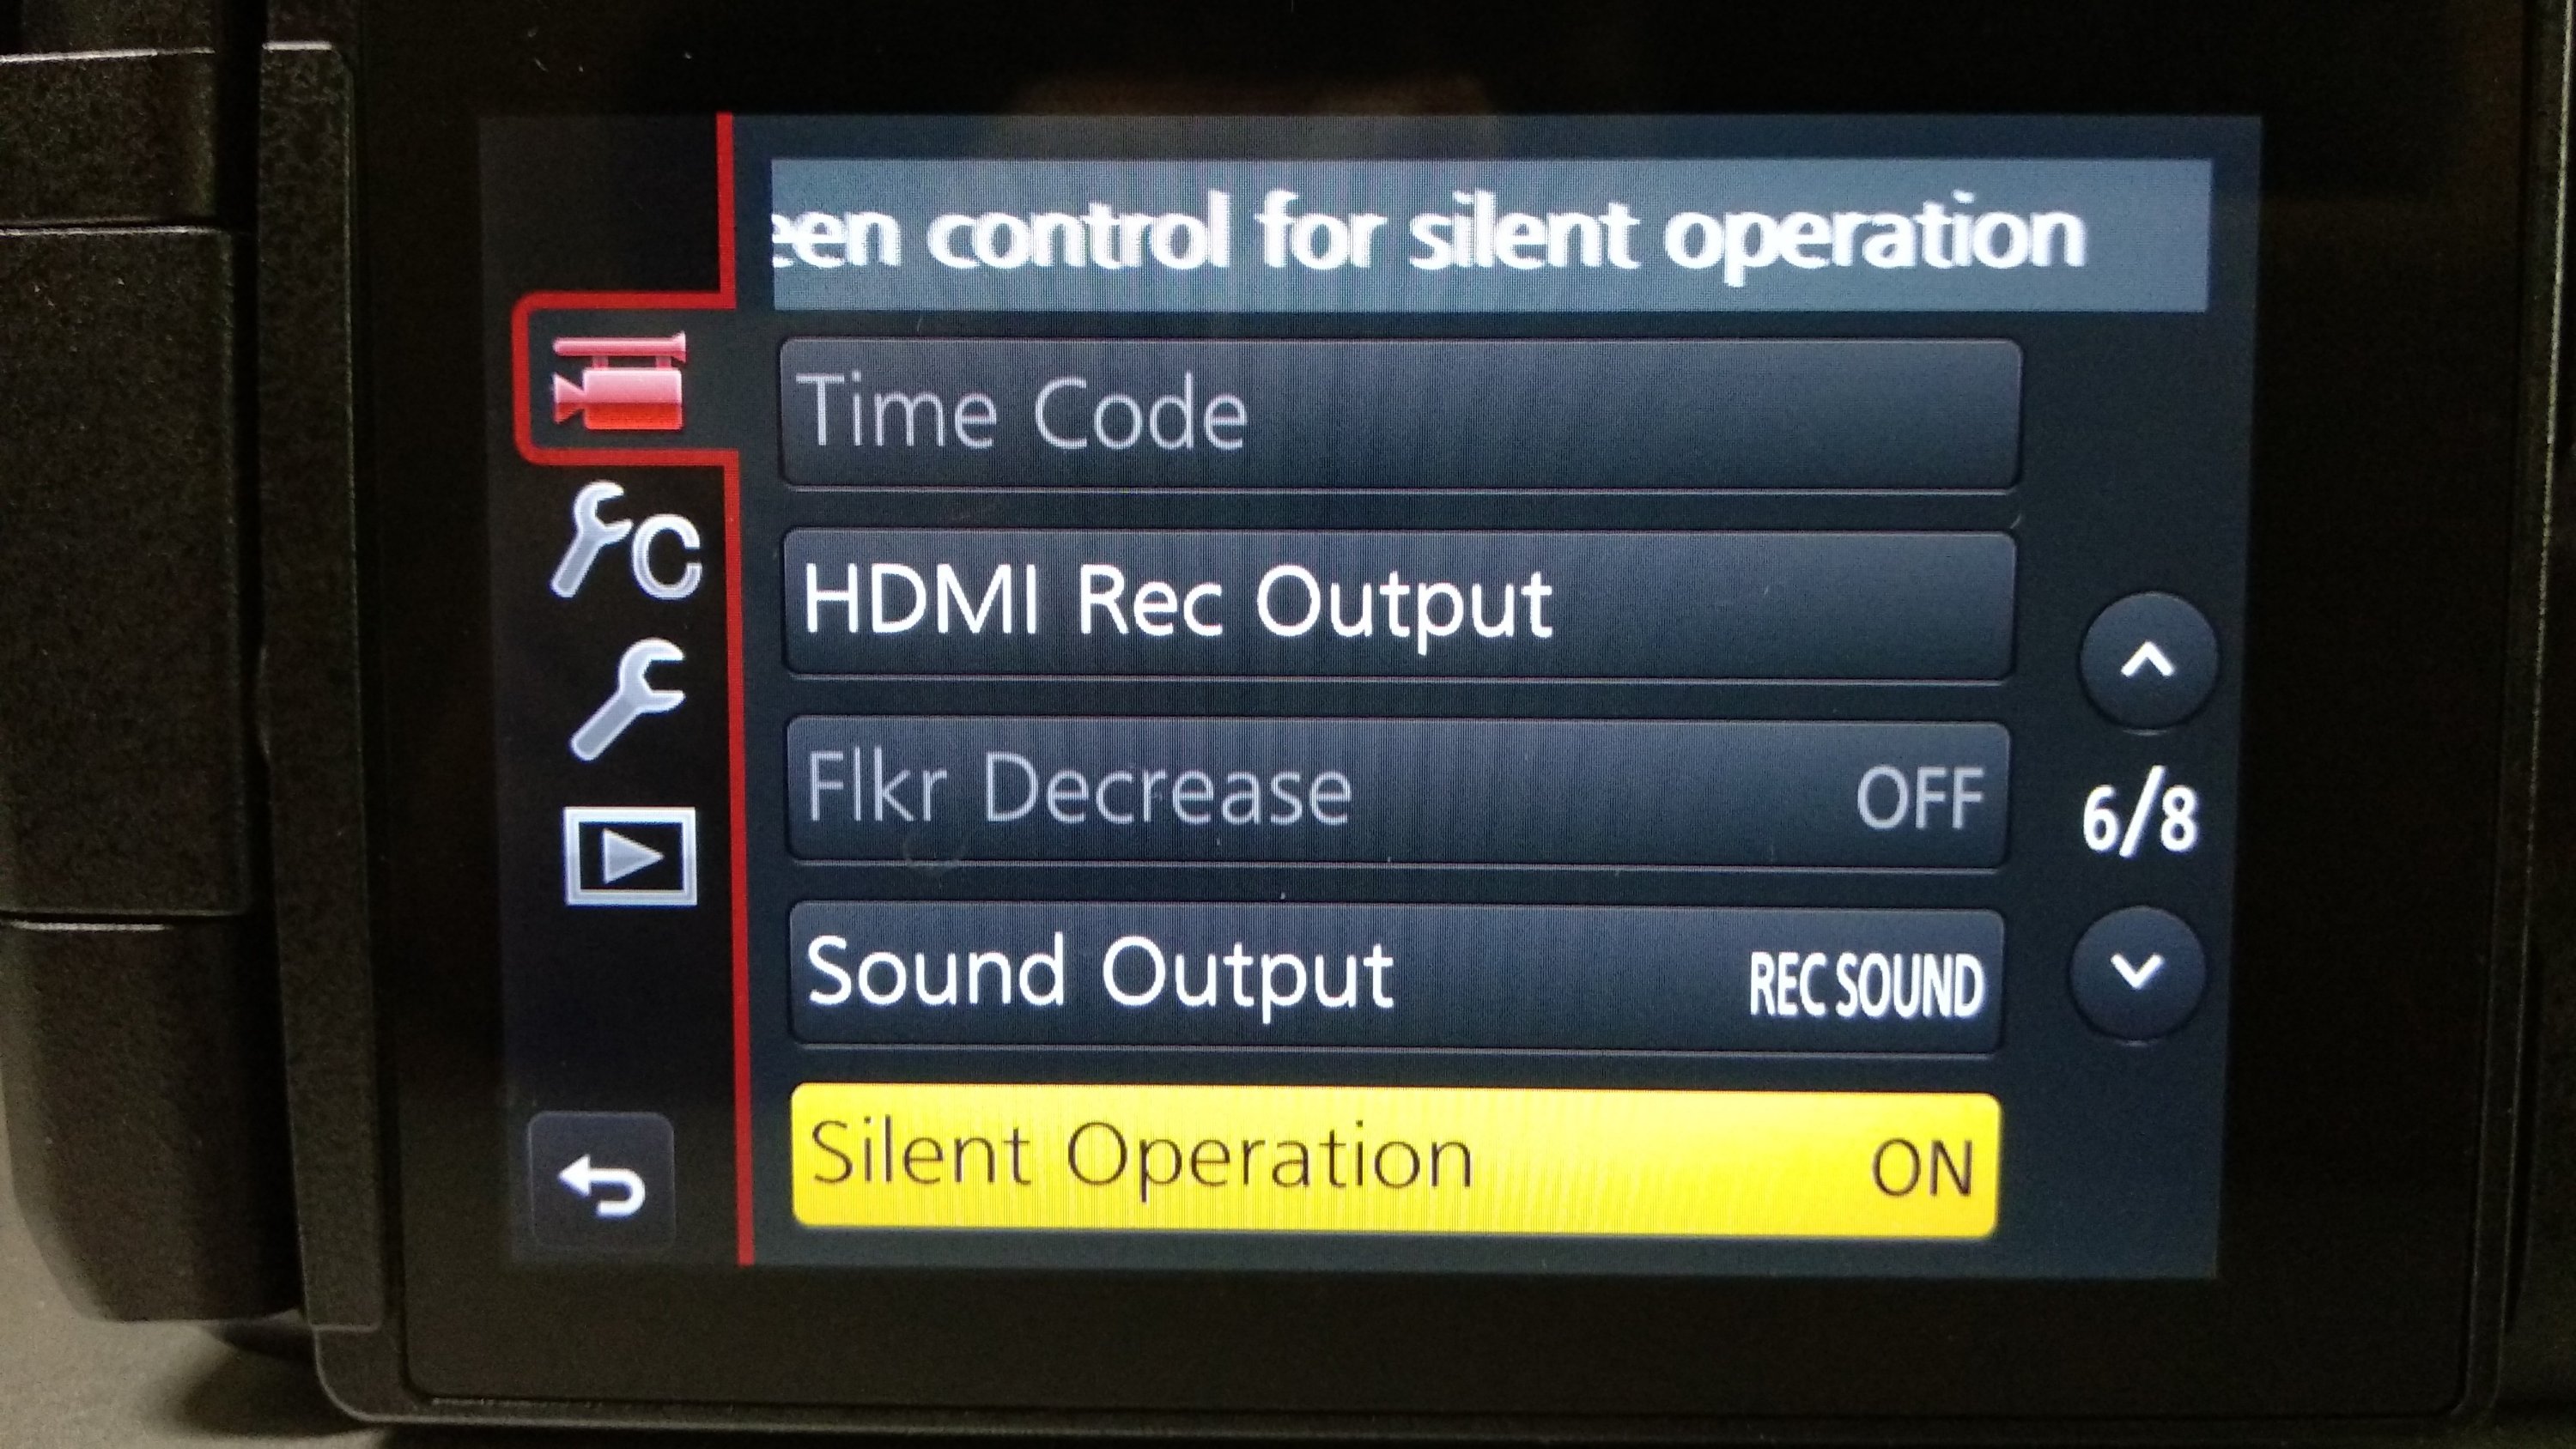
Silent Operation ON
Set Silent Operation to ON. I don’t want people around me at the event to hear my camera beep everytime I press a button.
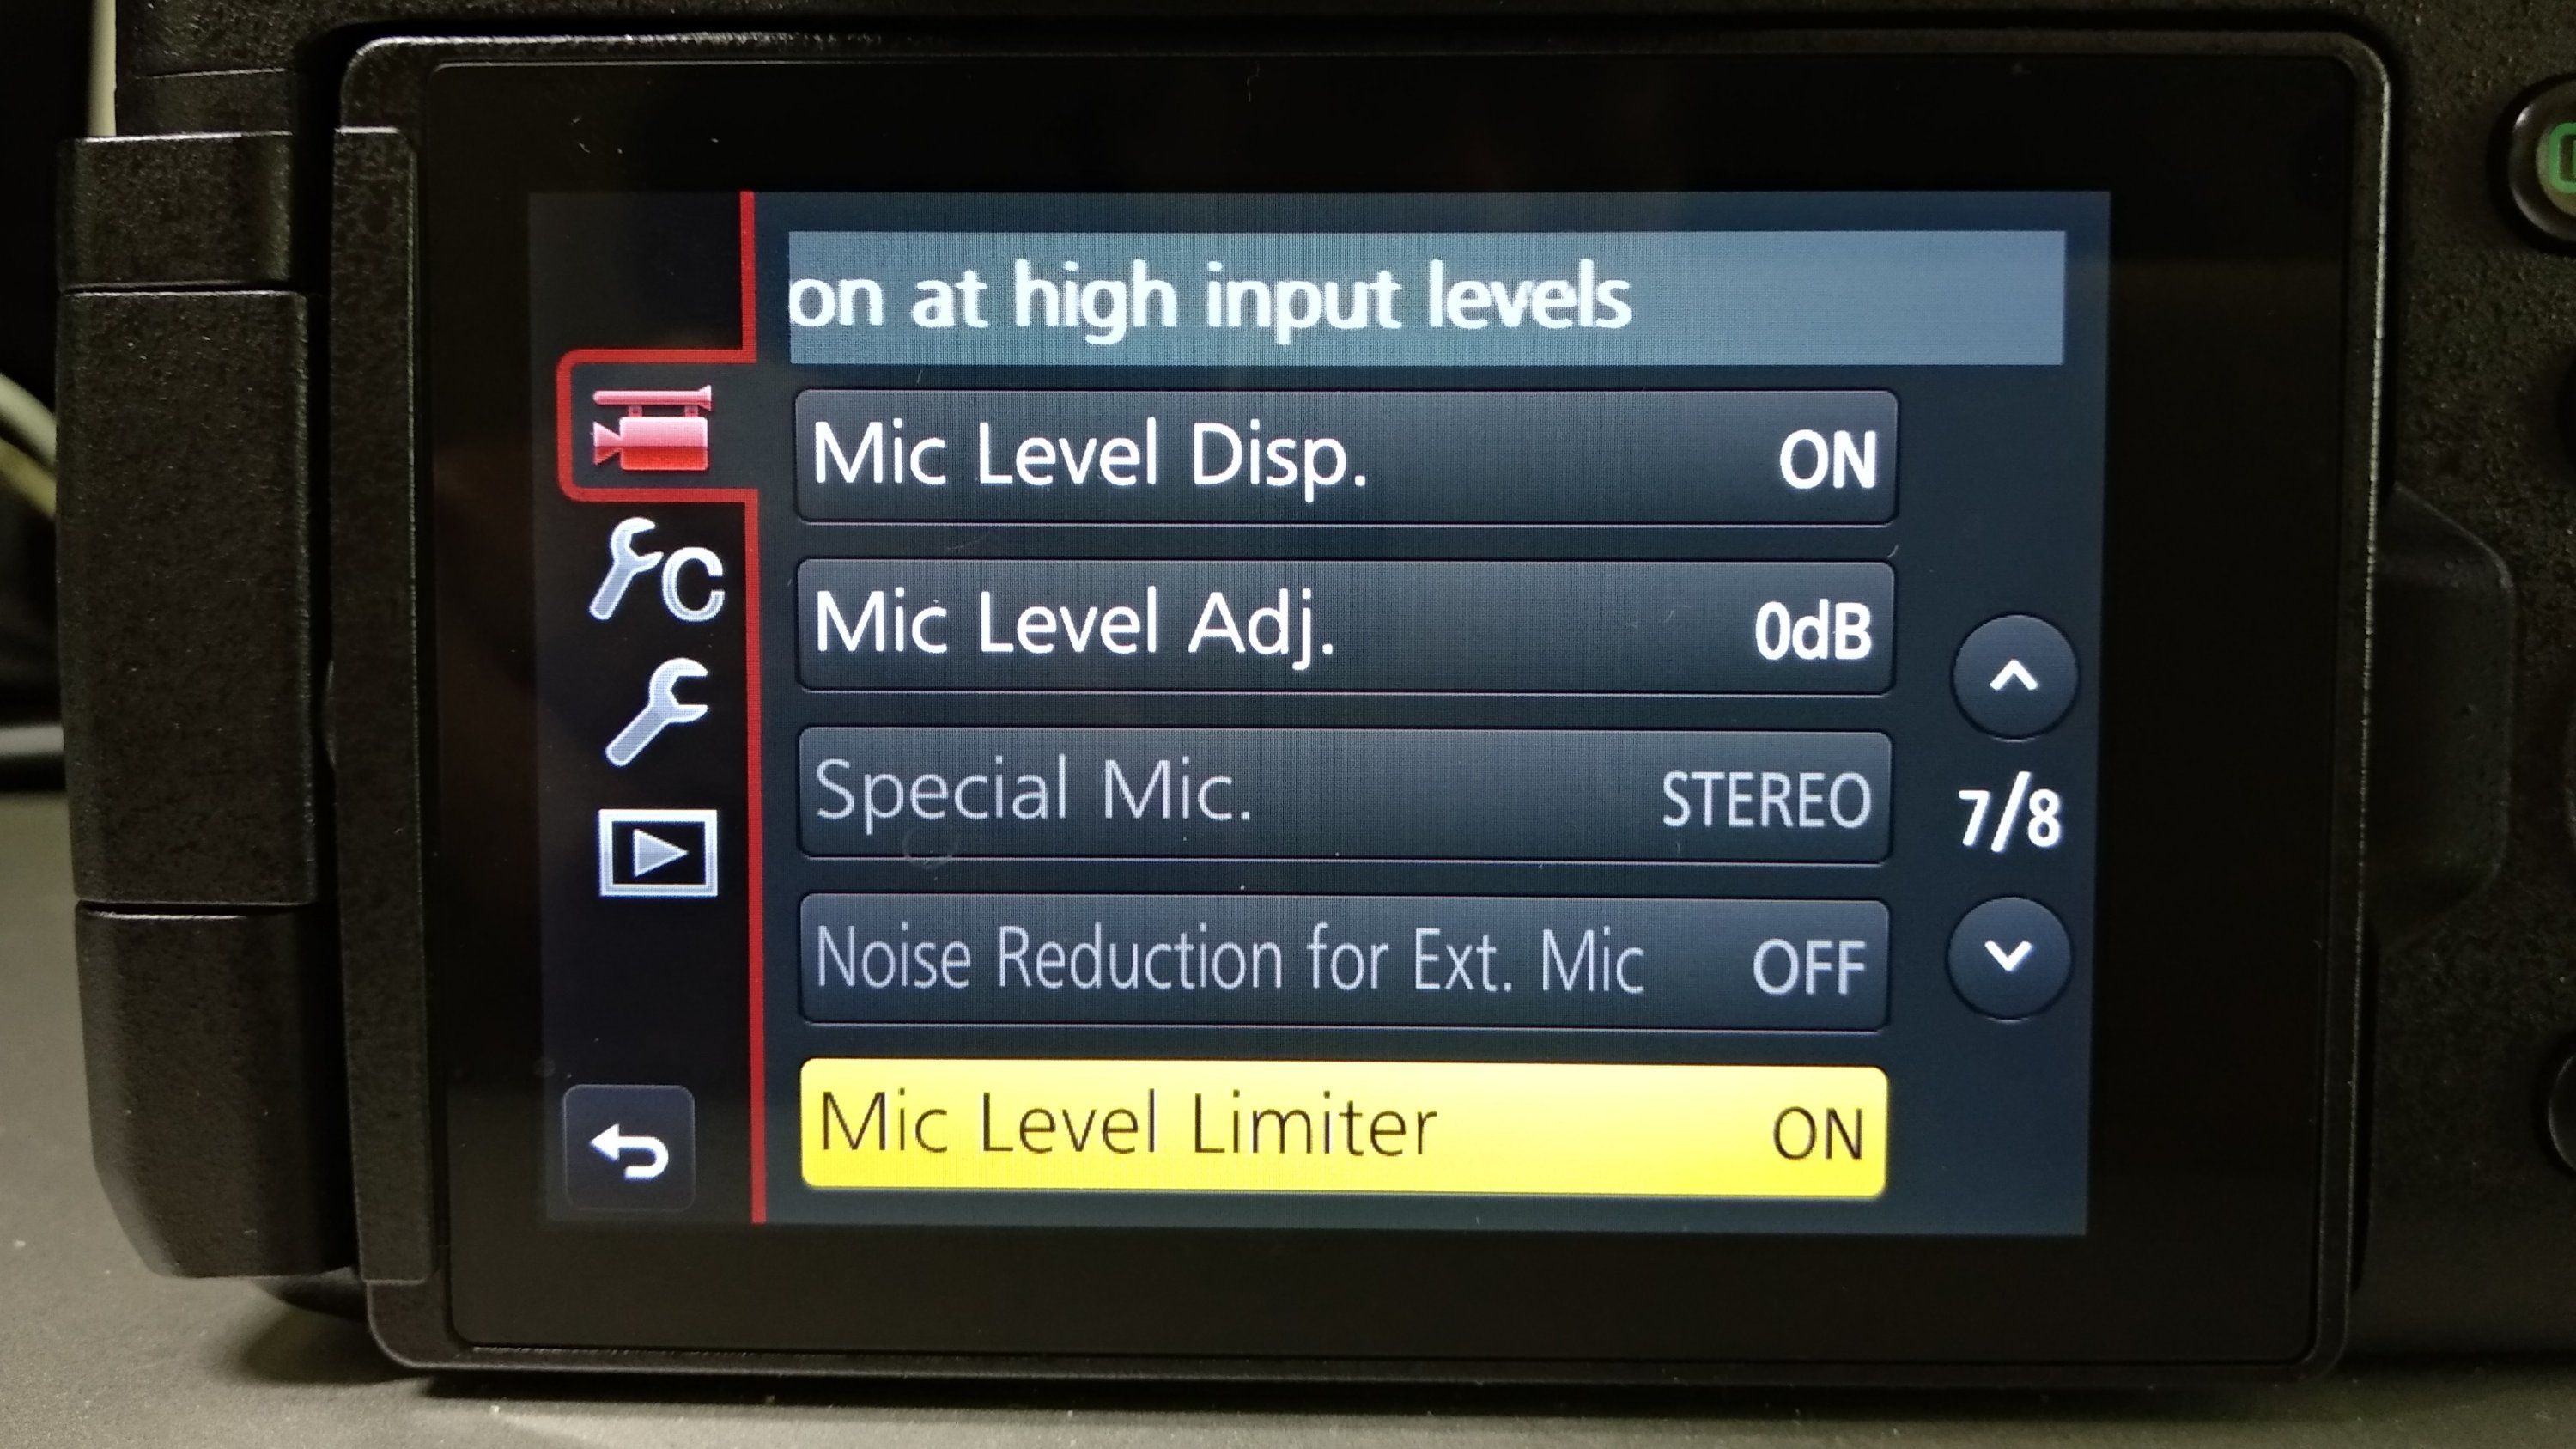
Mic Level Display ON
Turn Mic Level Display ON. I want to see the audio meter visually to monitor the audio recording levels. Also to make sure the microphone is working.
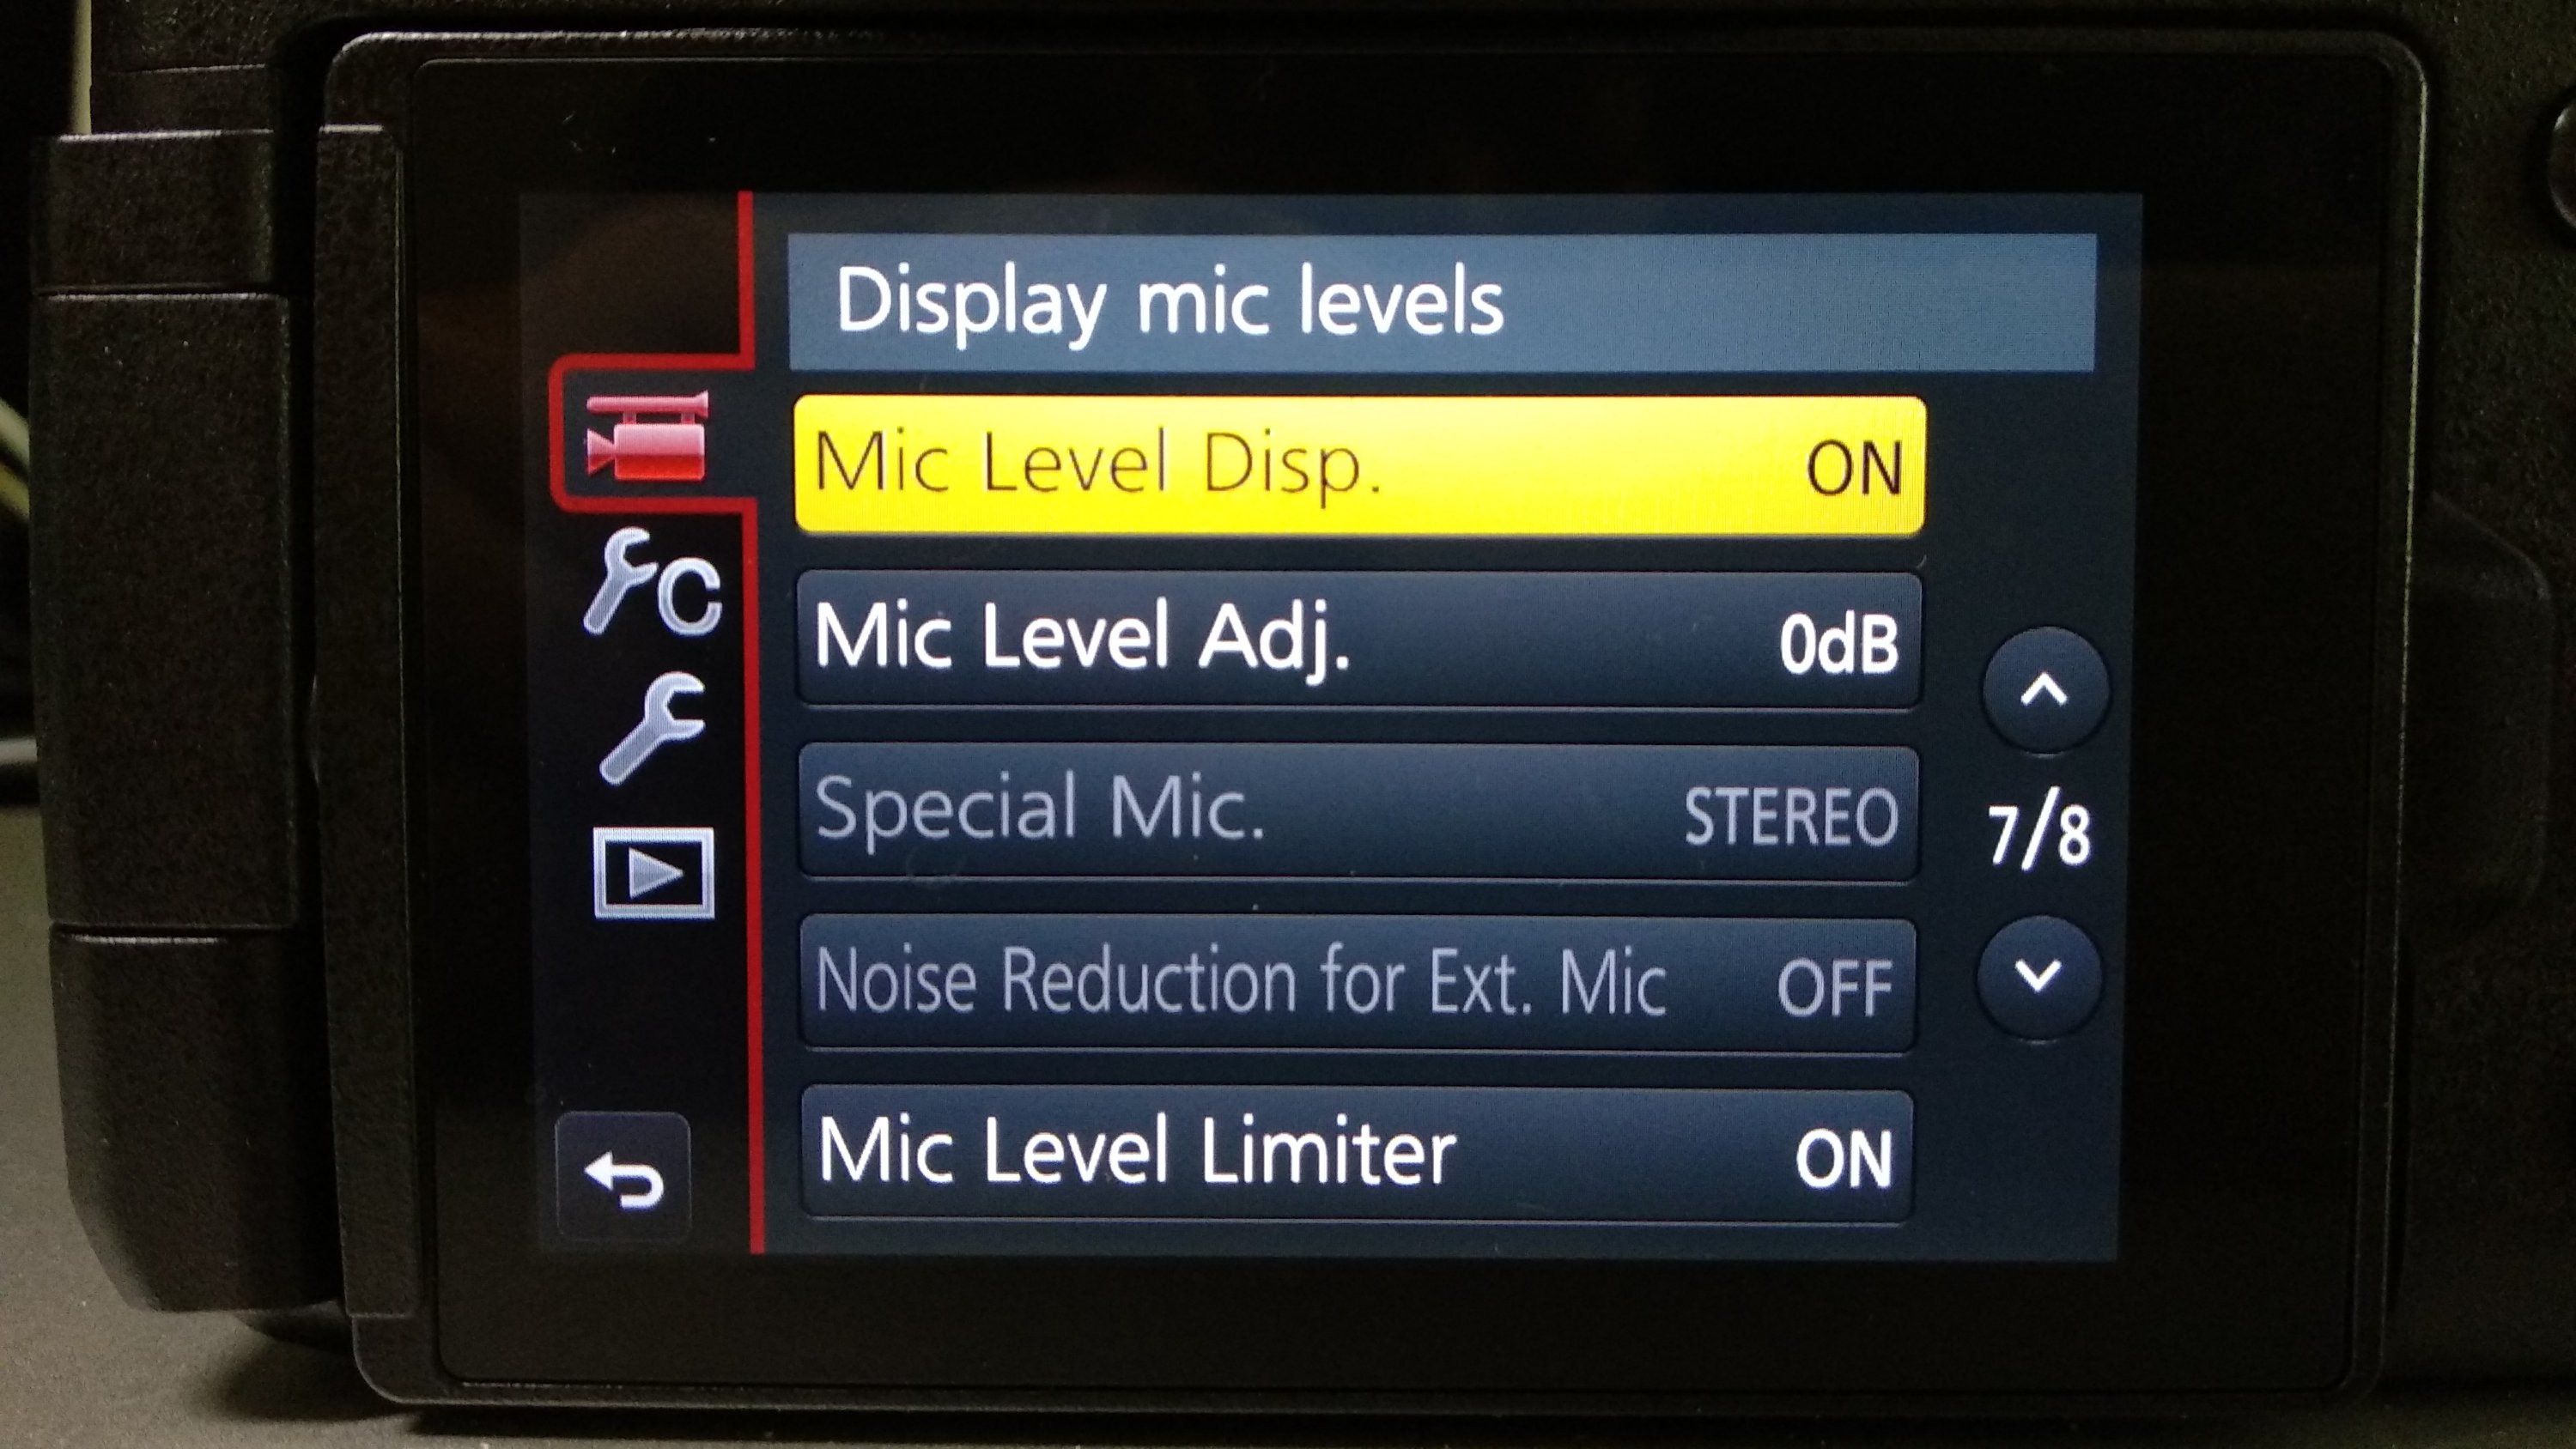
Mic Level Limiter ON
Set Mic Level Limiter to ON. During events, you never know when a sudden loud sound will happen. So I let the camera automatically limit the audio level when it happens.
Wind Noise Canceller OFF
Turn Wind Noise Canceller OFF. This works only when an external mic is plugged in. The canceller destroys audio quality. Use noise reduction in post instead.

Shutter Auto Focus ON
Turn Shutter AF ON. I want the camera to quickly focus on the subject when I half press the shutter button.

AF Assist Lamp OFF
Turn AF Assist Lamp OFF. I don’t want that bright green light shining on people and annoying them.
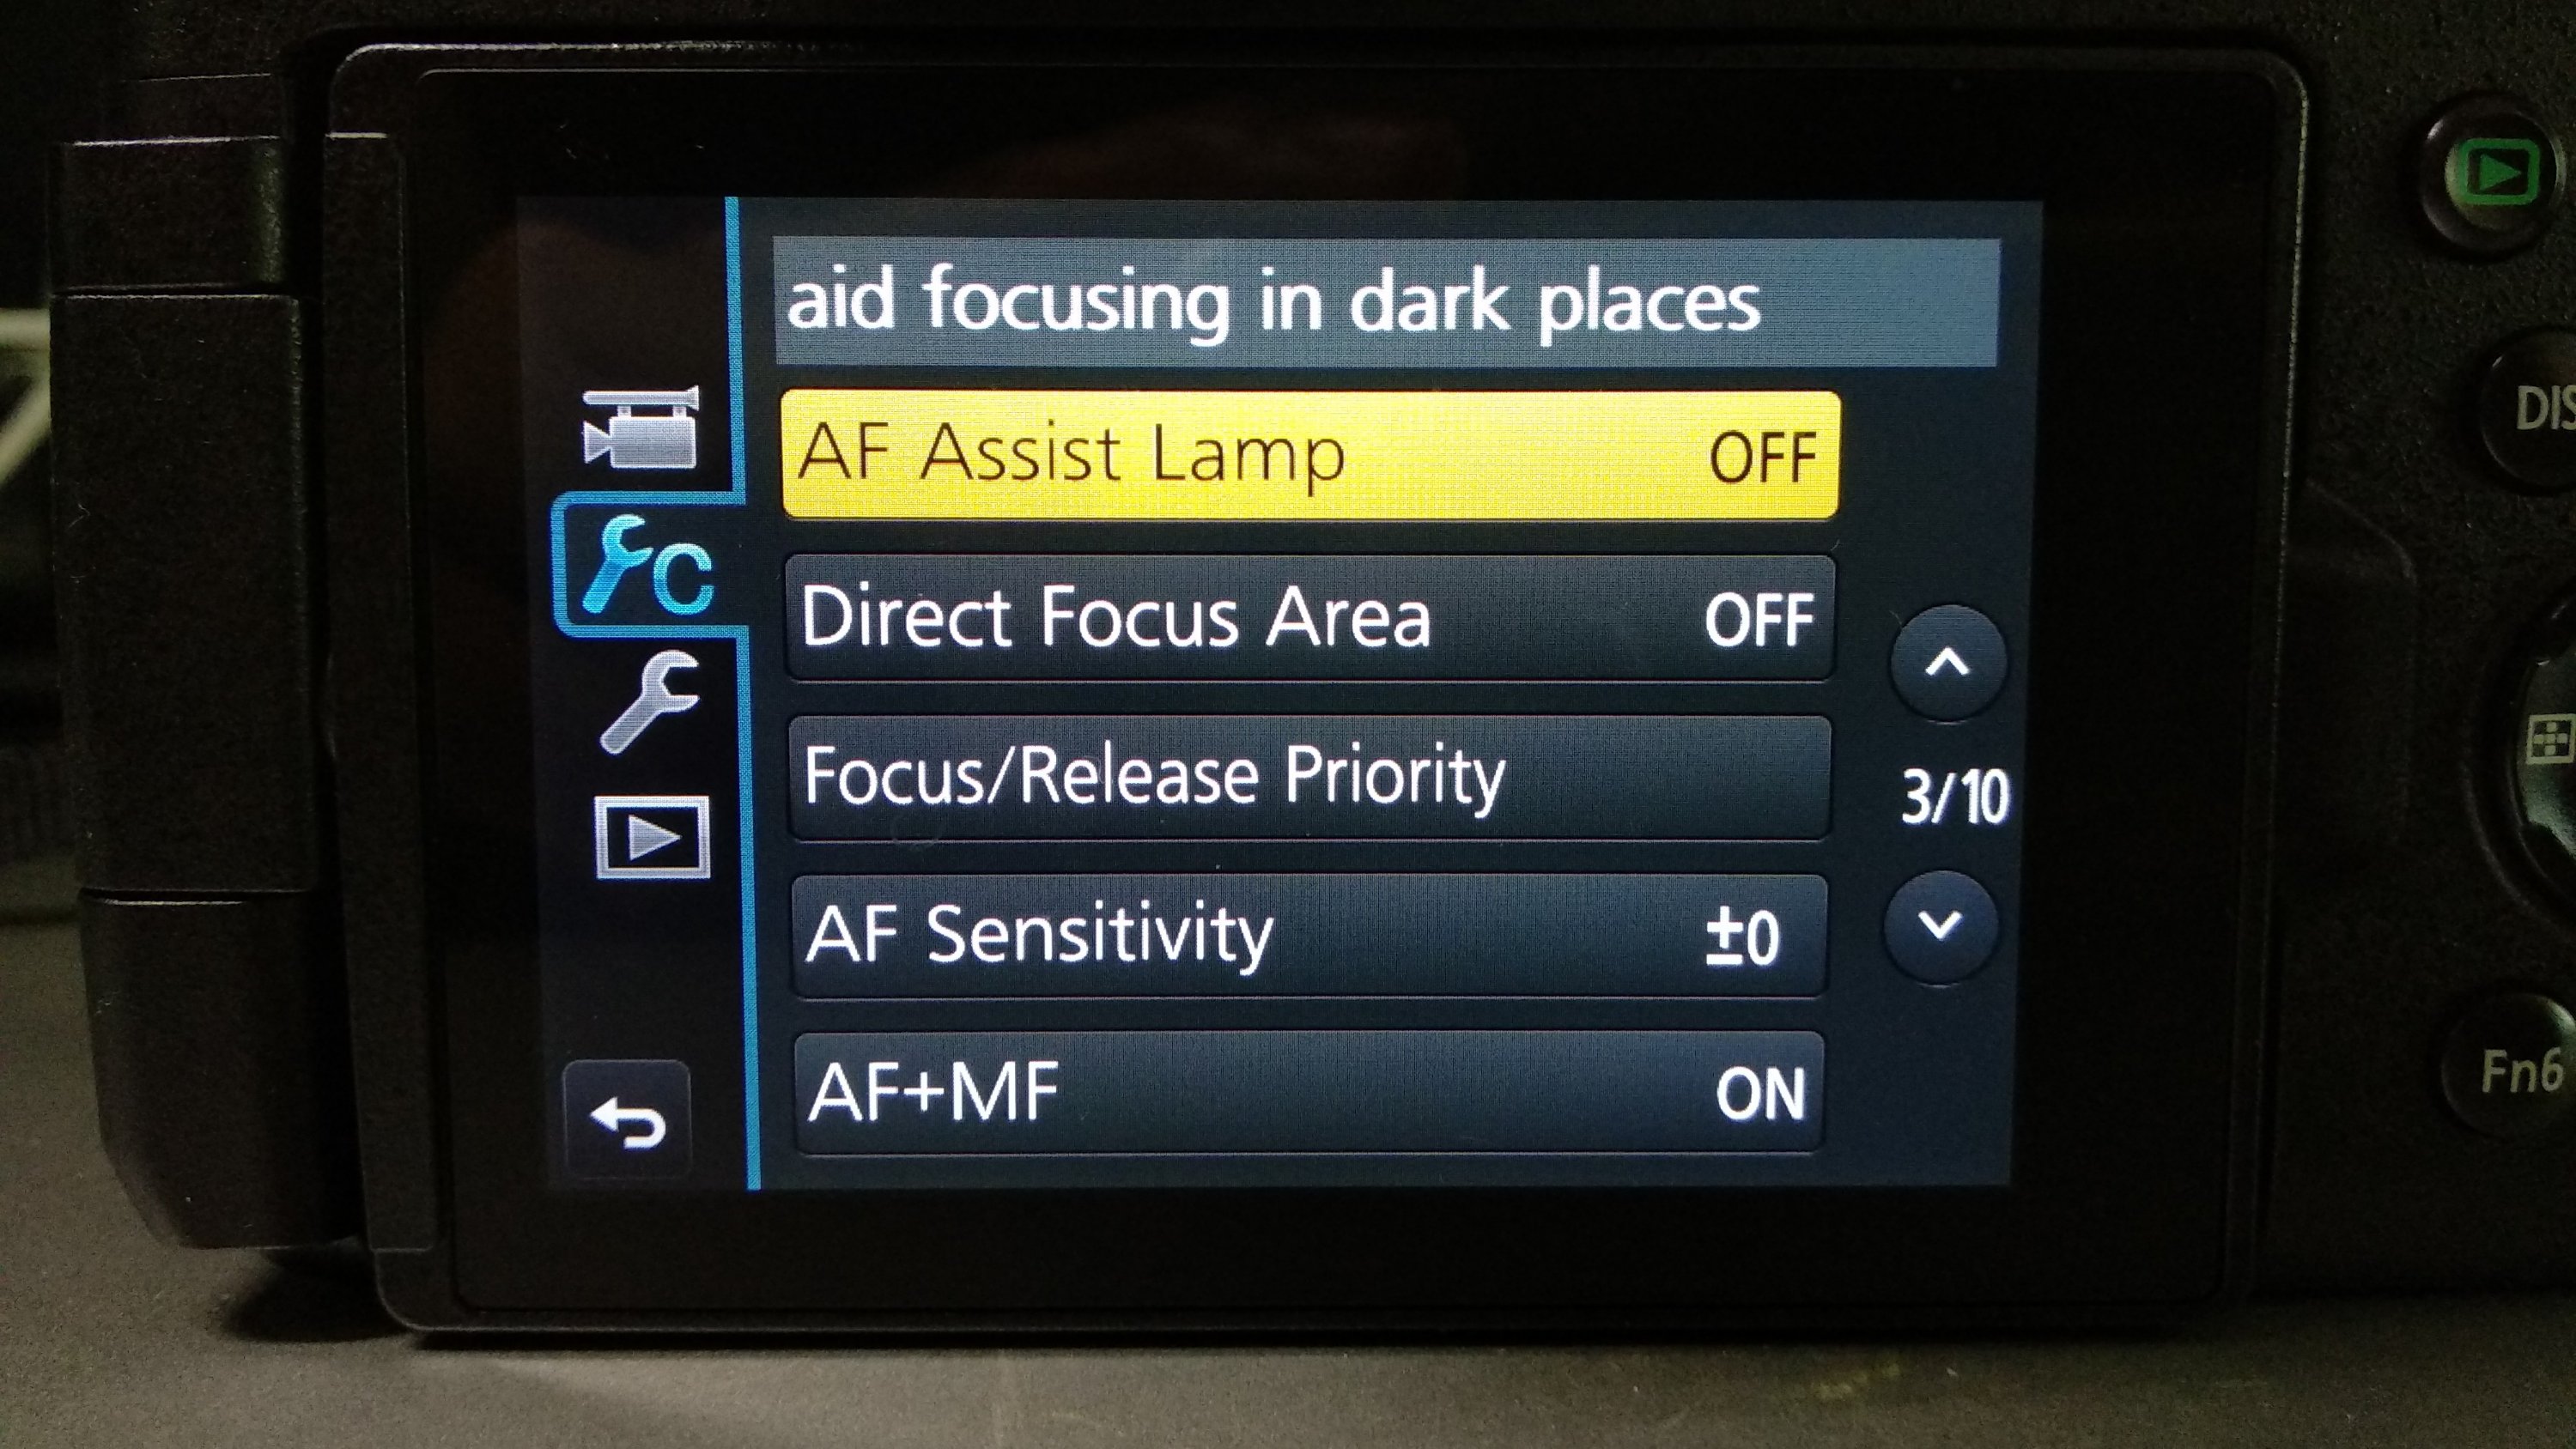
AF+MF ON
Turn on AF+MF. Focus setting on the FZ2500 is most tricky. I turn this on so I can have both manual focus and autofocus on the fly… Don’t know how this works but so far so good.

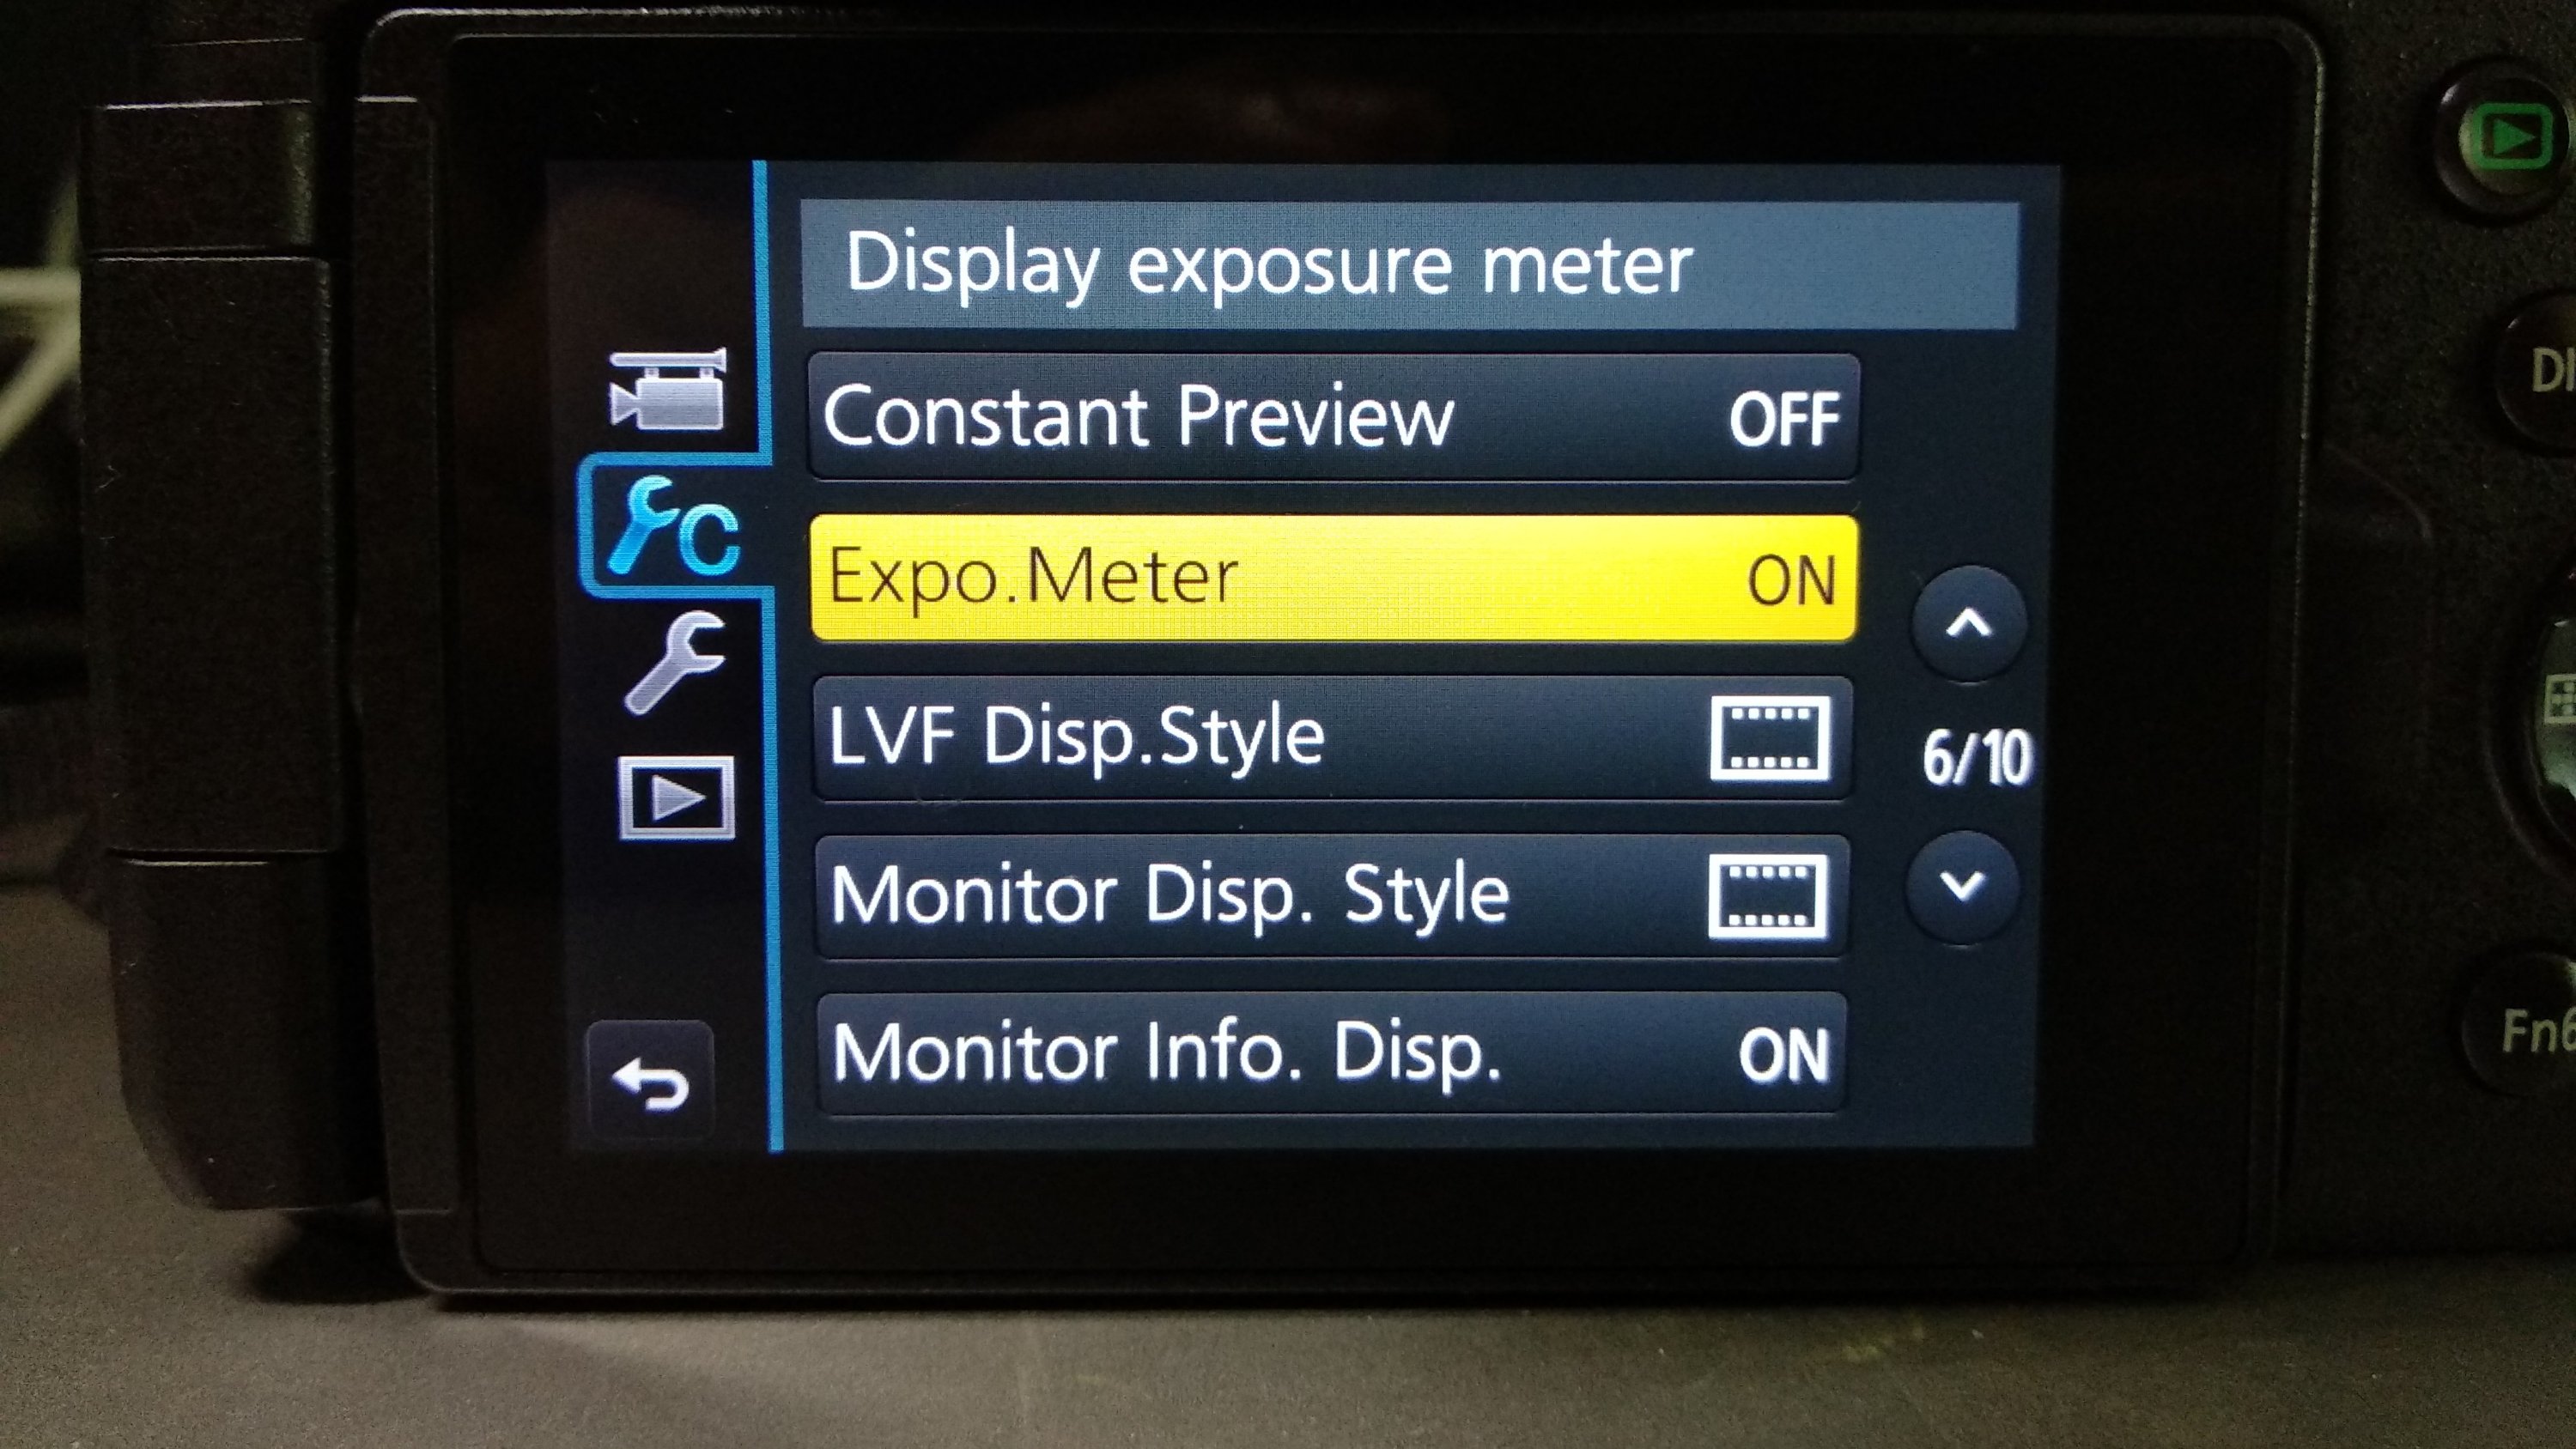
Exposure Meter ON
Turn on exposure meter. This is most useful when I am adjusting exposure on the fly, reacting quickly to changing lighting conditions.
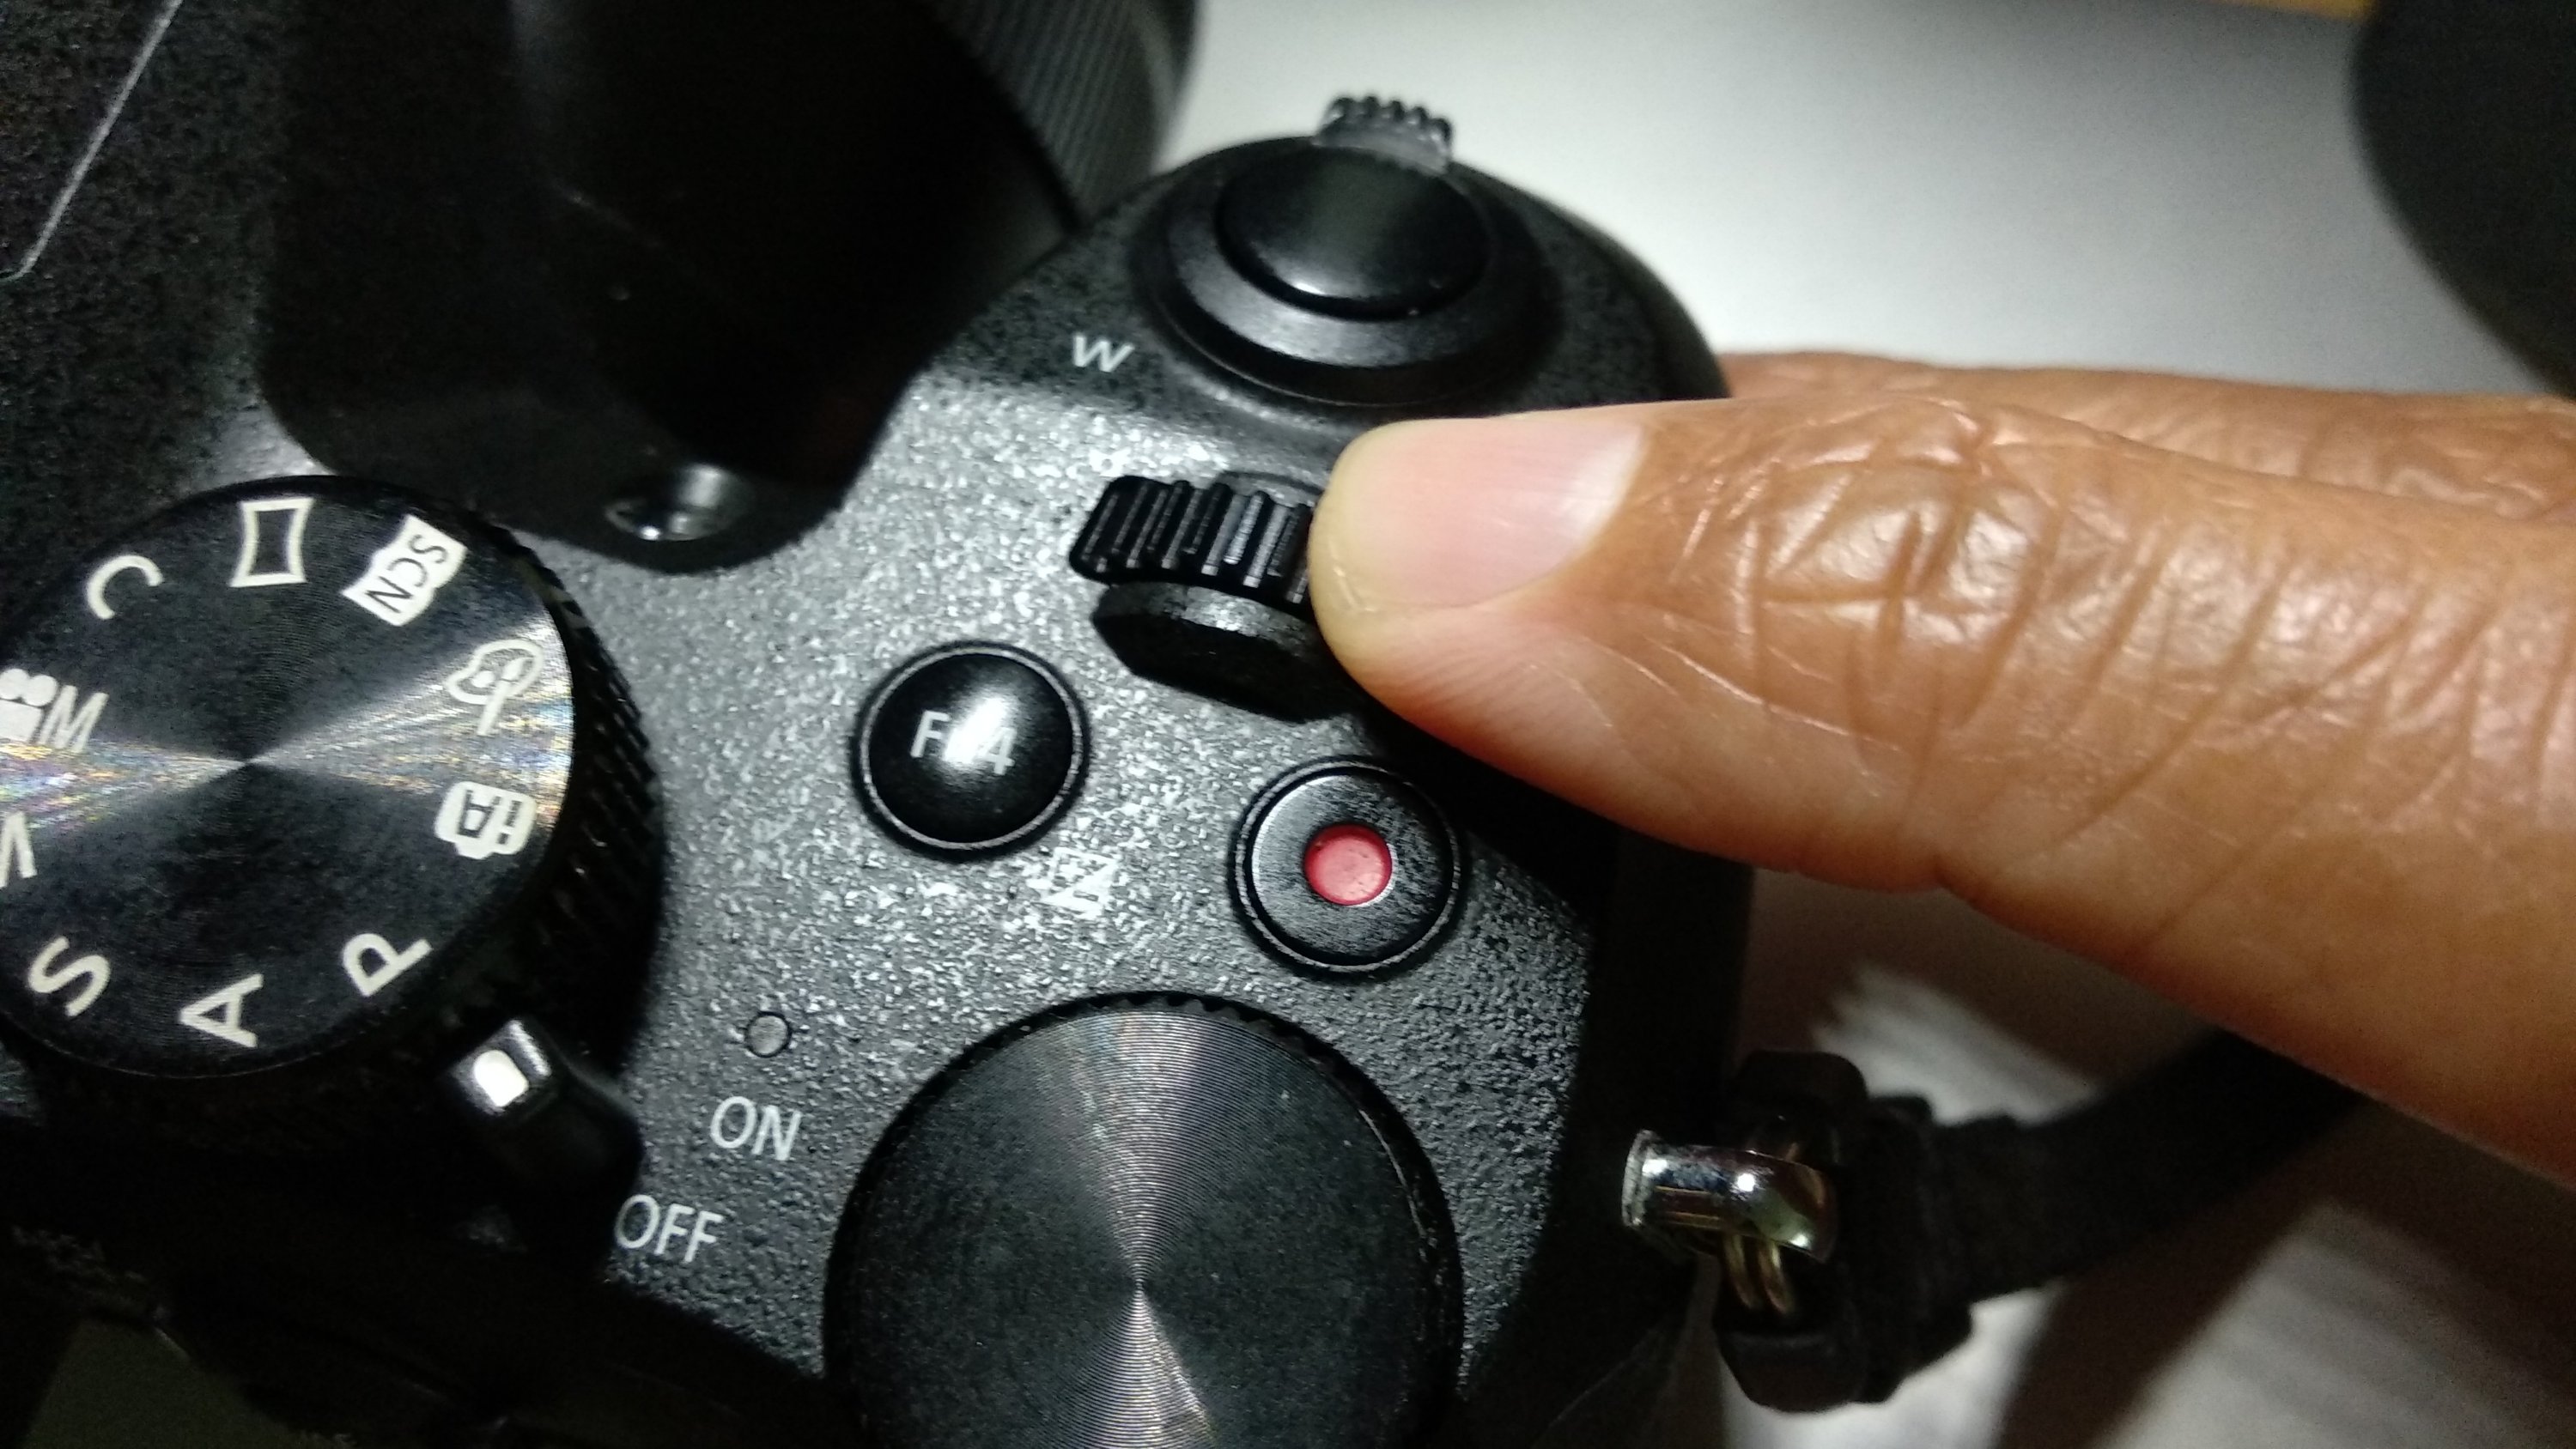
Exposure Compensation Dial
Set Front Dial to Exposure Compensation. This makes exposure adjustment on the fly so convenient.
Watch how I change the Panasonic FZ2500 Exposure Compensation Dial Setting…


System Frequency 50Hz (PAL)
This is actually the very first setting before any other settings. I live in Singapore so I choose 50Hz (PAL).

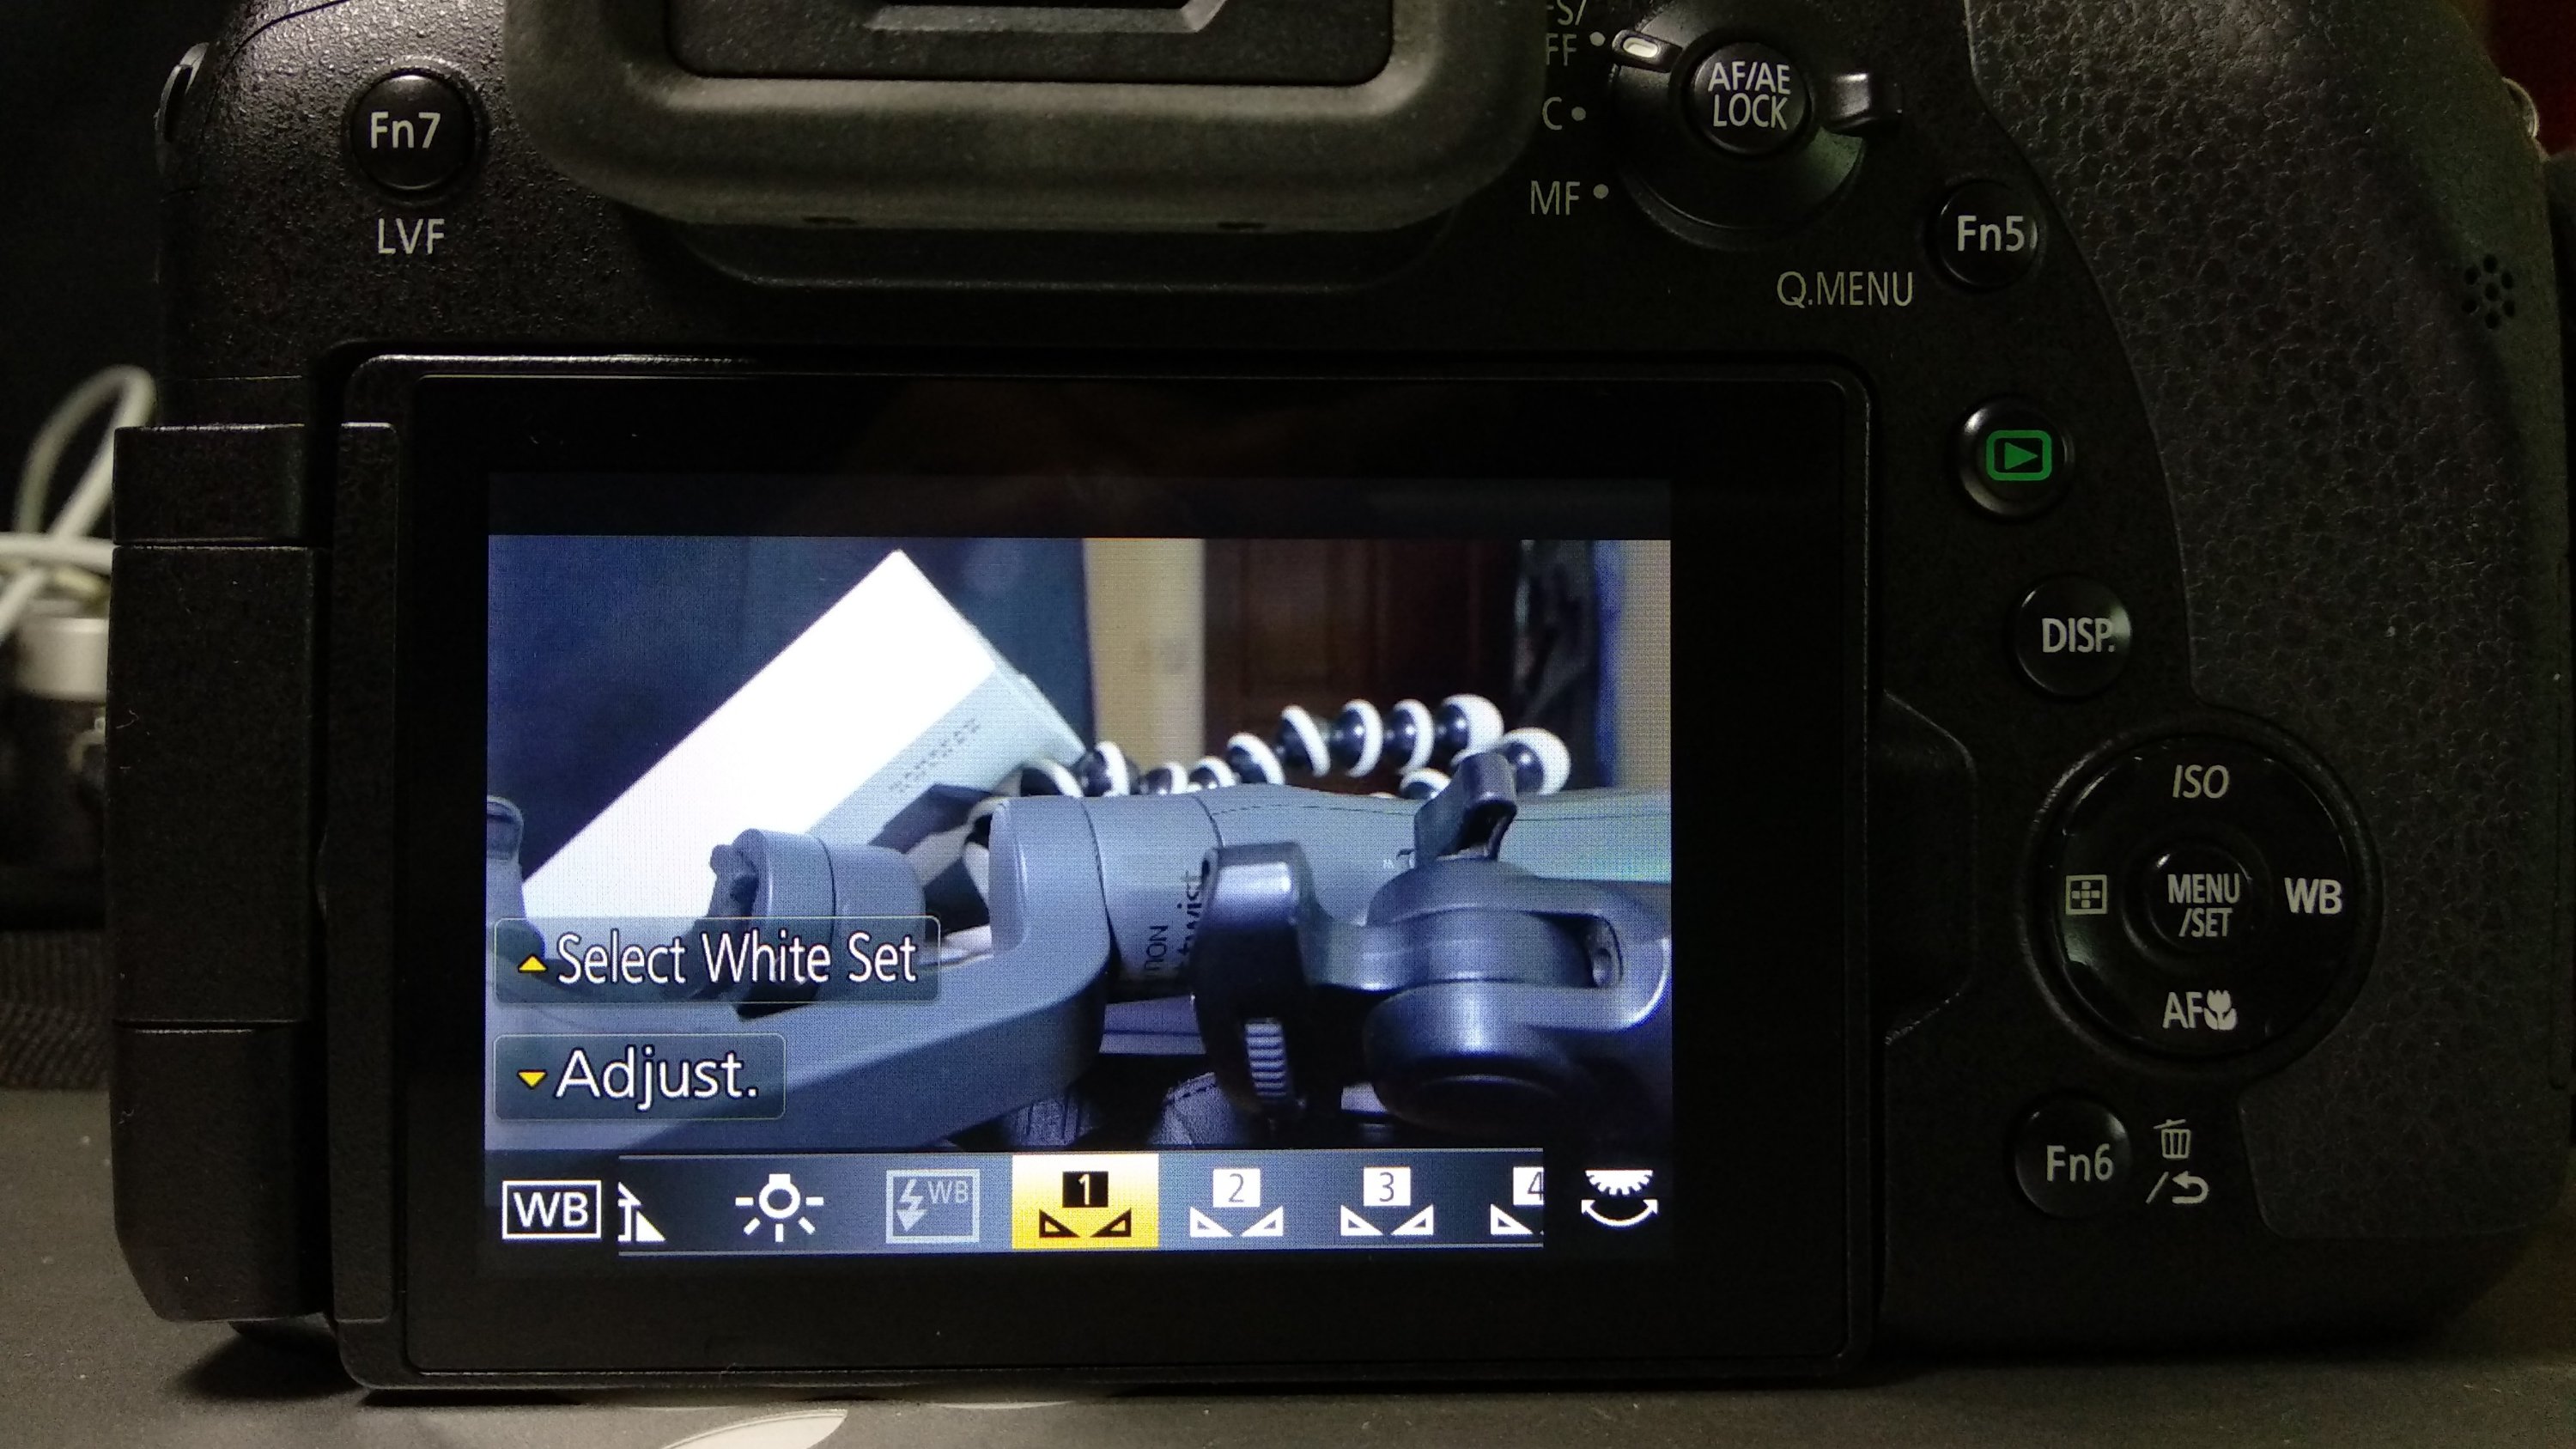
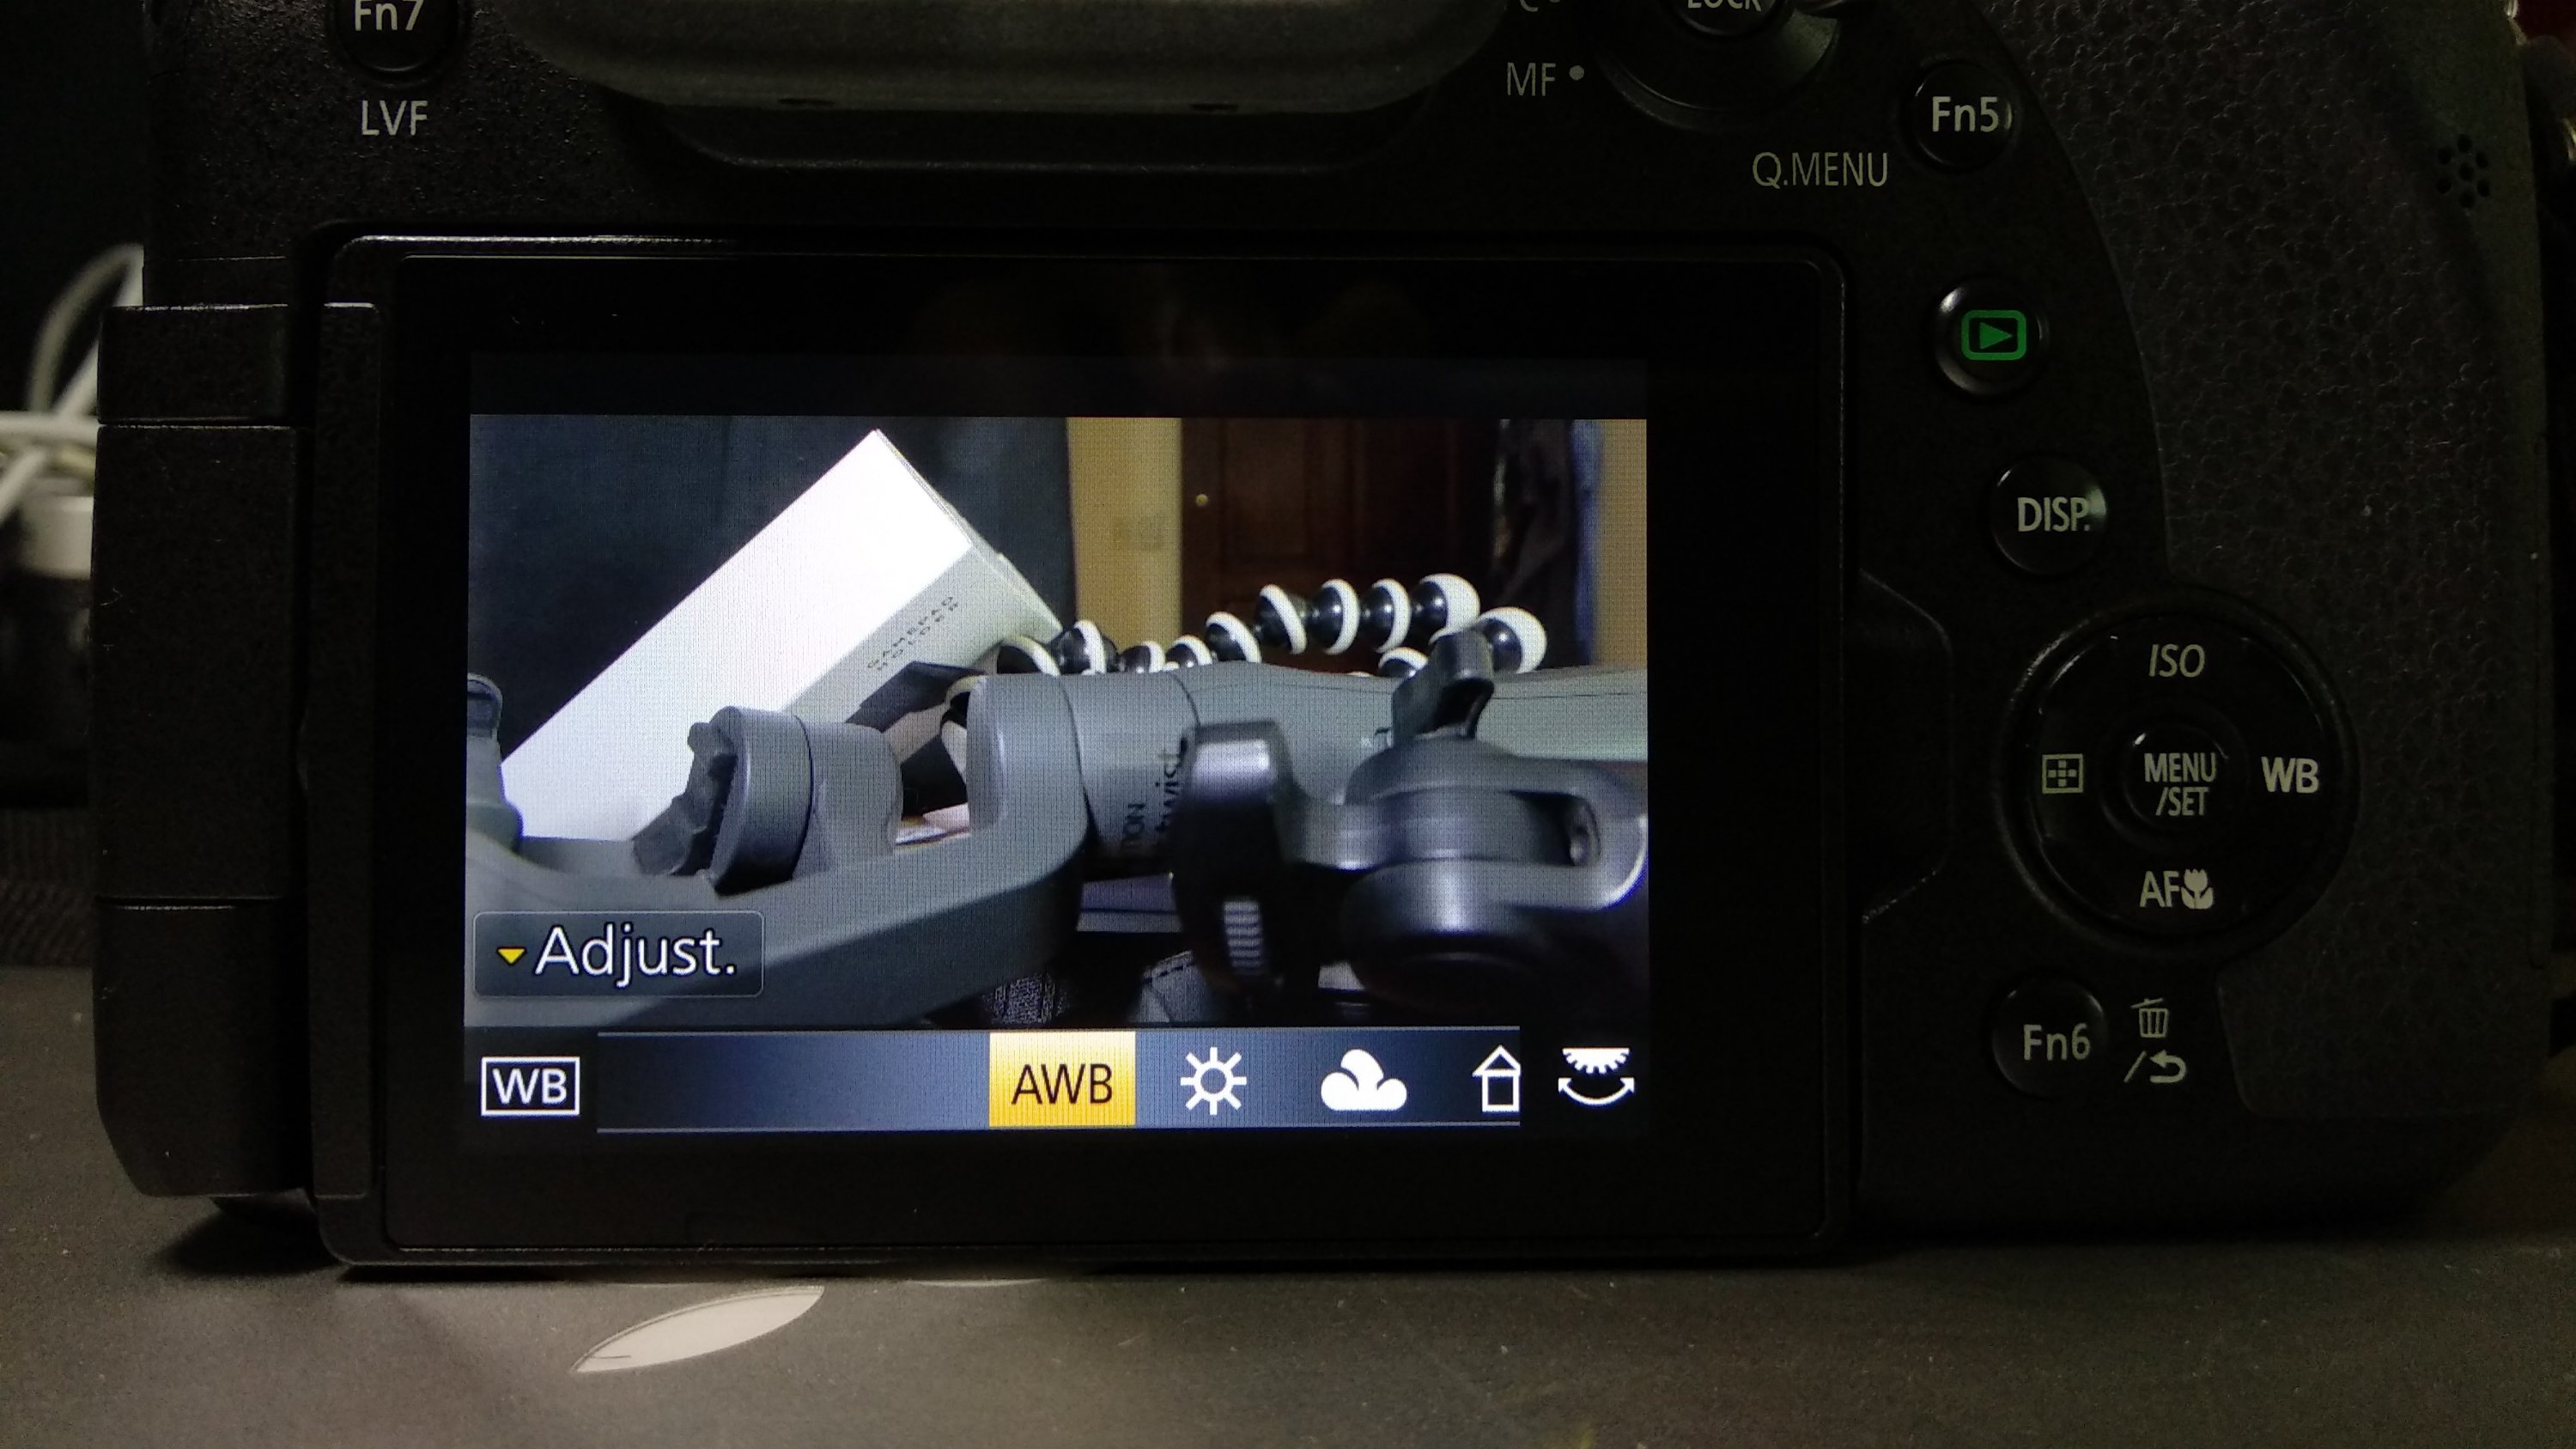
Custom White Balance for Indoors
When shooting video indoors, I always set a custom white balance based on the environmental lighting.
Auto White Balance for Outdoors
When shooting video outdoors in the day, l leave the white balance in AWB. The sun is always the best light source that the camera understands.
ISO 1600 for Indoors
This is a personal preference. Whenever I go indoors, I set the ISO to 1600 for that bright and cheery look. Anything higher will introduce tiny video noise grains.

ISO Auto for Outdoors
Again when under the sun, the camera knows what to do. So it’s auto ISO when I go outdoors in the day.

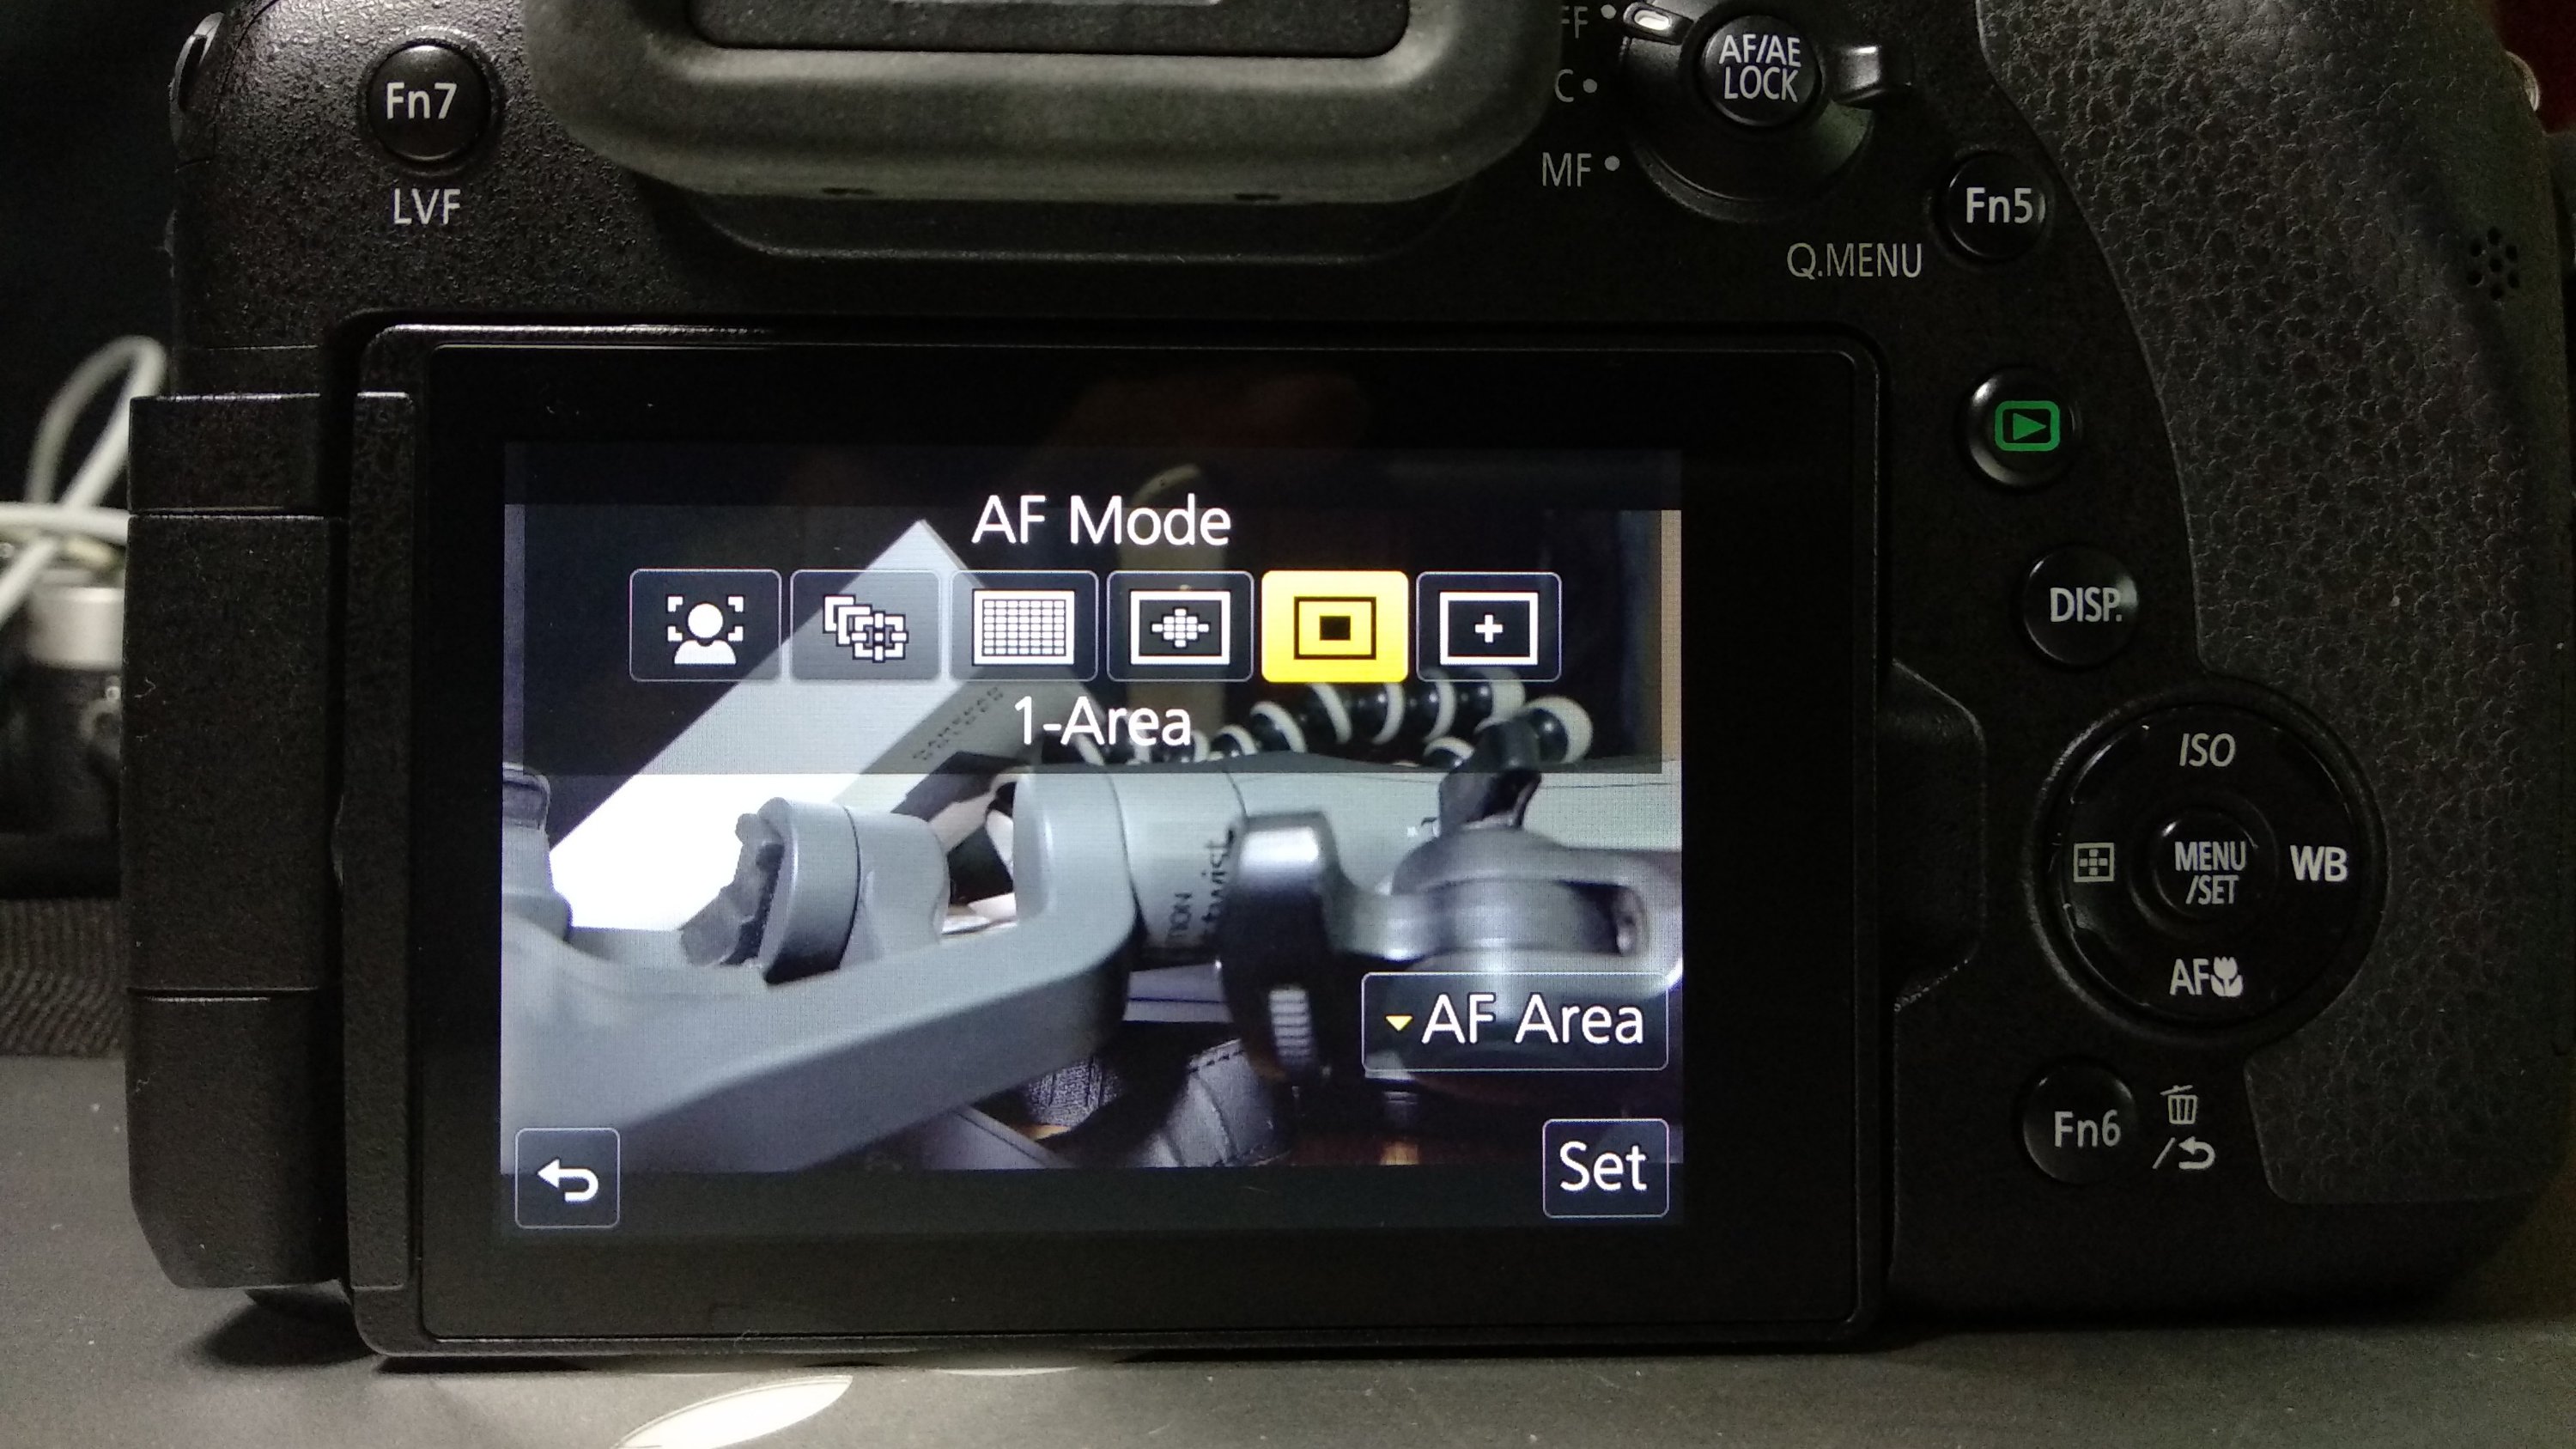
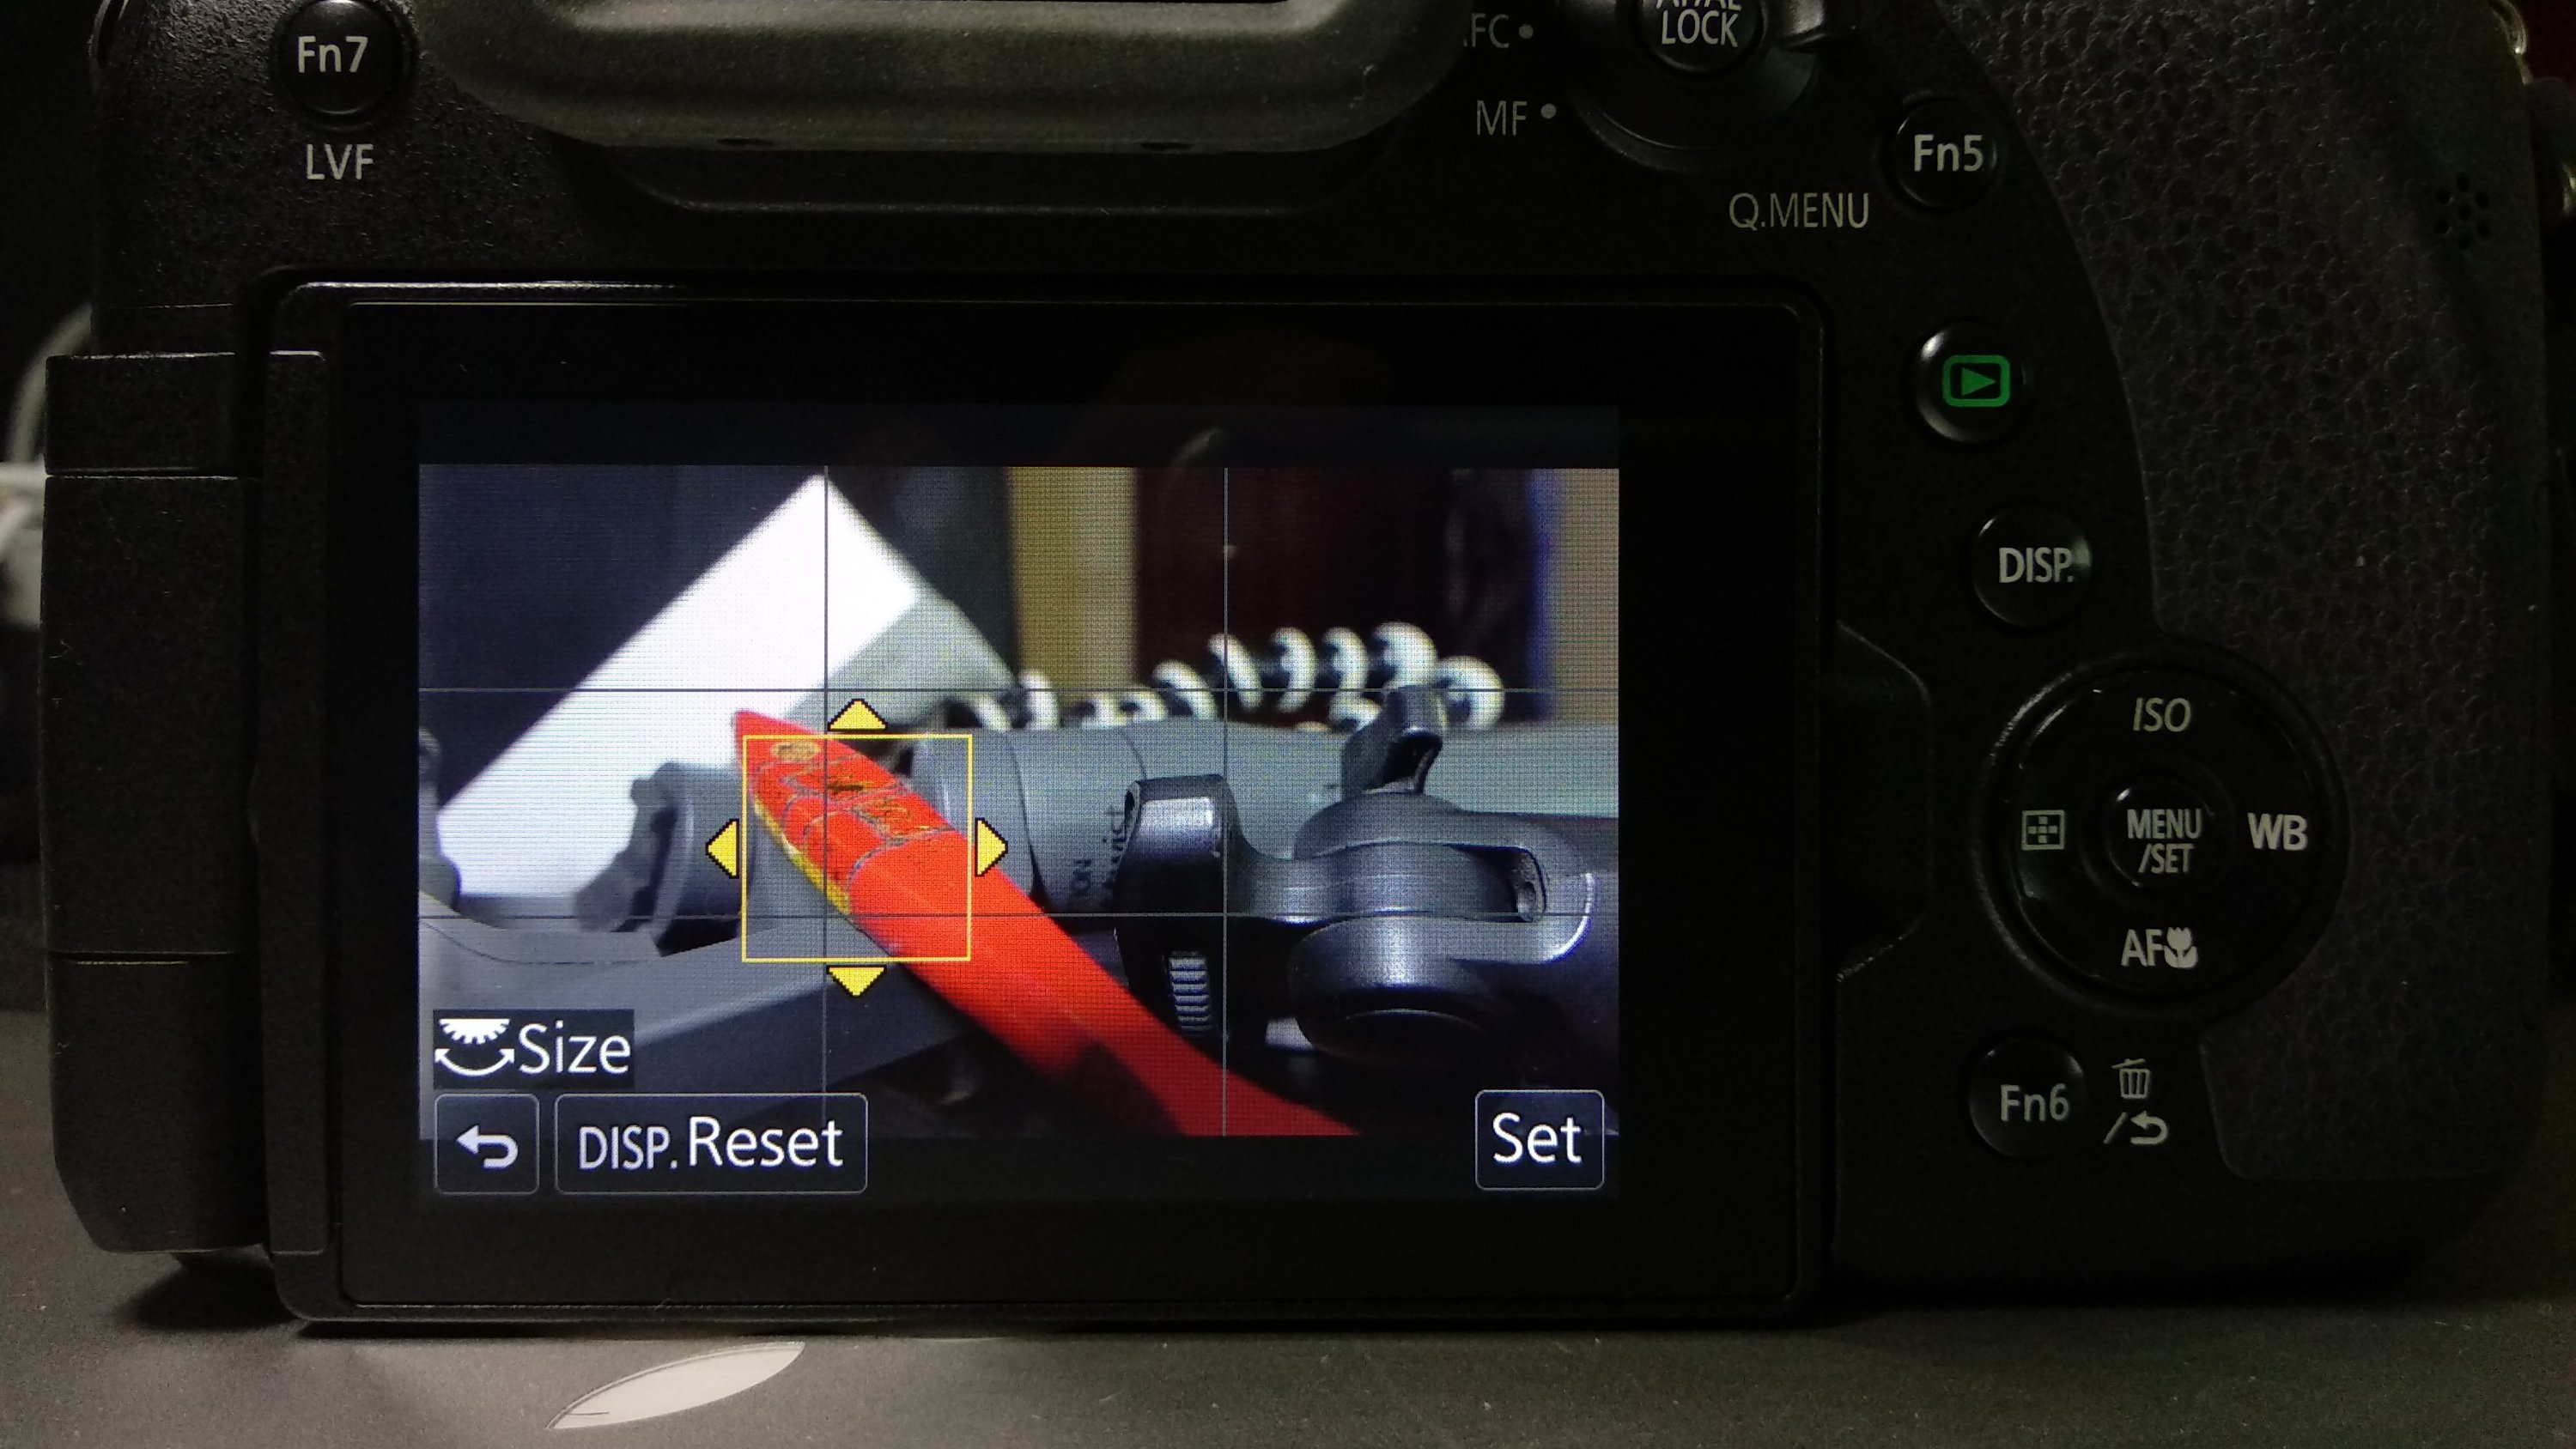
Single-Area Auto Focus
My preferred auto focus mode is the 1-area mode. I can move the yellow square anywhere on the touchscreen with my finger to focus on anything I want so easily.
Manual Exposure and Shutter-Priority
Set Exposure Mode to “M” Manual Exposure when I want to maintain the same exposure under a fixed lighting condition. Fix the shutter speed at 25 using the rear dial and adjust the aperture using the front dial. Do this when shooting anything on stage like seminars, concerts, and stage performances.
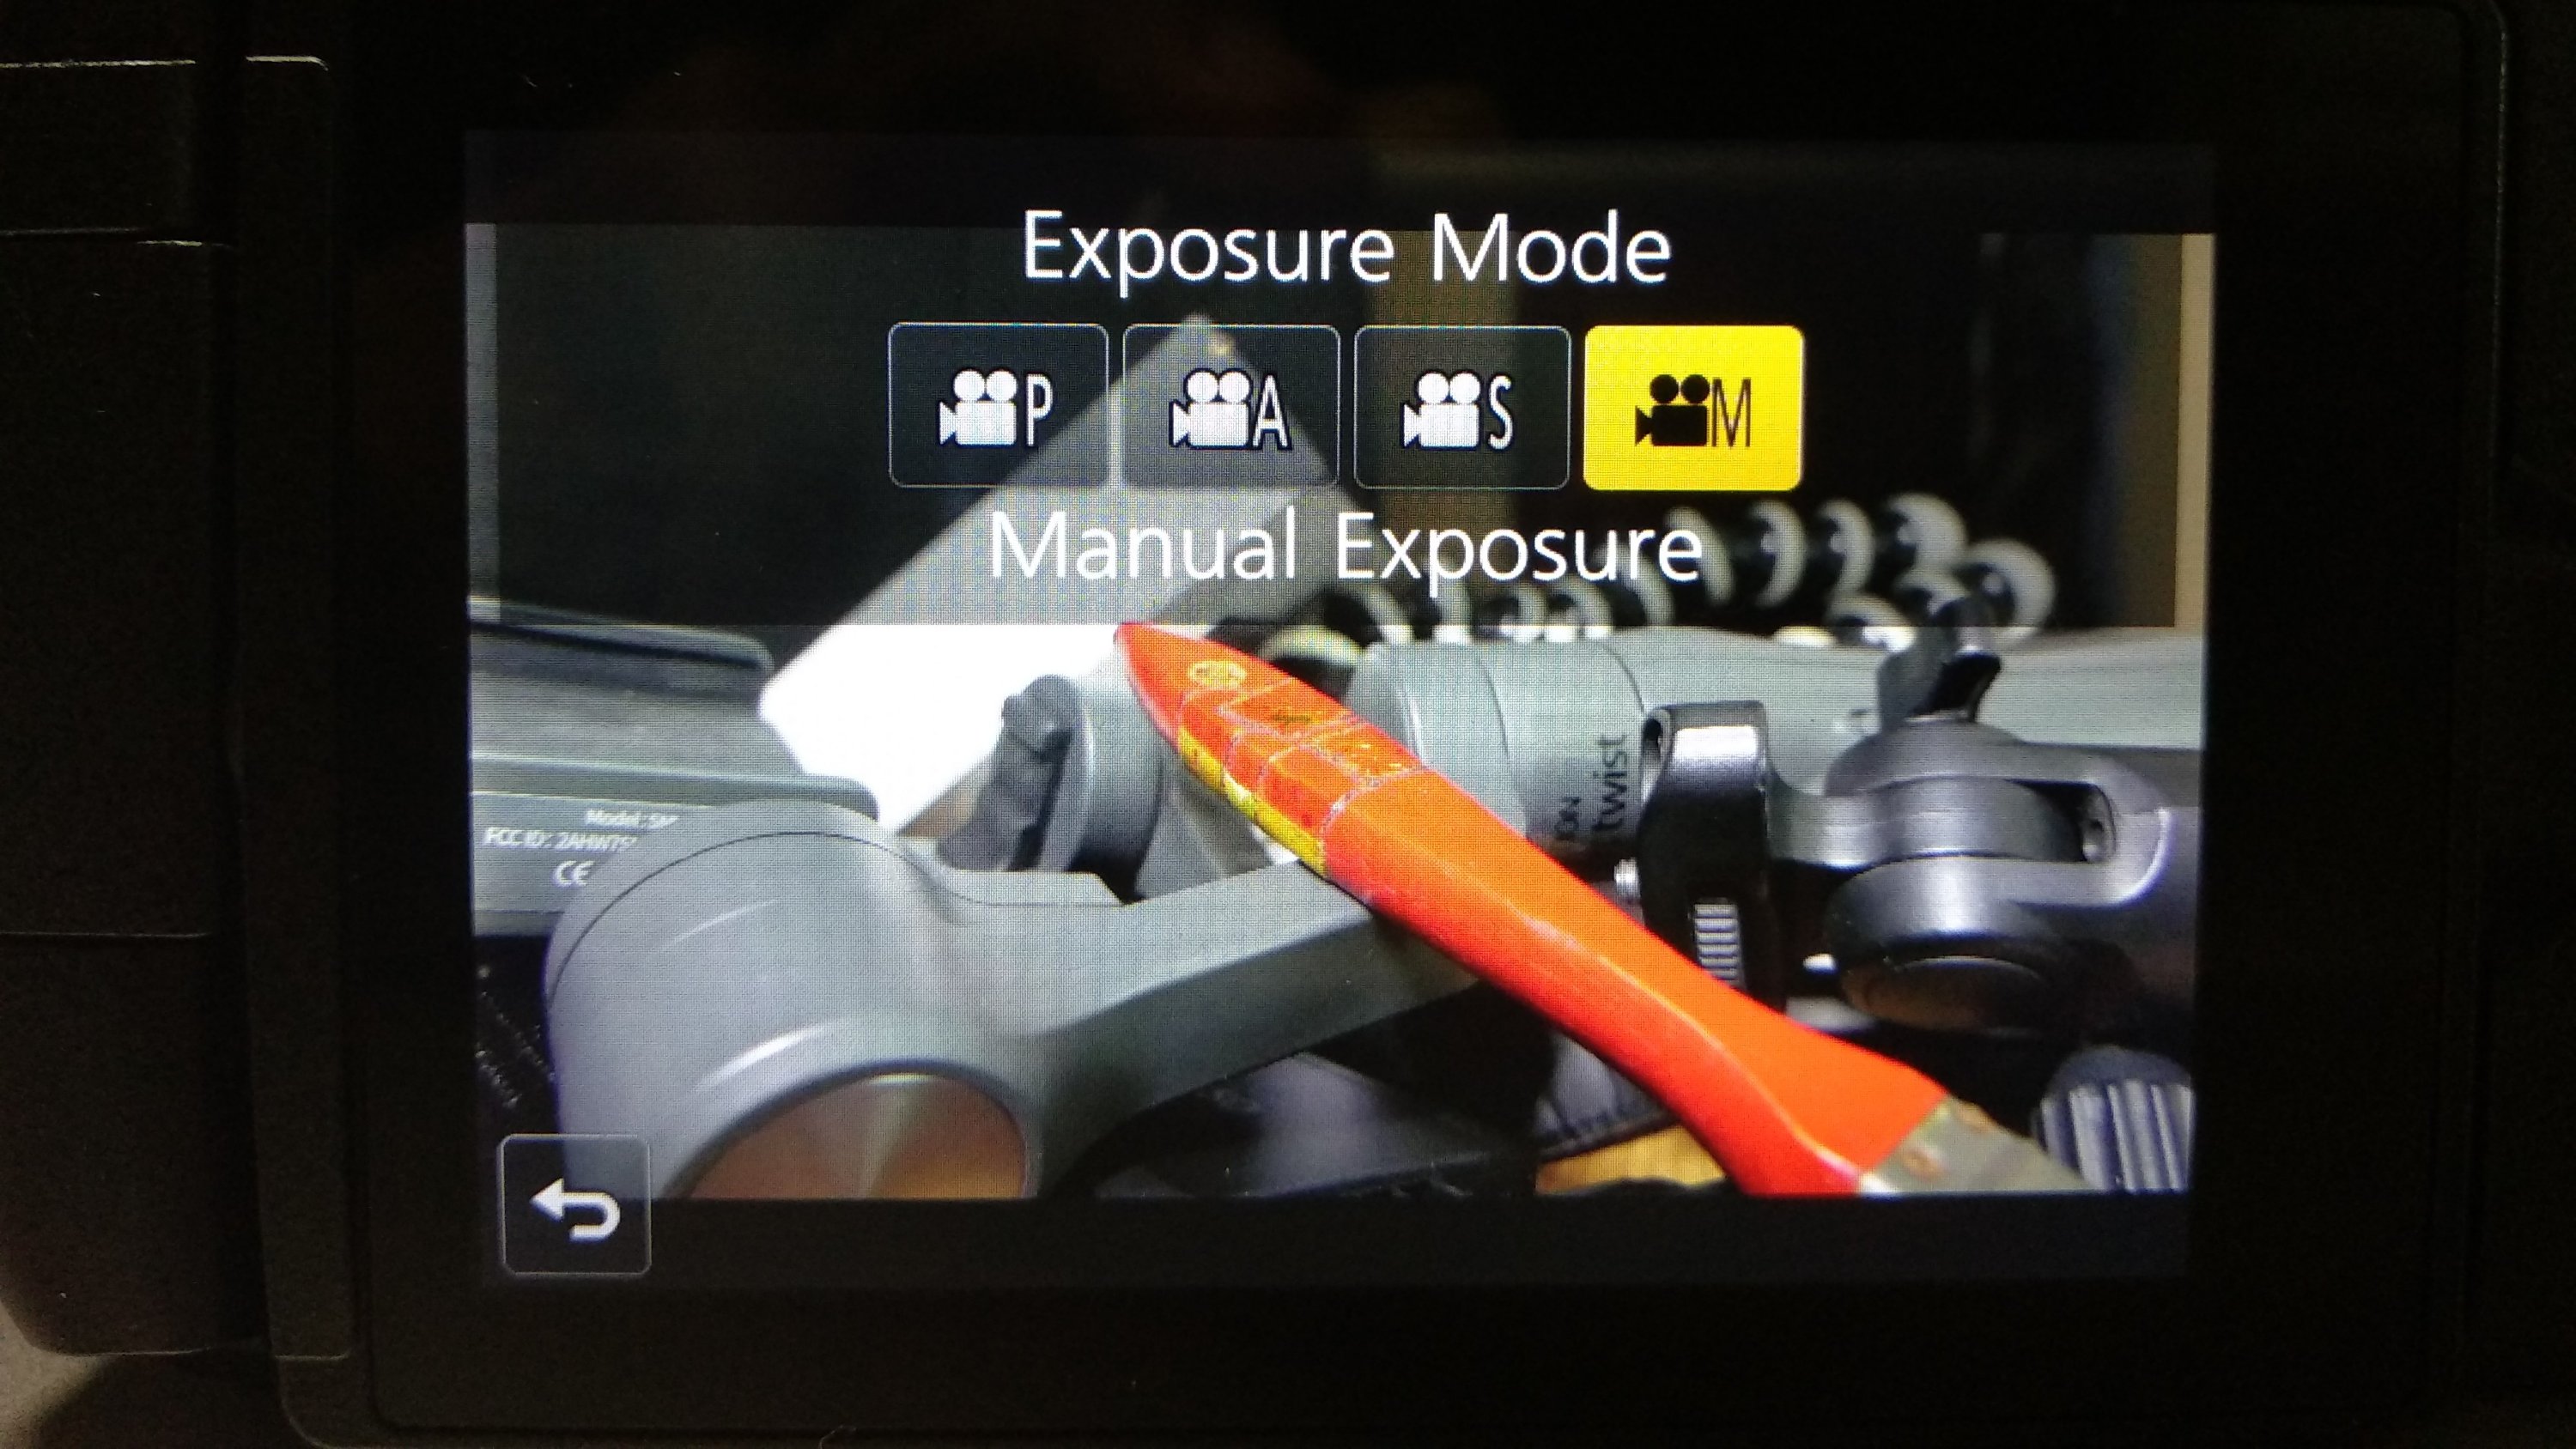
Set Exposure Mode to “S” Shutter-Priority when the lighting condition keep changing. The aperture will adjust automatically. I can manually tune the exposure further anytime using the front dial set as Exposure Compensation. Do this when capturing fast moving events like excursions, walkthroughs and outdoor activities.

Always maintain shutter speed at 25, adjusted with the rear dial.
Use the Shutter Button as Recording Button
Use the shutter button to start and stop video recording. The advantage is that it will help you automatically focus on the subject quickly before recording.
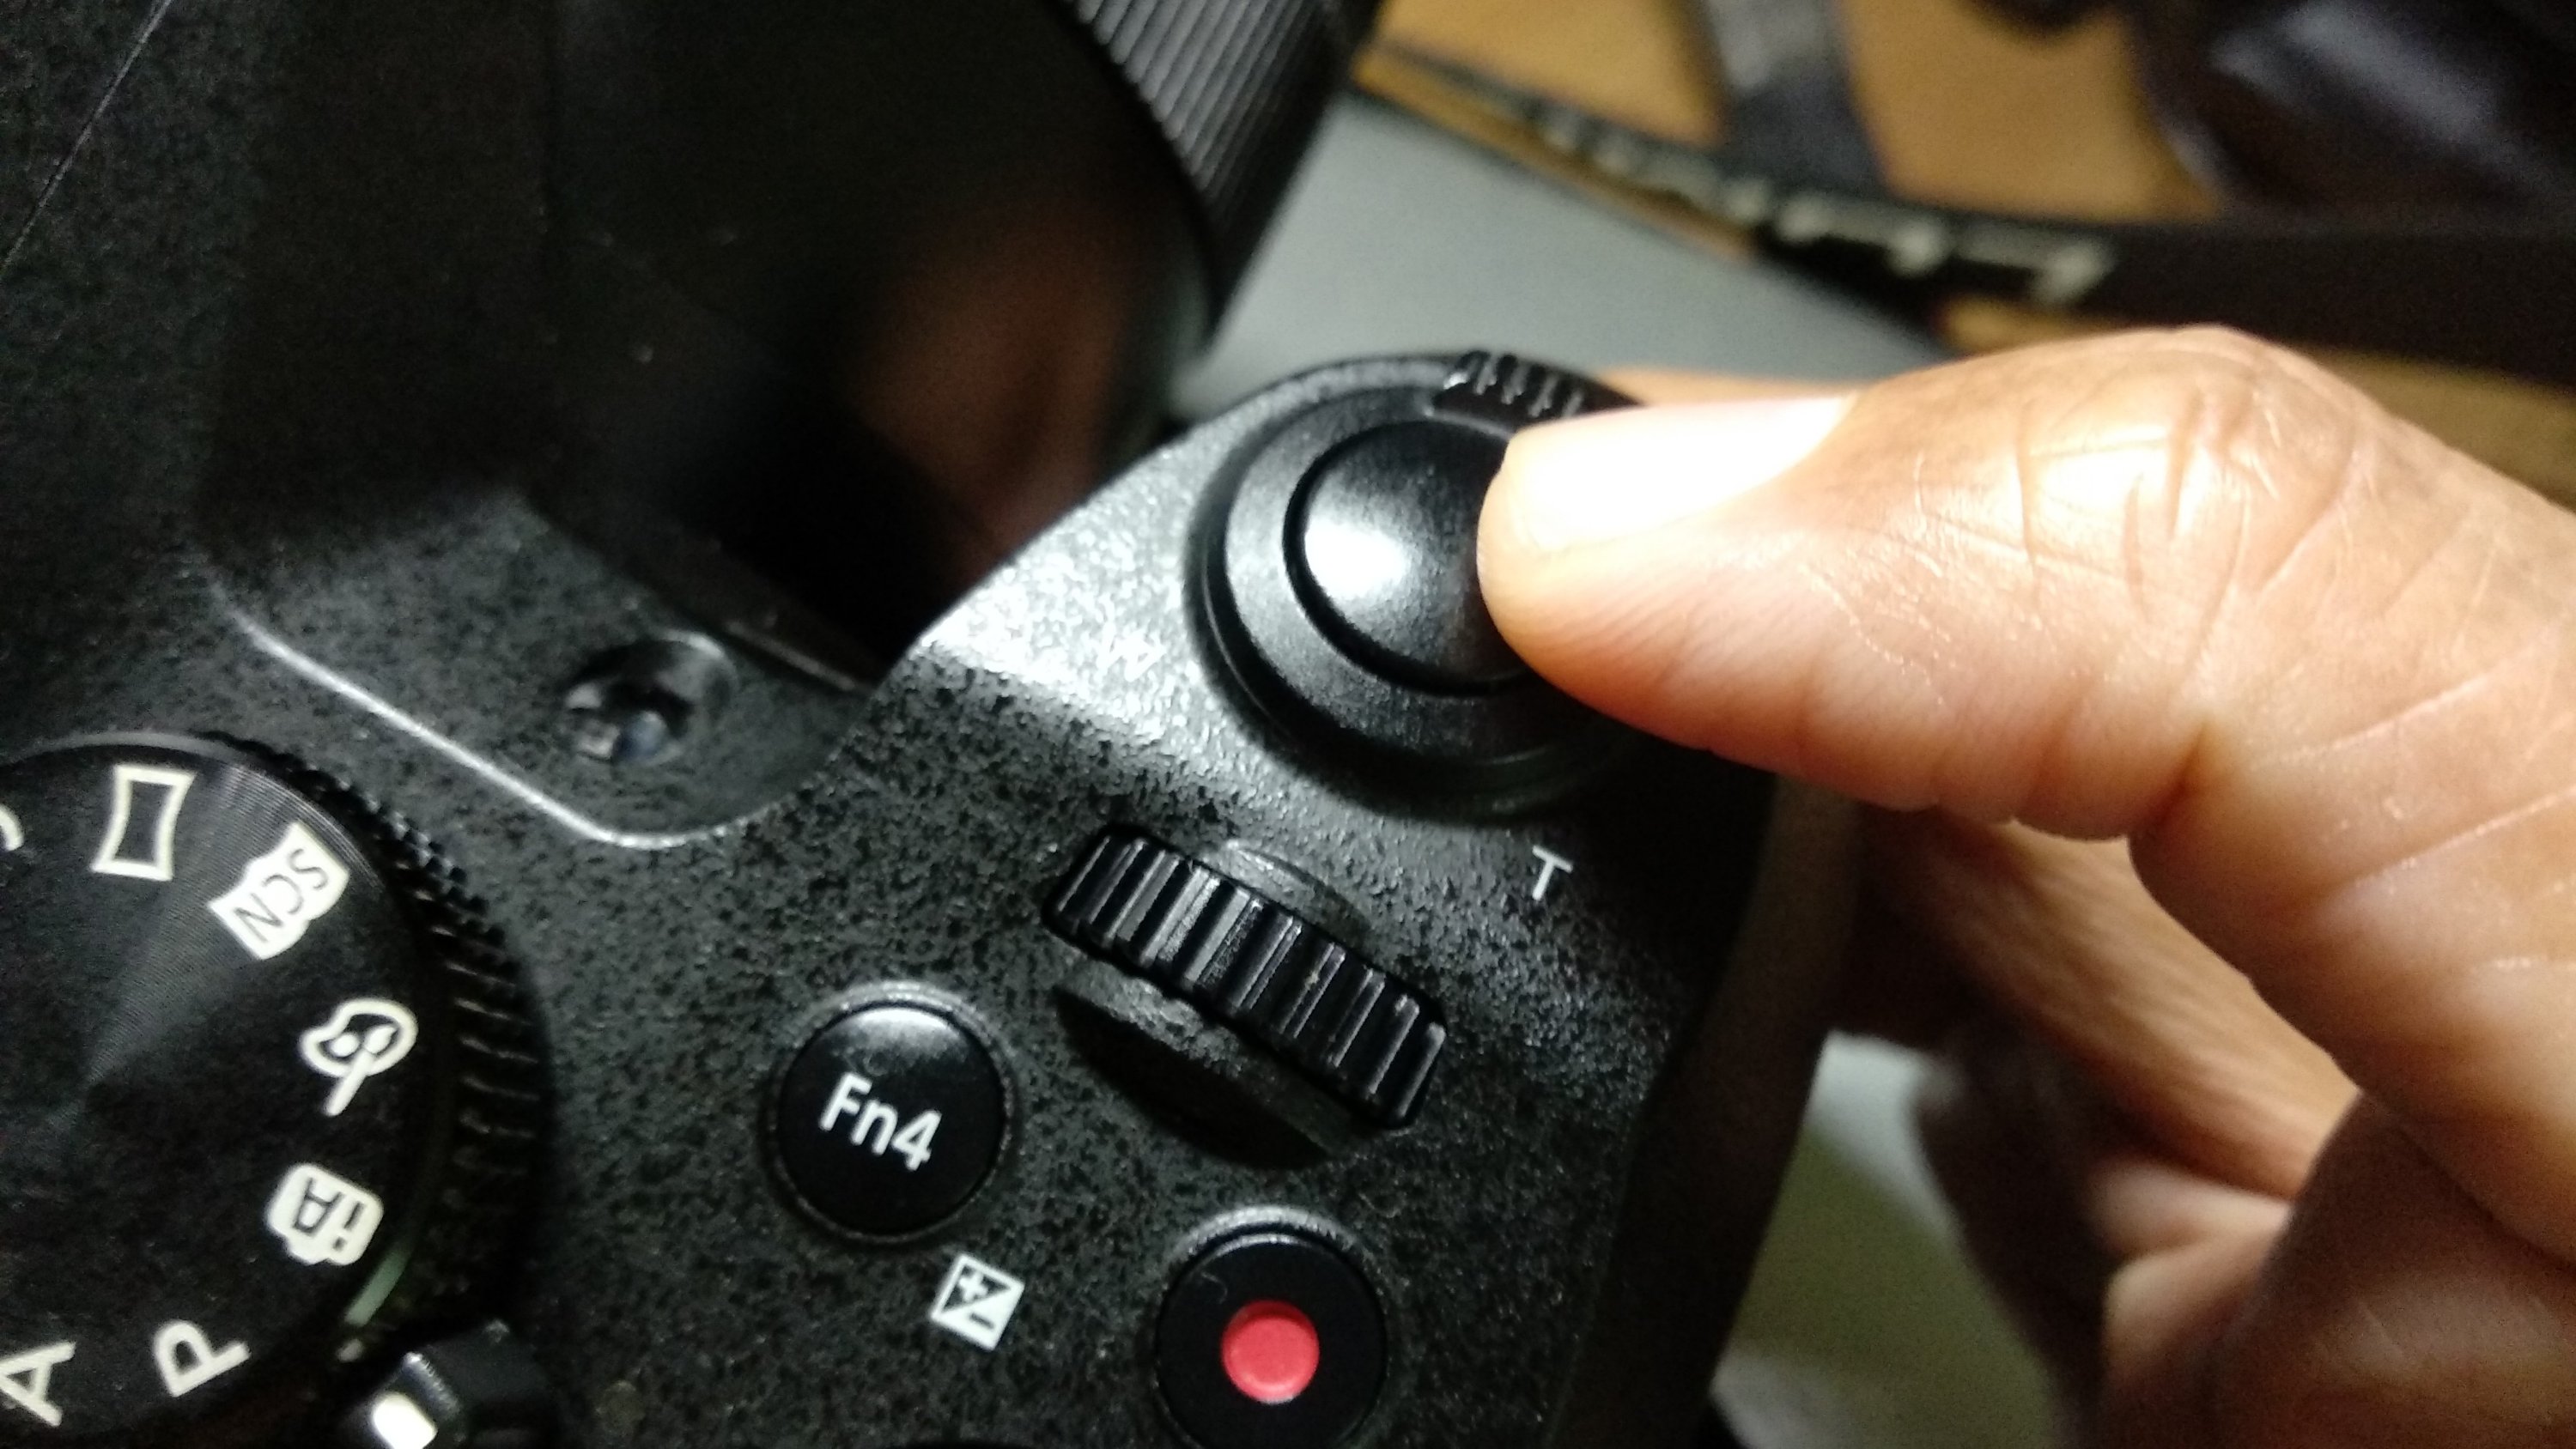
Use the Front Dial to Adjust Exposure
As my front dial is set as Exposure Compensation, I can change the exposure quickly on the go.
The Other Settings
I left out some settings that I may have taken for granted or left at default.
Watch the coming video to catch the other settings as I walk through them.
Please feel free to leave your question. I would love to answer them.
Adrian Lee | VIDEOLANE.COM
Hire me, Adrian Lee, for an intense, entertaining and informative training on Videography and Video Editing Course for Beginners.
PS:
Extend Battery Duration
The battery duration of the Panasonic Lumix FZ2500 is miserable for video.
I had to change the battery at every 30 to 40 minutes of active usage.
That means I have to carry 10 spares to last the whole day of the shoot .
This is not good for run and gun events when there is no time to recharge.
I found the solution to extend the battery duration using a power bank.
![]()

Discover more from VIDEOLANE.COM ⏩
Subscribe to get the latest posts sent to your email.
hi- I bought an FZ2500 for video specifically on top of a boat tower on a mount that uses the rope to follow the water skier. The skier is about 80-85′ feet away and the auto focus has been ok but not perfect. Should I take it off auto focus, focus on the horizon (beyond 85′) and put it up on the mount?
Will focus at the horizon still be in focus at 85′ ?
It is difficult to play with focus and other settings once the camera is up on the tower so looking for a solution that can be put into play just before I put the camera up.
Have you tried using the Panasonic Image App to control the FZ2500 wirelessly?
just found that the app can do that, will be trying today, thanks
last weekend I went up to 4k video, something else must have changed as it looked horrible and was not usable. Will take back down to the 1080 at higher fps today. Still trying to figure out best settings, using above article as starting point.
Happened to me as well
Please help with Video 4k Settings for best quality results
Can the Lumix FZ2500 record an 8 hour seminar? I’m wanting to record an all day seminar and need continuous recording without it stopping.
Yes, it can record 8 hours, even continuously. All you need is a huge SD card and a connection to the AC power, like what I bought… https://videolane.com/usb-external-power-supply-adapter-for-panasonic-lumix-dmc-fz2500/
Thank you Adrian Lee
Surely shutter speed shoukd be set to 1/100 (double the 50fps frame rate) and not 1/25?
That is a rule we all learned. However, that rule is brought down from the days of film. We are no longer in that age now. Try it and see the difference for yourself. Sorry, but I am a tradition breaker and rule bender.
Using the Panasonic batteries I get close to 2 hrs continuous filming at seminars.
At weddings for a 7 hour day I can get by with 3 but take 4 in case.
Other makes of batteries not as long. I do have the power bank I made for it. It runs around 8 hrs if needed. Lots of how to make one on YouTube.
I like the power bank method
a couple of things I do different since using the GH cameras since the GH2, I now have GH4 and 2 FZ-2500s. One thing is mike level adj should be -12db, this keeps it from being to over loaded/saturated as I get feeds from sound boards, and band outputs. Even for weddings the grooms mike or officiant mike. You can always turn it up in the computer. This has been suggestion for years for these cameras. I use a mixer on camera on input for wireless and other for zoom mike and I can turn up or down left or right mikes before it goes into camera. Shutter should double of what you want, like 24p should be 48, 60p at 120 or just use shutter angle of 180 all the time and don’t worry about it. I use Realtime for sound as Realsound was behind what I was hearing thru the air since it was going thru the camera processing to earphones so I was hearing a lag. Realtime is fine as I trust the camera to process what I’m hearing. Other the that mine is setup like yours.
Thanks for sharing.